
How to use transaction rules
How to use transaction rules
Have some transactions that you'd like to automatically categorise without having to do anything? Transaction rules let you do just that, along with automatically categorising any new transactions that occur.
1. Create a transaction rule
In the transactions feature, select the transaction rules icon to create a new rule.
2. Enter your details
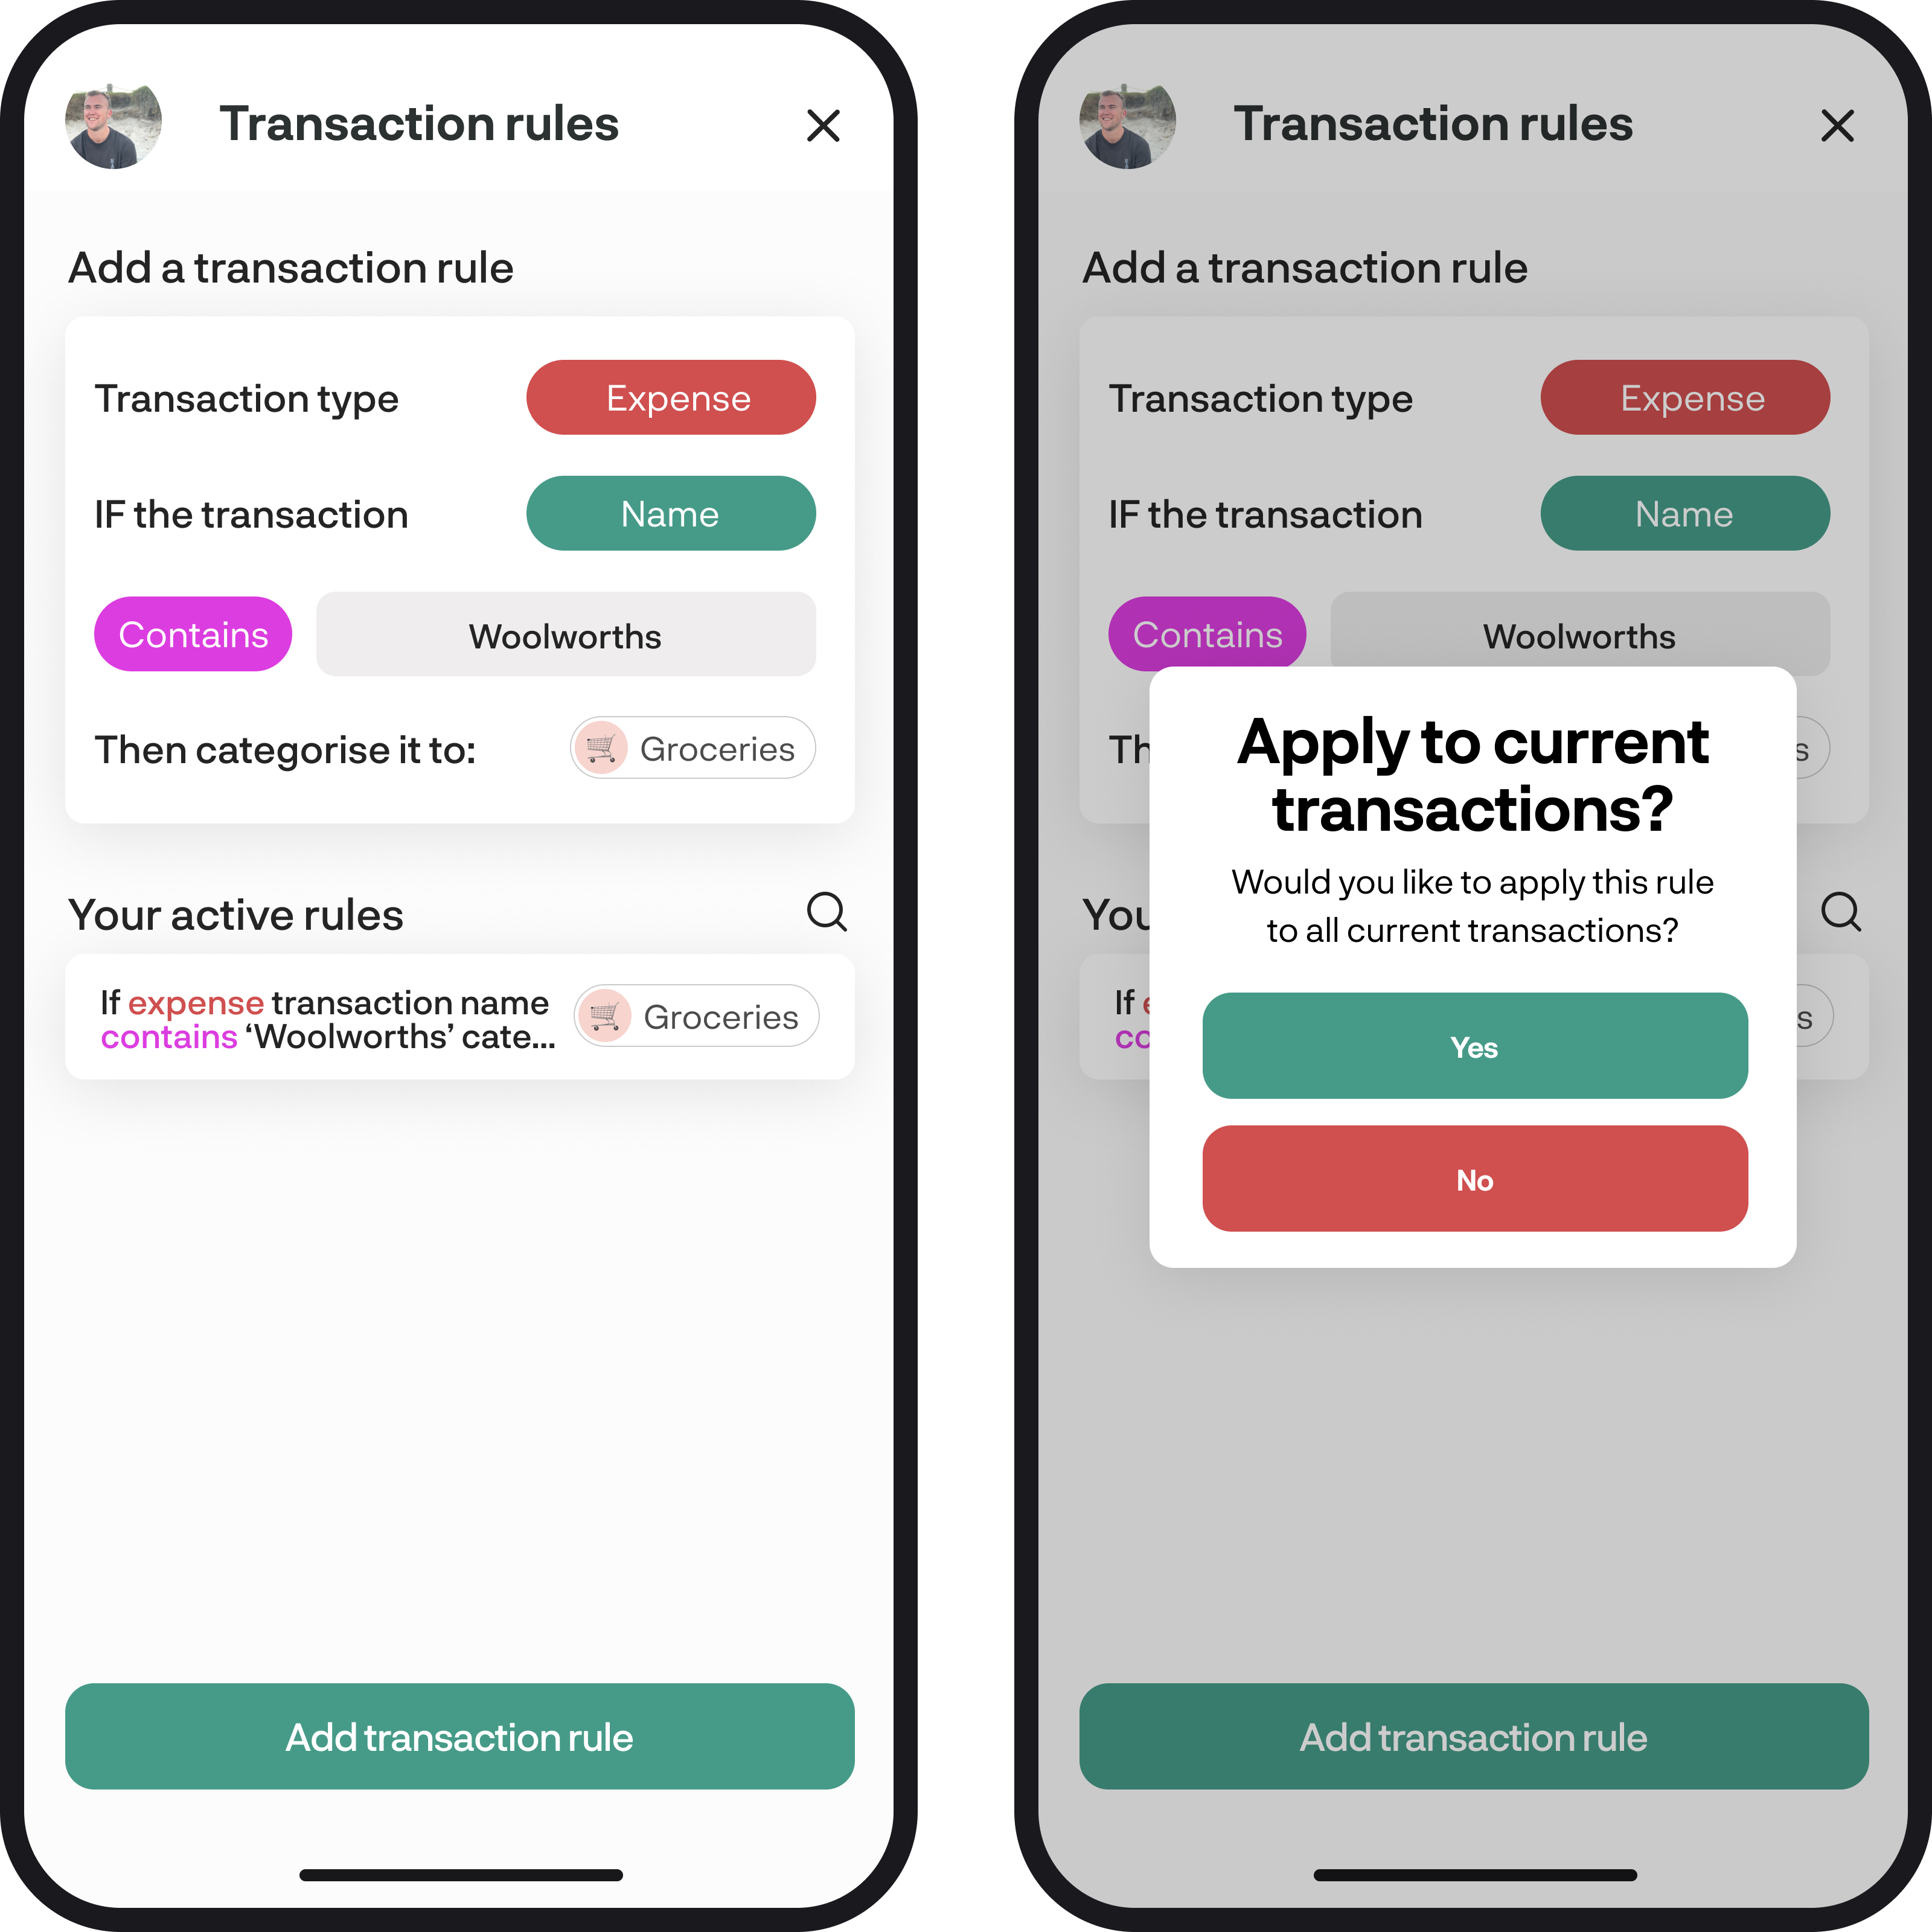
Start by selecting if you want the rule to apply to an income or expense transaction. Then now, enter the name or description of that transaction; this can either be contains, exact match, starts with or ends with. Now select the category you want the transaction to be categorised into. Once you're all done, select the green 'Add transaction rule' button at the bottom.
Once you select 'Add transaction rule', a pop-up will appear where you can choose to apply the rule to current transactions. If you select 'Yes' then the rule will be applied to any current transactions that meet your rule criteria along with new transactions that occur. If you select 'No,' then the rule will only apply to any new transactions that occur.
3. Rule conditions
Transaction rules can be an exact match, contains, ends with or starts with.
Example: if you have a bunch of transactions named ‘Test transaction 12345’ and the numbers at the end change each transaction, you can create a 'contains' rule using the name ‘Test transaction’, and the rule will pick all transactions up with those words.
4. Edit your rules
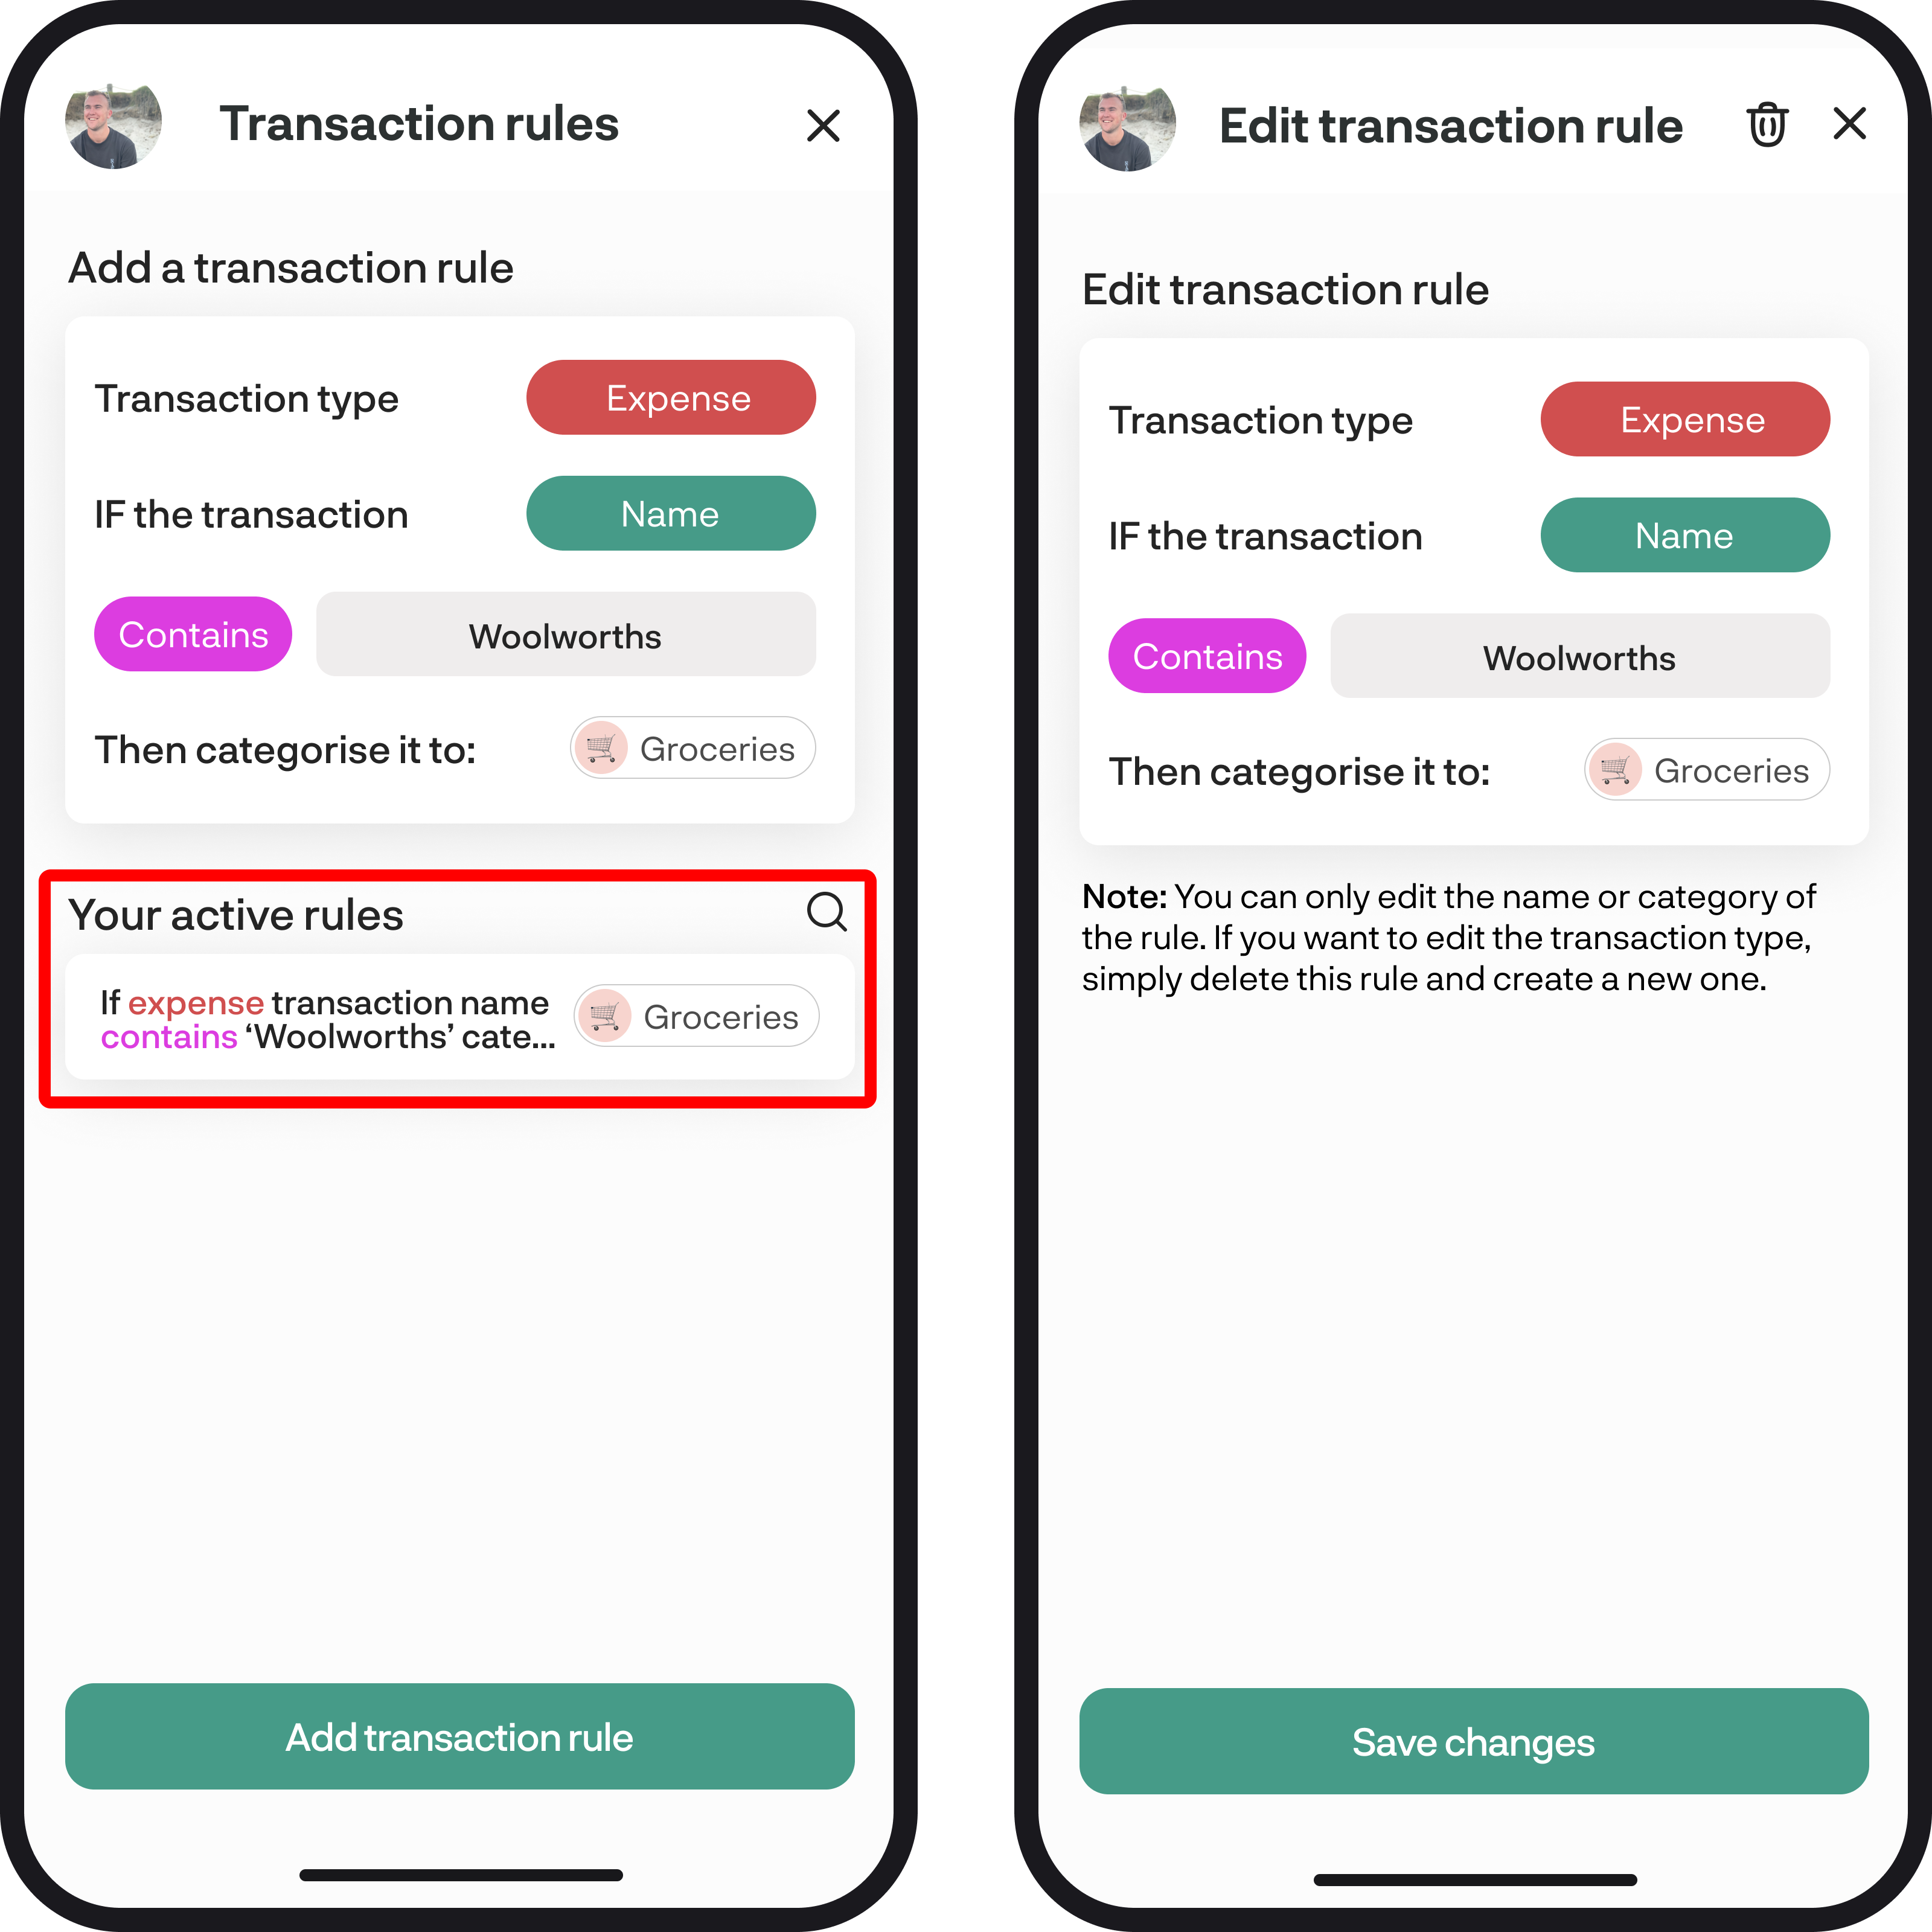
Once you create your rule, it will appear below the 'Your active rules' heading. To edit your rule you can simply select the rule you want to edit or search for it using the name you've entered. You can make changes to the name or category for the rule, once you complete your changes select the green 'Save changes' button.
To delete the transaction rule, simply select the bin icon in the top right corner and then a pop up will appear to confirm the deletion.
5. Shortcut to create a rule
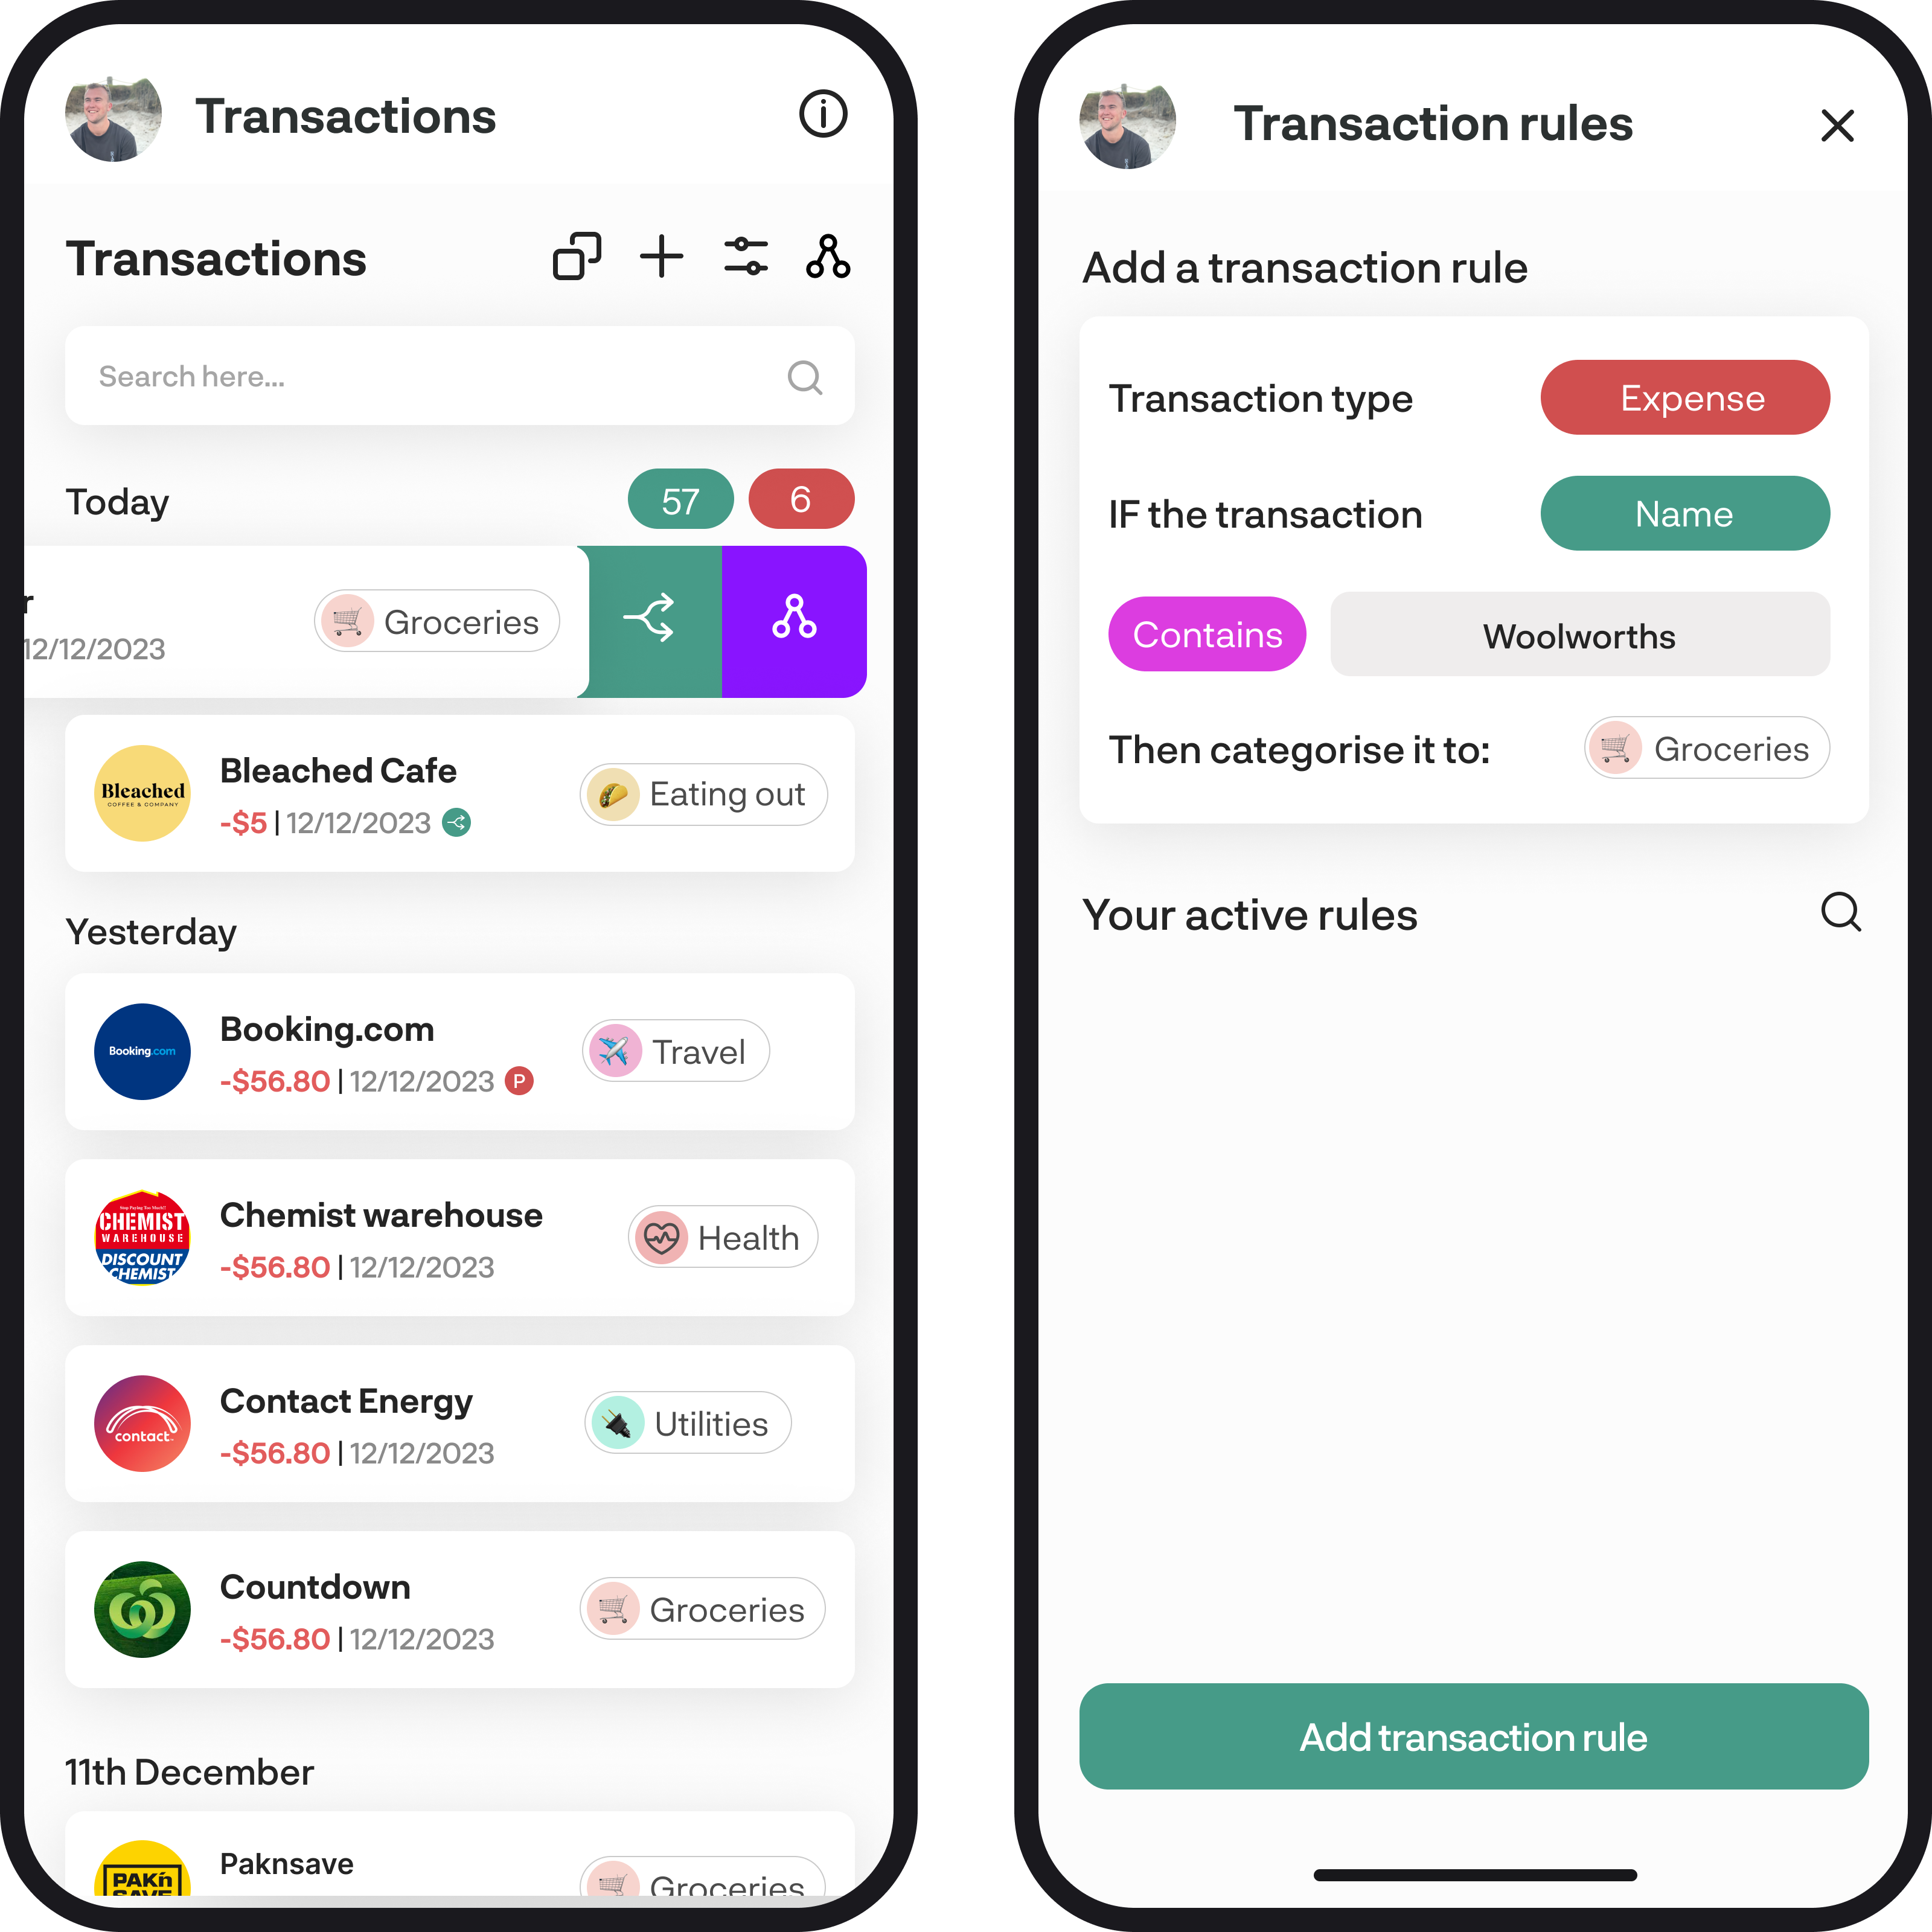
To quickly create a rule, you can swipe to the left on a transaction and select the transaction rules icon. This will then pre-populate all your transaction details so all you have to do is select a category to assign to the rule and you're good to go.
6. How and when the rules apply to transactions
When you connect your accounts or when new transactions load in, we automatically check these transactions against your rules to see if any match the criteria you've set. If they do, then they automatically get categorised to the category you've selected in the rule.
Note: At times there may be a slight delay in updating categories for these transactions, if this is the case then you can simply pull down to refresh in the transactions feature. When new transactions load in, the rules are applied in a hierarchy of exact match, contains, starts with, and ends with. This means that if you have an exact match rule matching 'Test transaction 12345' and also a contains rule of 'Test transaction', then the exact match rule will take priority and apply that.
You're all ready to go 🎉
Woohoo! You've now got an overview of how to use transaction rules. If you run into any issues or have any questions, feel free to get in touch with us at hello@budgetbuddie.co.nz.