Accounts feature overview
Accounts feature overview
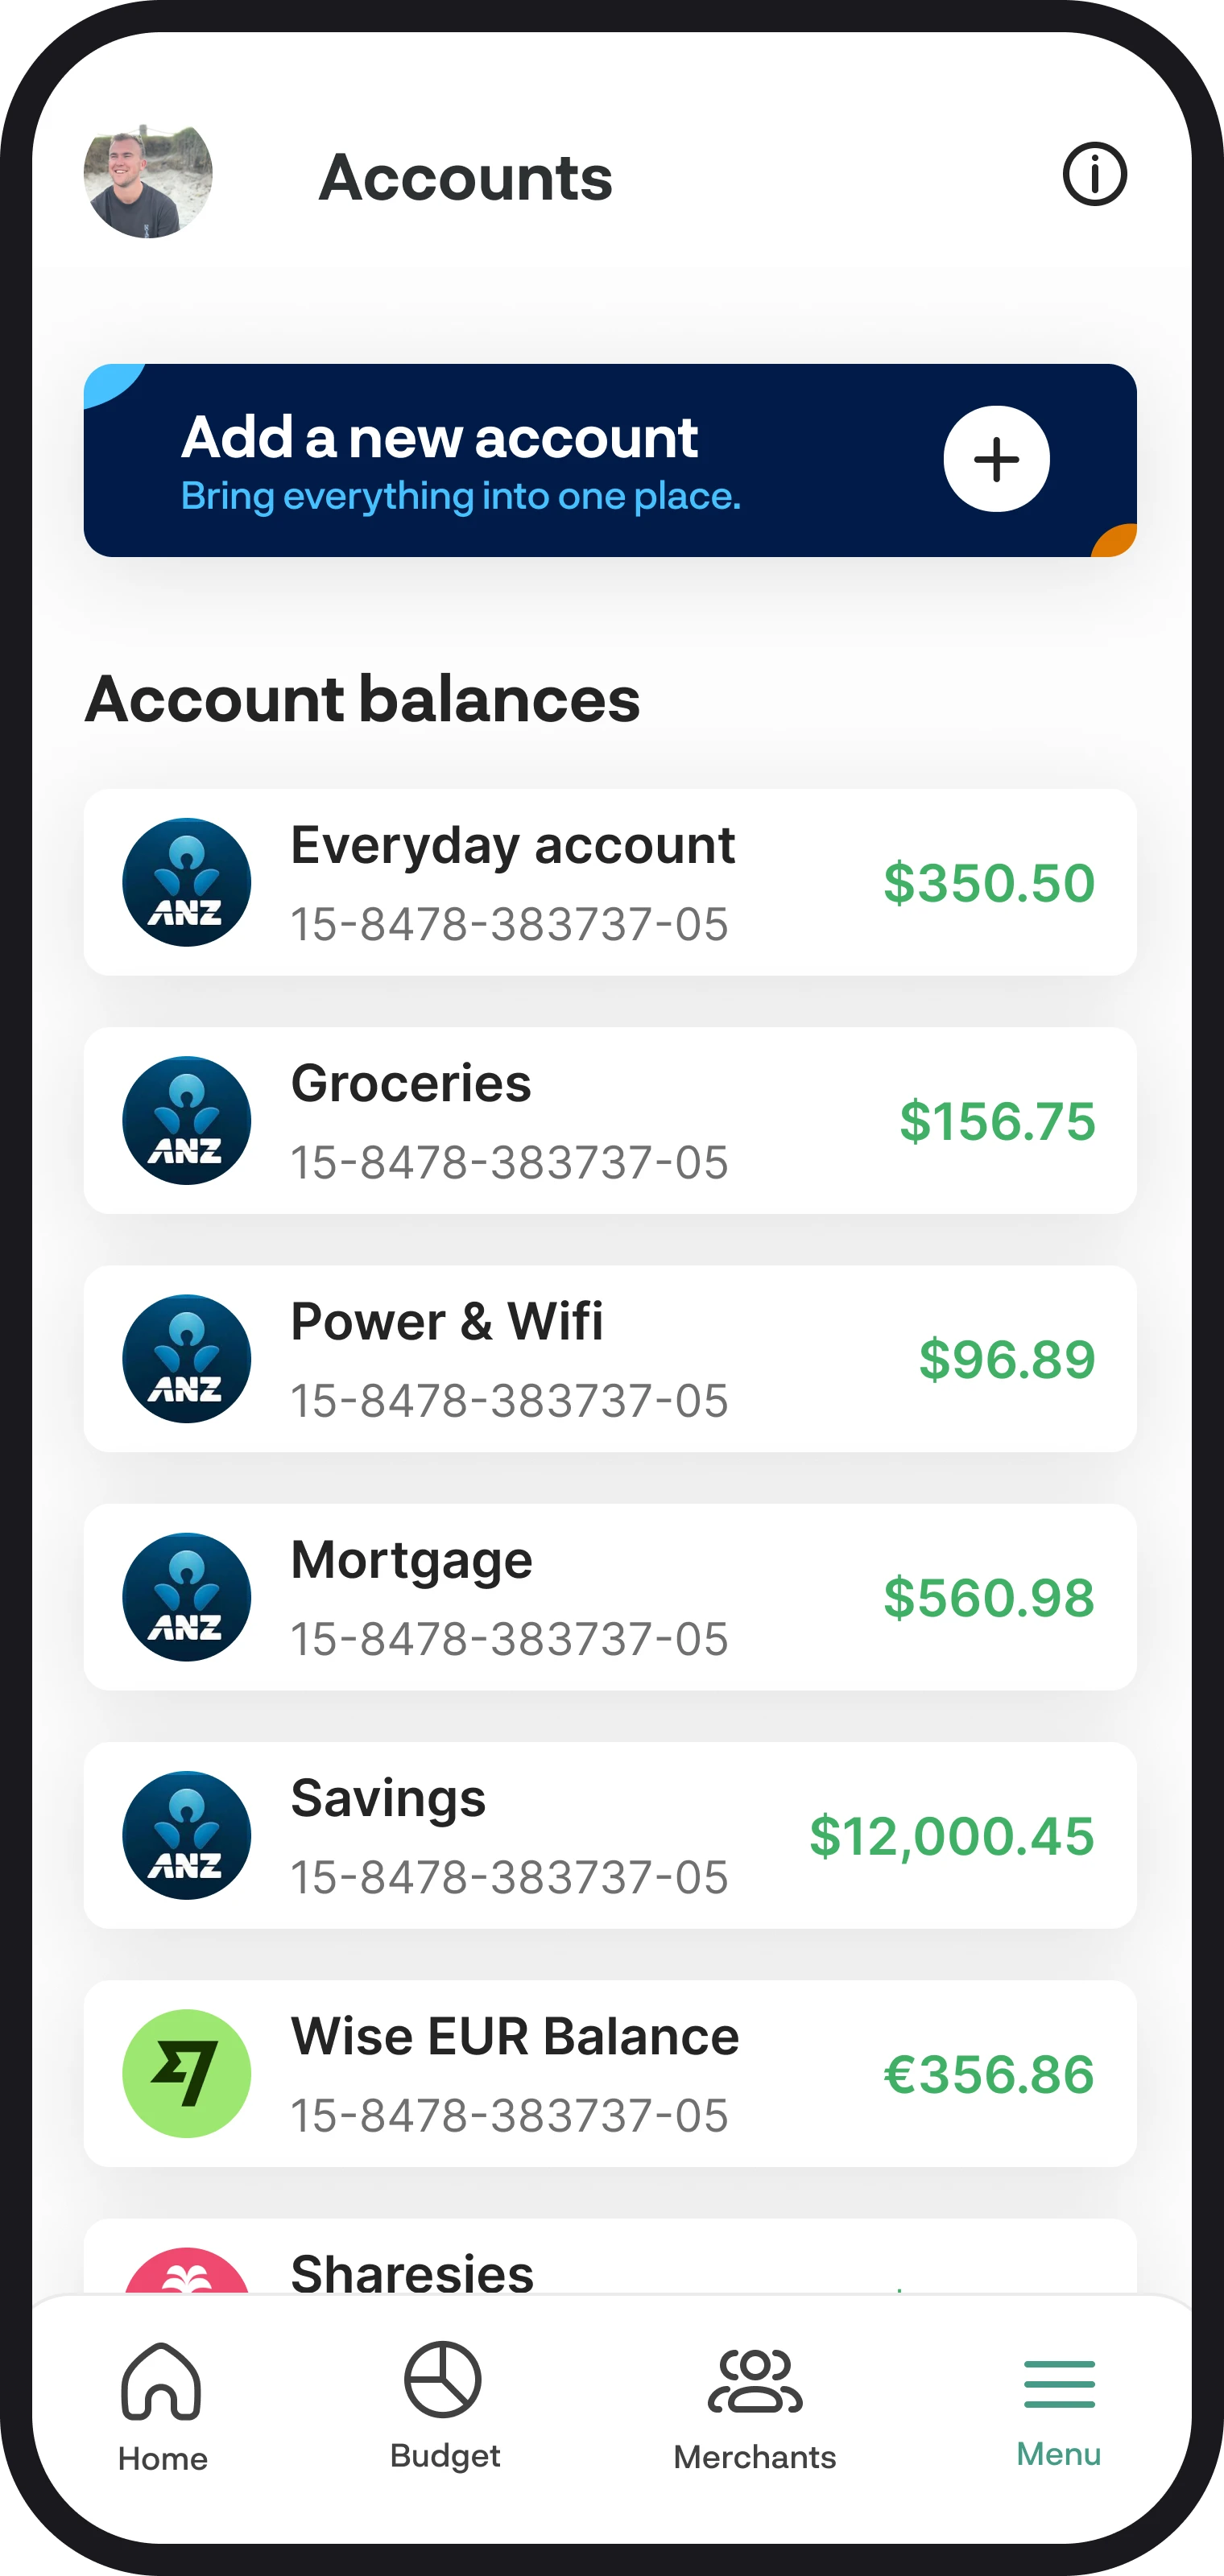
Show all your accounts on one screen, view your account details, and view all your transactions with the accounts feature. In this guide, we'll give you a full overview of how to get the most out of your accounts.
1. A quick summary
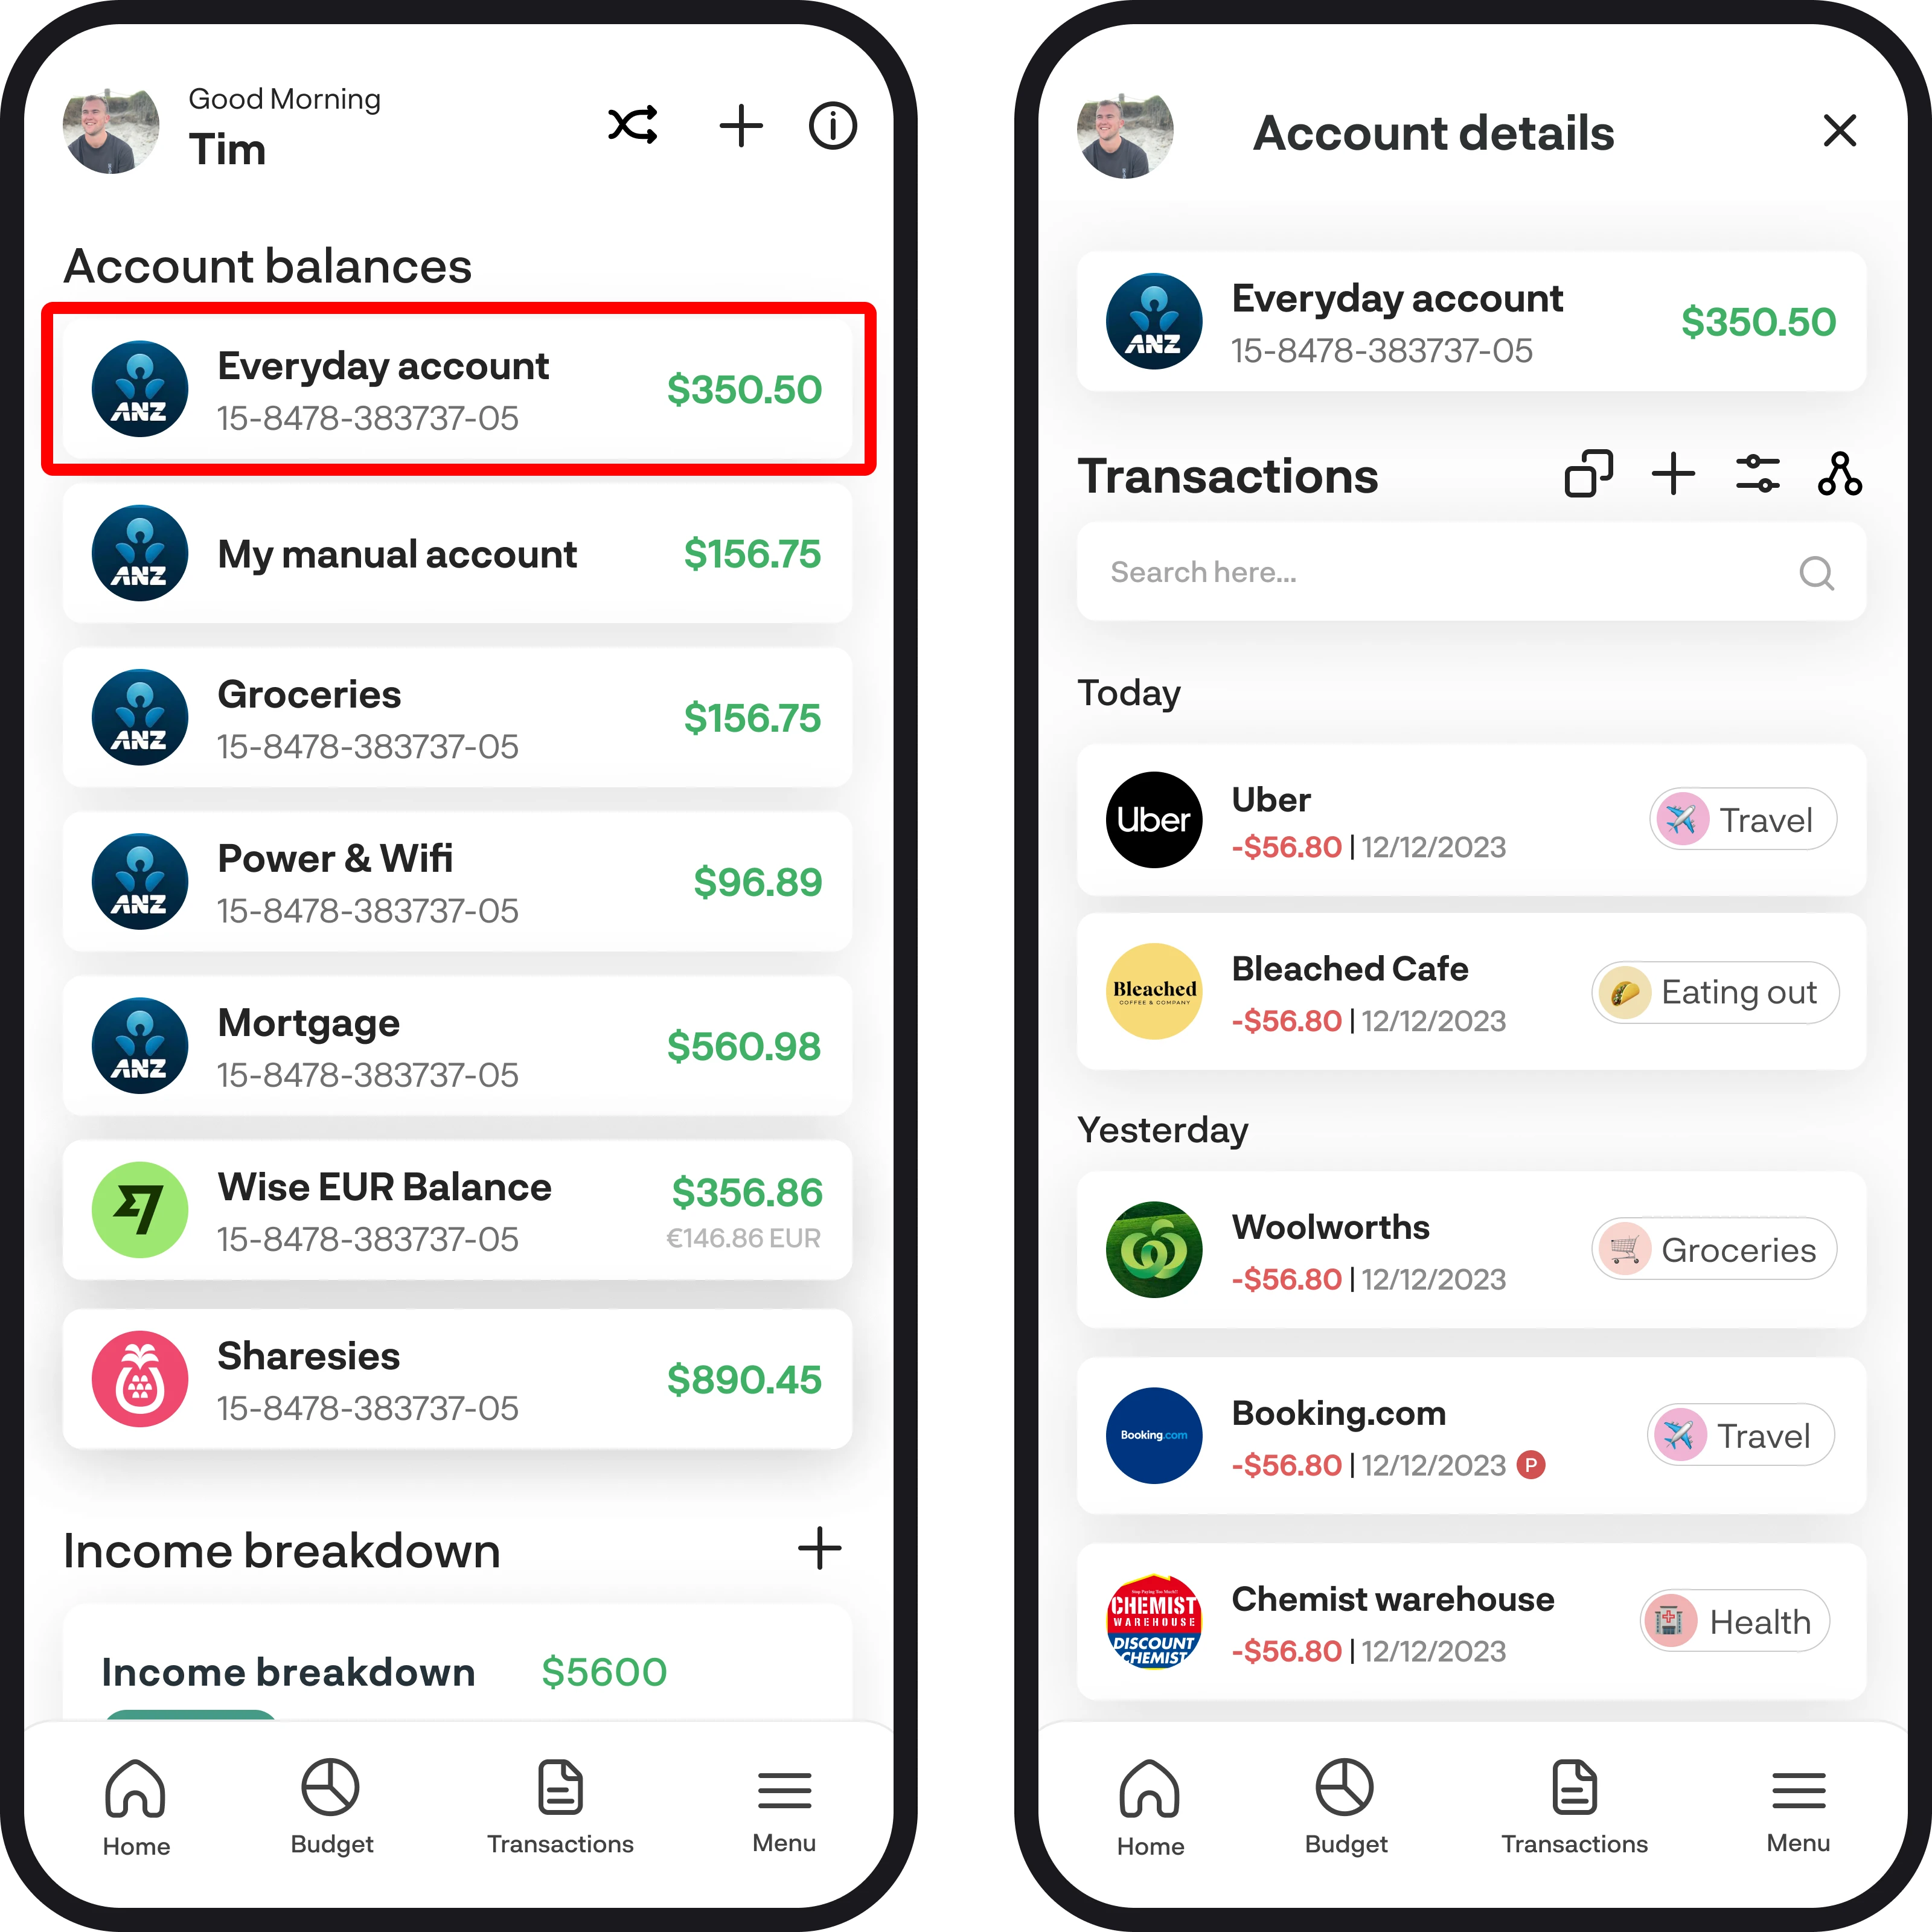
When you connect your accounts using Akahu, all your accounts and balances pull through to the accounts feature. Your balances update every time you open the app, but it may take 10–15 seconds to fully update as we get fresh data from Akahu. If you'd like to view your transactions for each account, you can do this by tapping each account widget, which will bring you to the account details screen. If one of your accounts isn't available in Akahu, you can also manually add them to the accounts feature as well.

2. Add an account
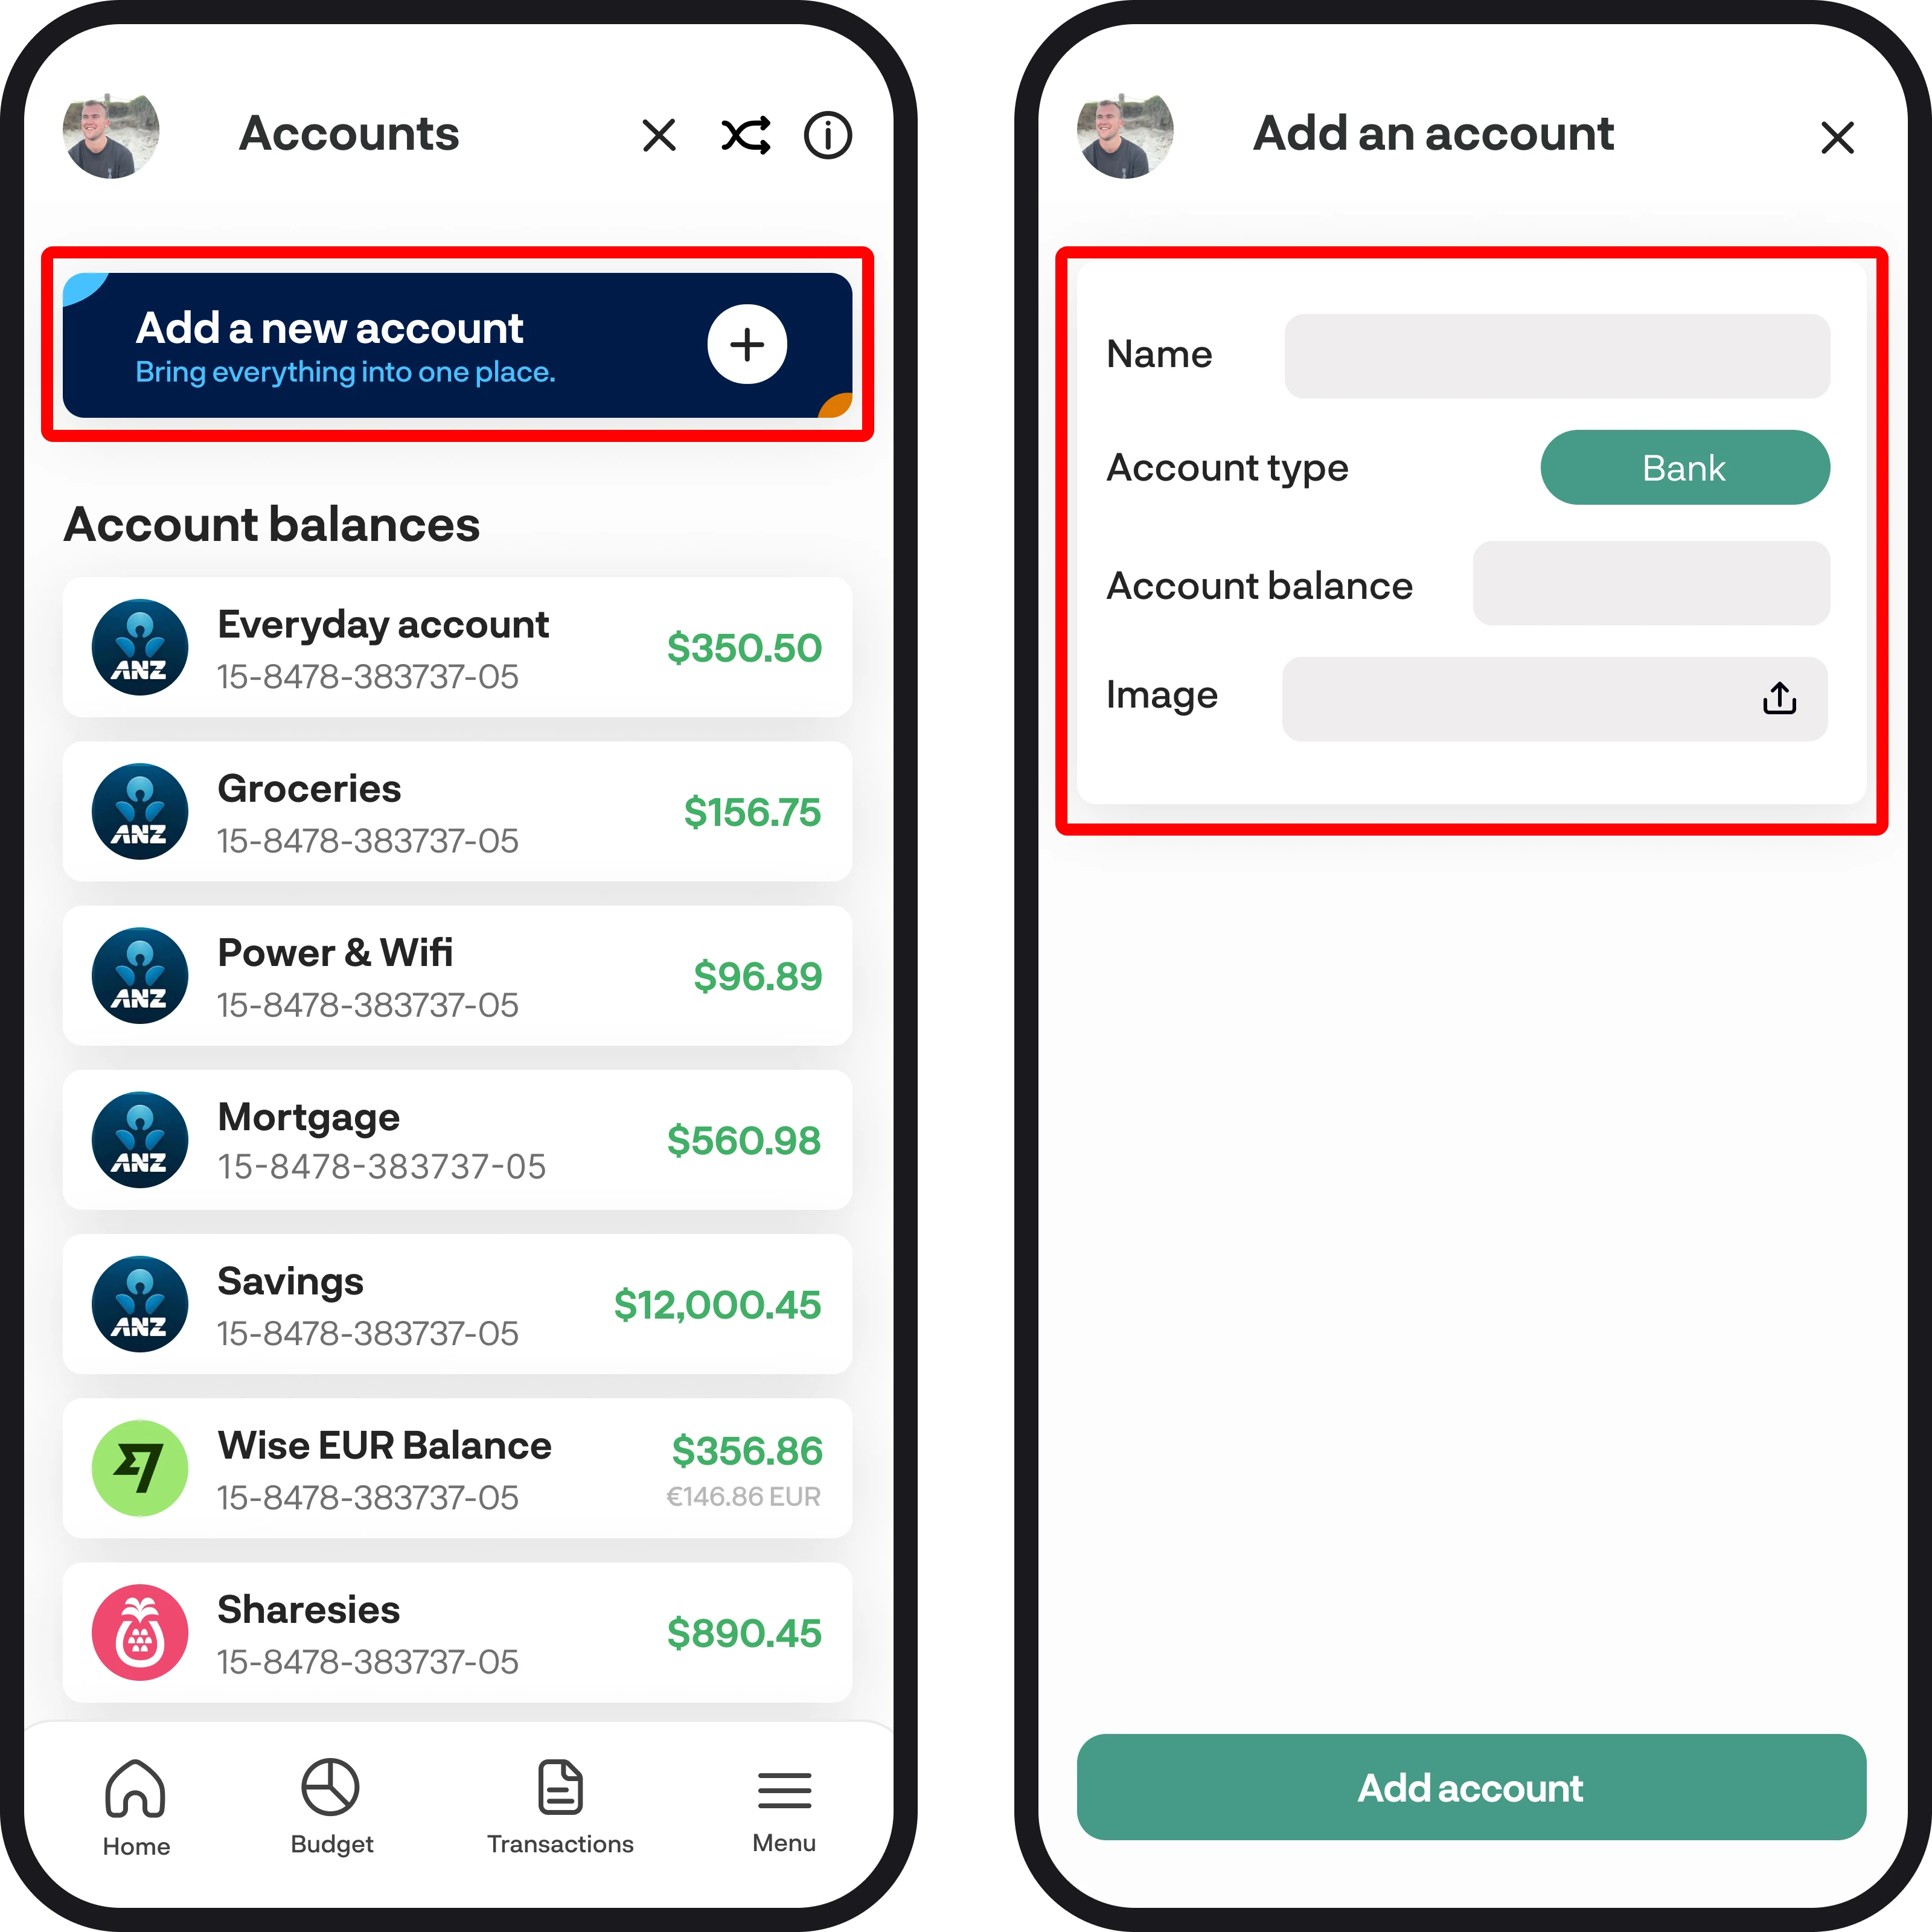
If you'd like to add an account via Akahu, you can do this by going to the Connect Your Accounts feature. You can read more on how to do that here. If you'd like to add an account manually, you can do that by tapping the 'Add an account' button at the very top of the screen. Enter the name of the account, select your account type, enter your account balances, and then, if you like, you can add an image for the account too. Once you're finished entering your details, simply tap 'Add account' at the bottom.
3. Remove an account
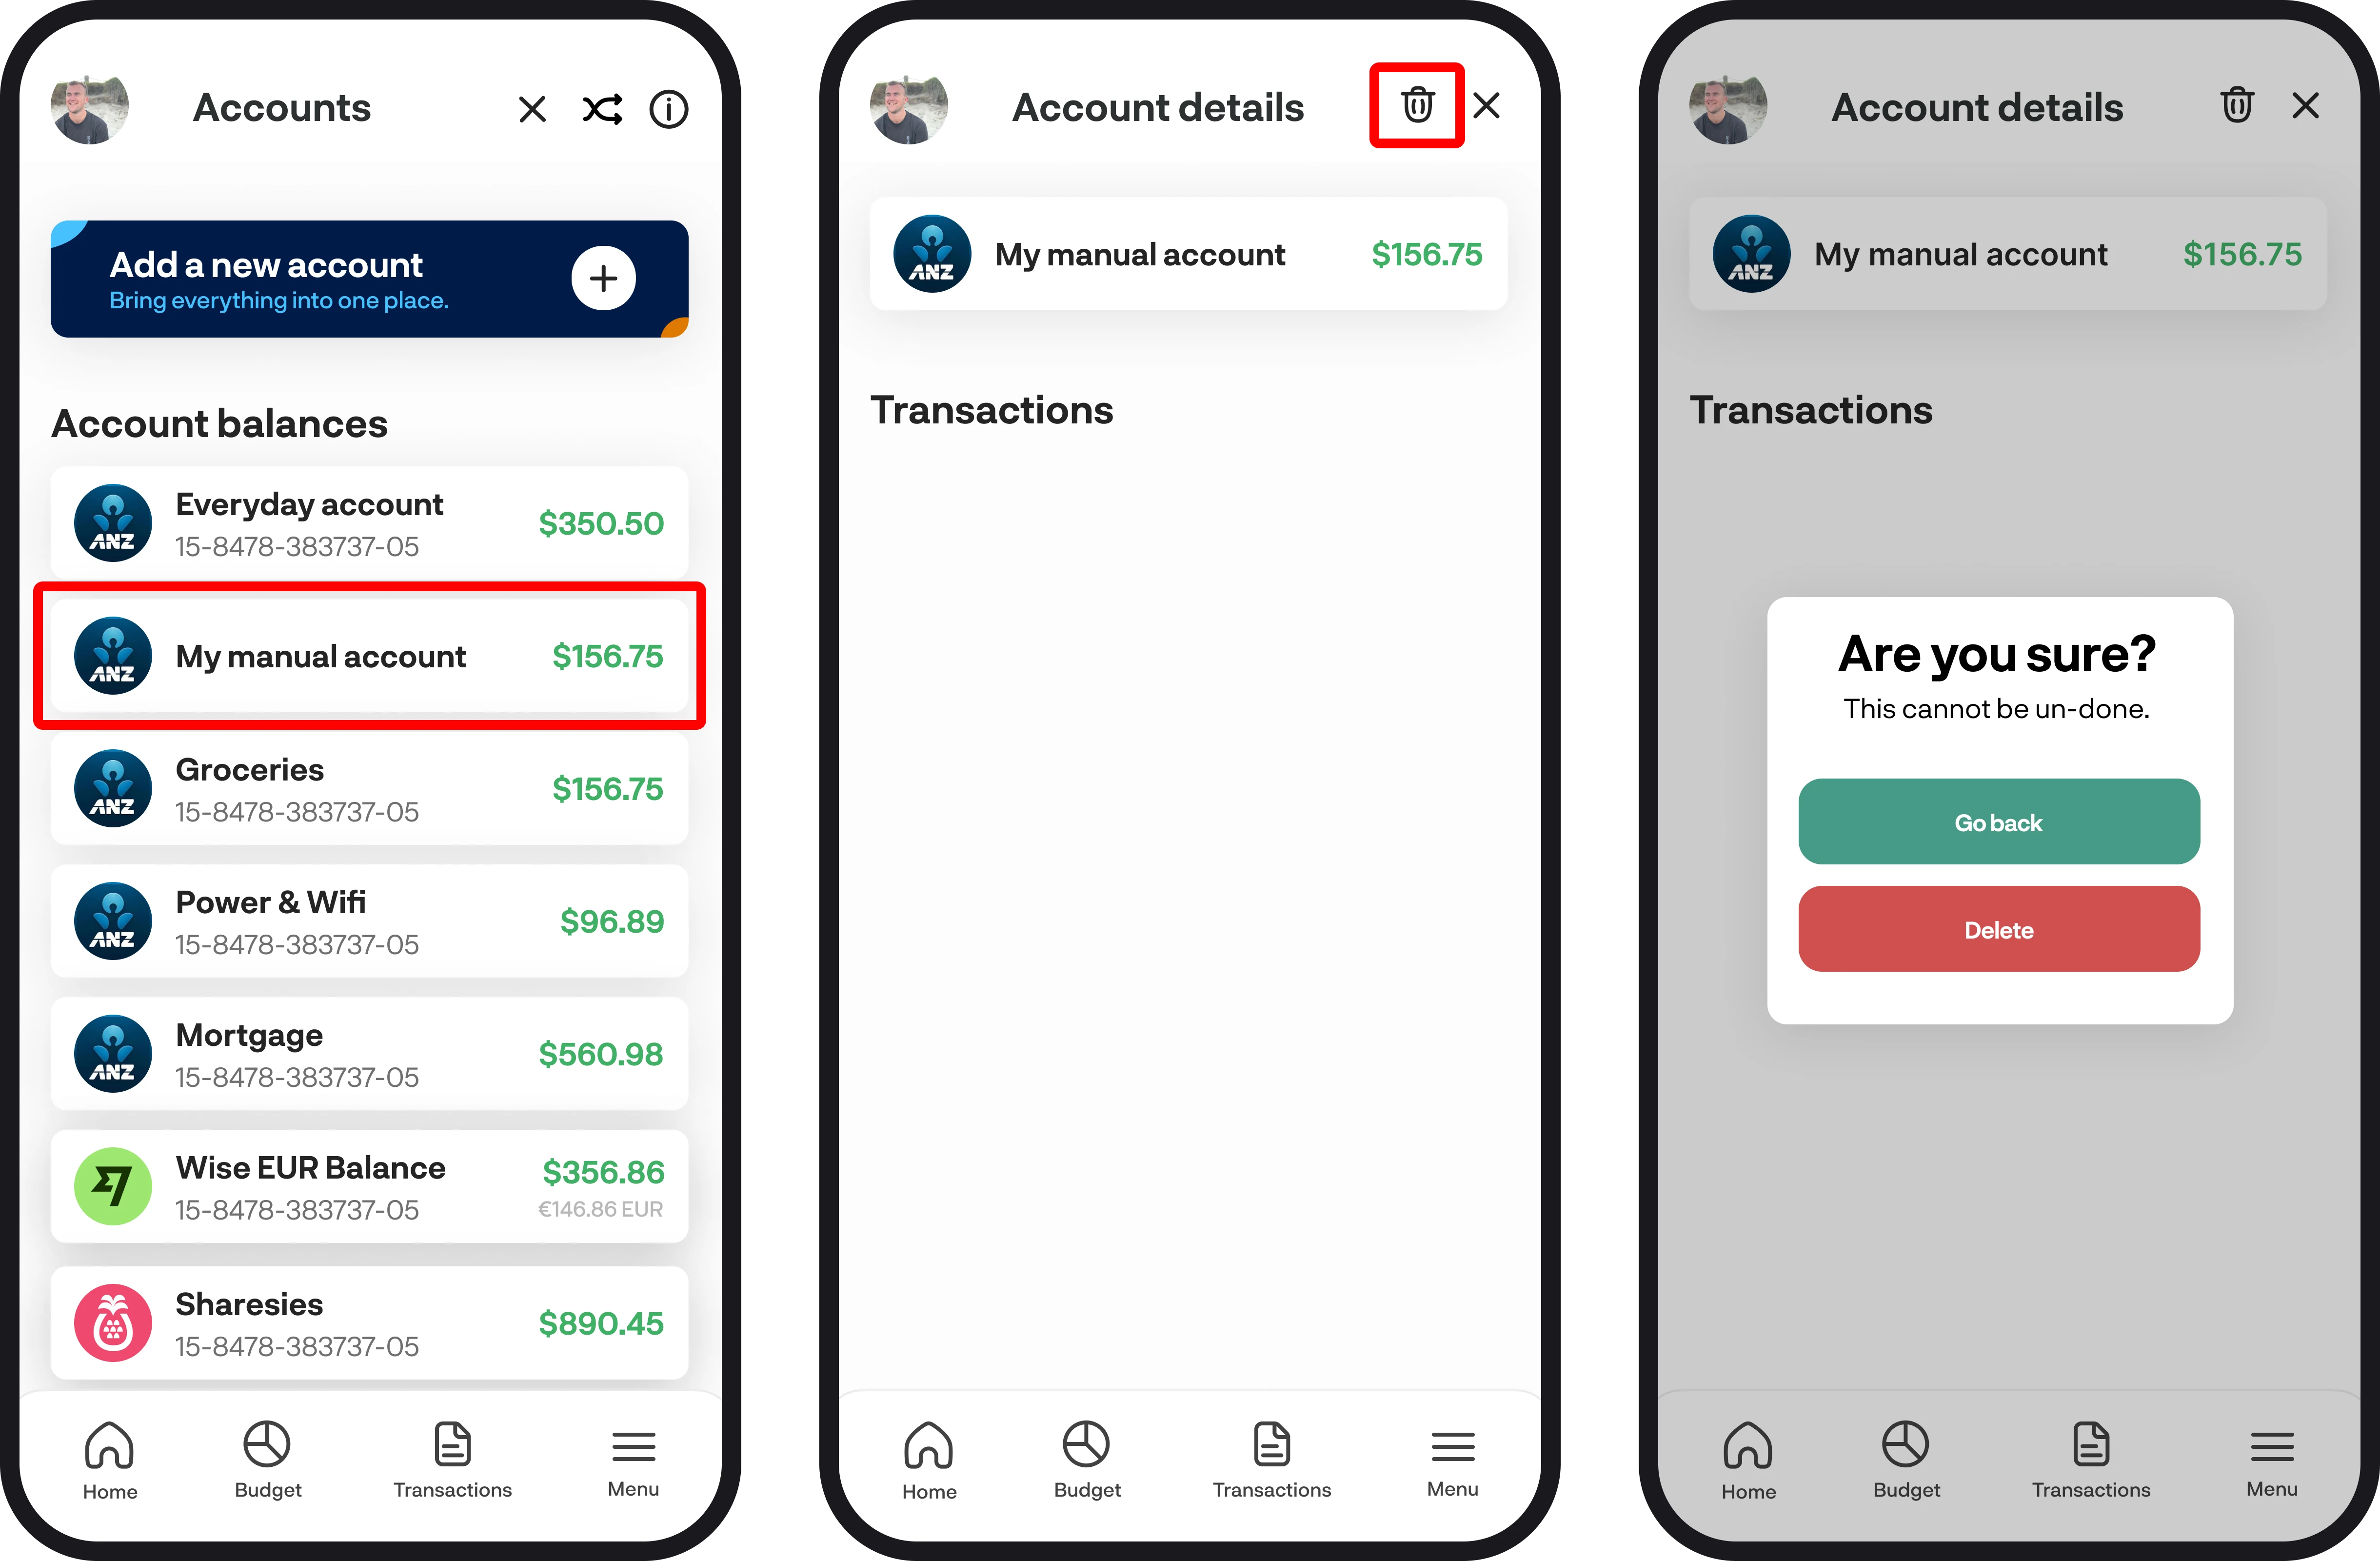
If your account is connected via Akahu, you'll need to remove it via the Connect Accounts screen. You can read more on how to remove an account with Akahu here. If your account is manually set up, then you can remove it by tapping on the account itself, which will then bring you to the account details screen. To remove the account, simply tap the bin symbol up in the top right corner. A pop-up will appear to confirm the deletion; once you select confirm, your account will be removed.
4. Refreshing accounts
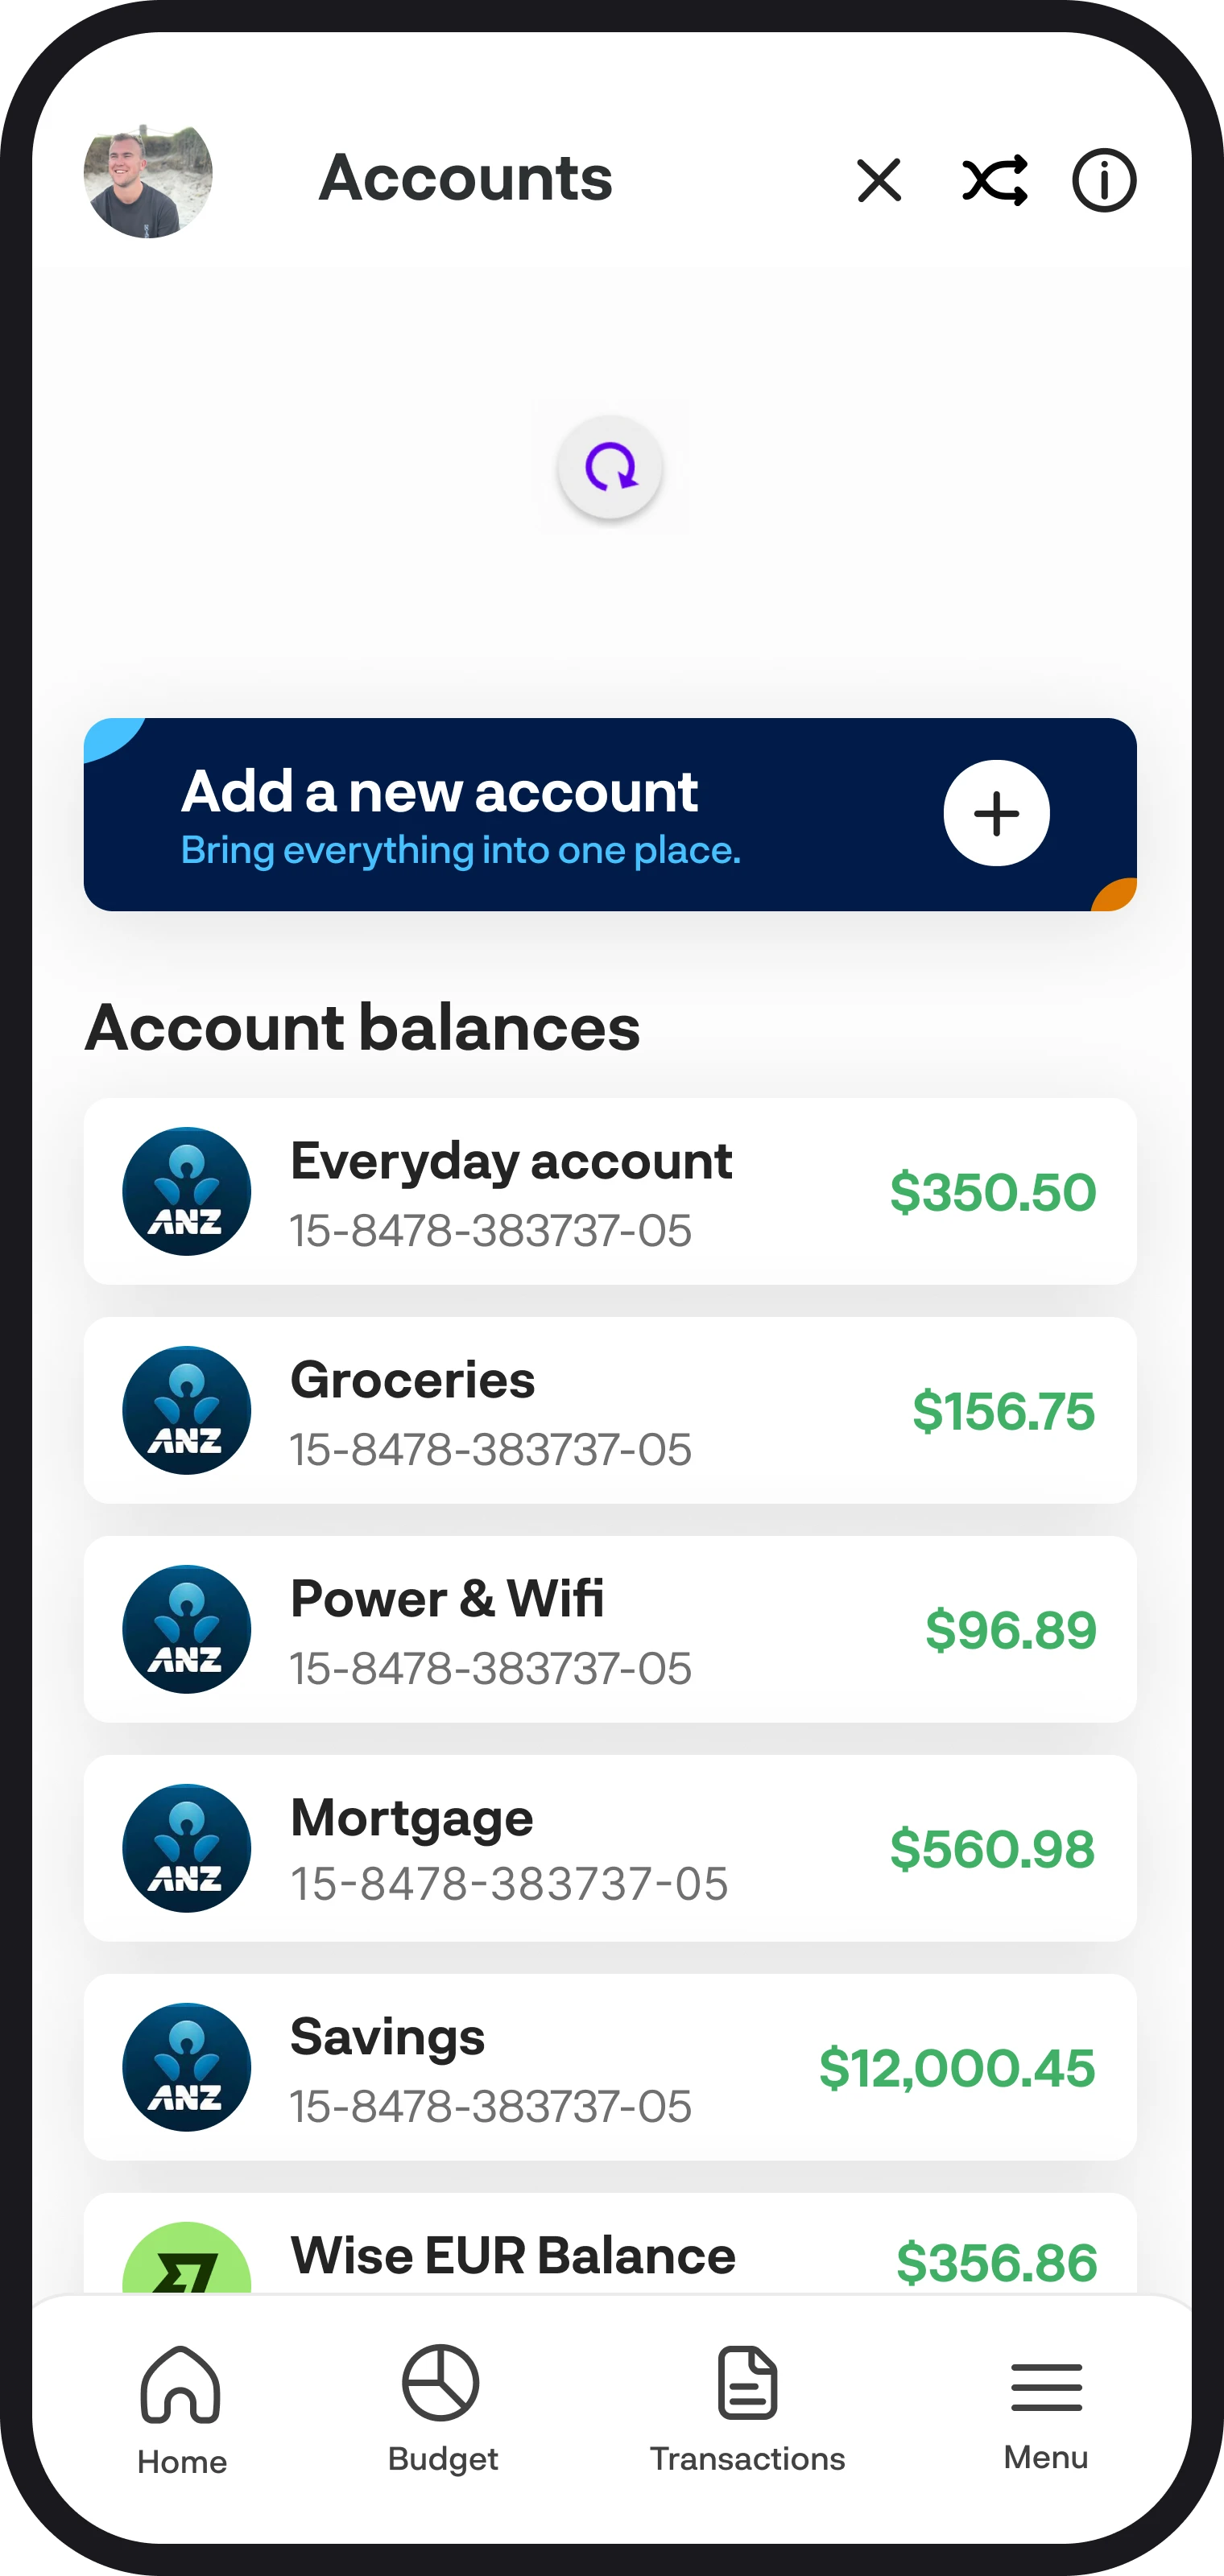
We refresh your account balances each time you open the app; there may be a delay of 10–15 seconds for the balances to update as we pull in new data from Akahu. If you'd like to manually refresh your accounts, you can do this by pulling down to refresh on the main accounts screen.
5. Reorder accounts
To change the order of your accounts, simply select the reorder icon in the top-right corner. You can then hold down on each account to organise it however you want. To finish reordering, select the reorder icon again.

6. Account details
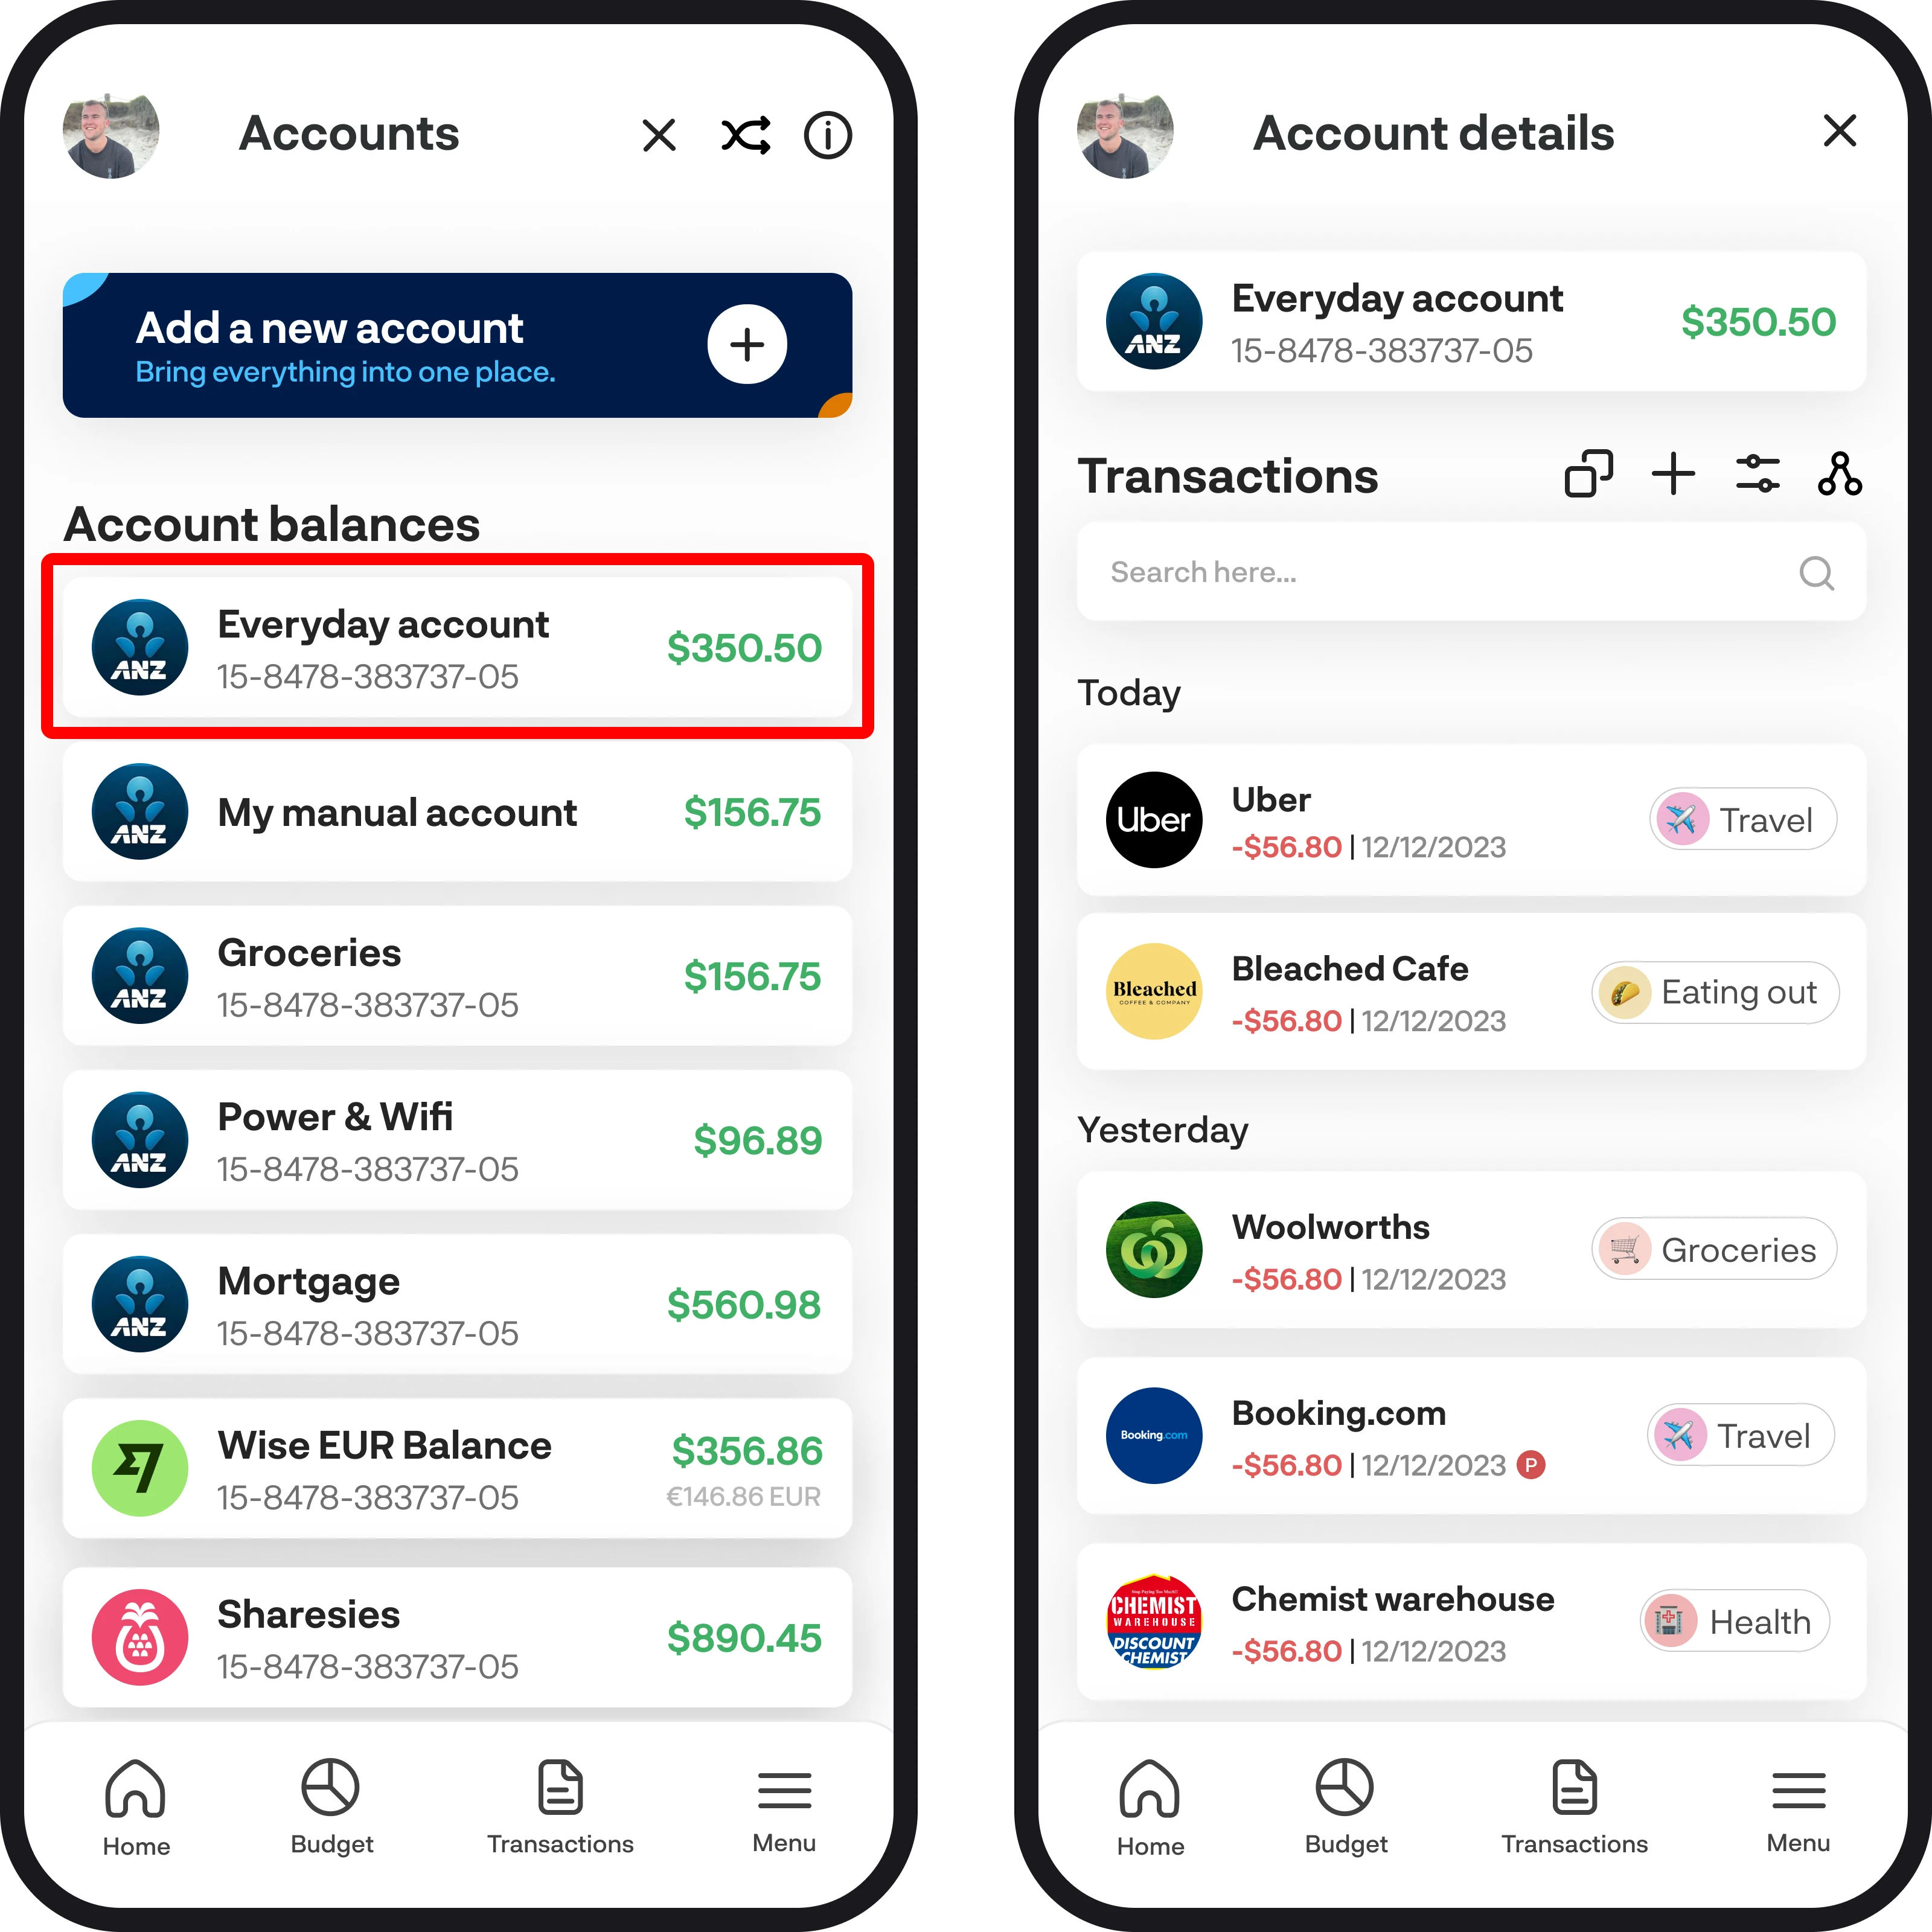
To view your account details, simply tap on the account widget, and then you'll see the account details screen. If your account is connected via Akahu, then you'll be able to see all your transactions for that particular account.
7. Share portfolio details
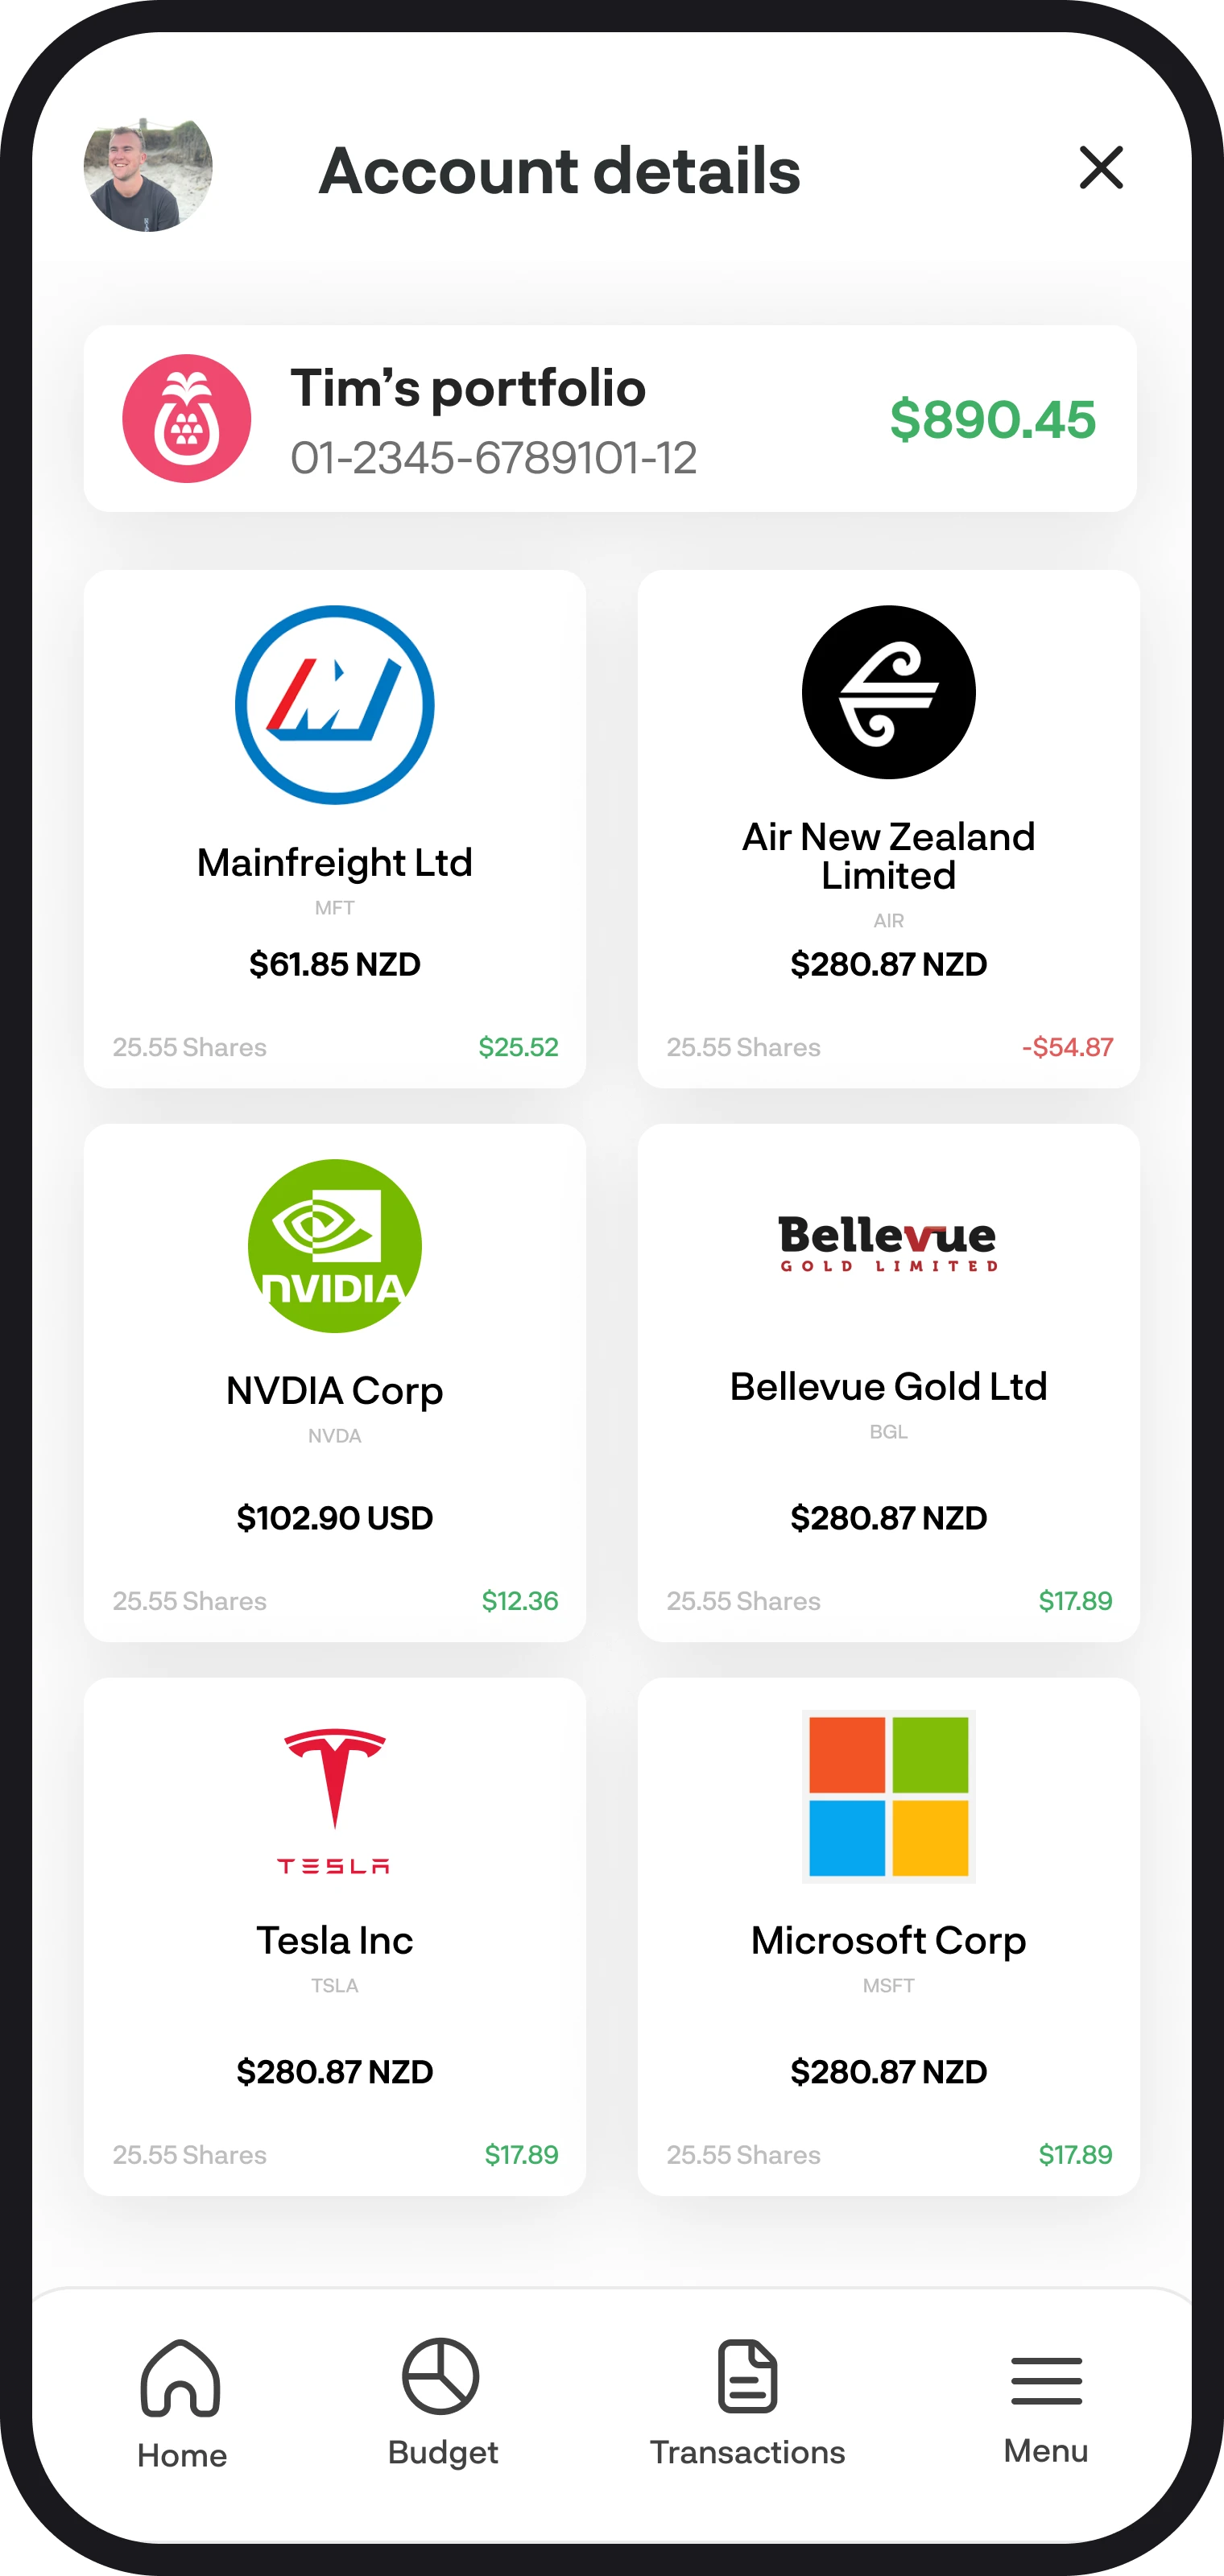
If you've connected your shares portfolio to BudgetBuddie, we'll display all your individual investments within your share portfolio. You'll see all the details of each investment, including logo, name, code, value, shares held and your total return in the bottom right corner.
8. Home loan details
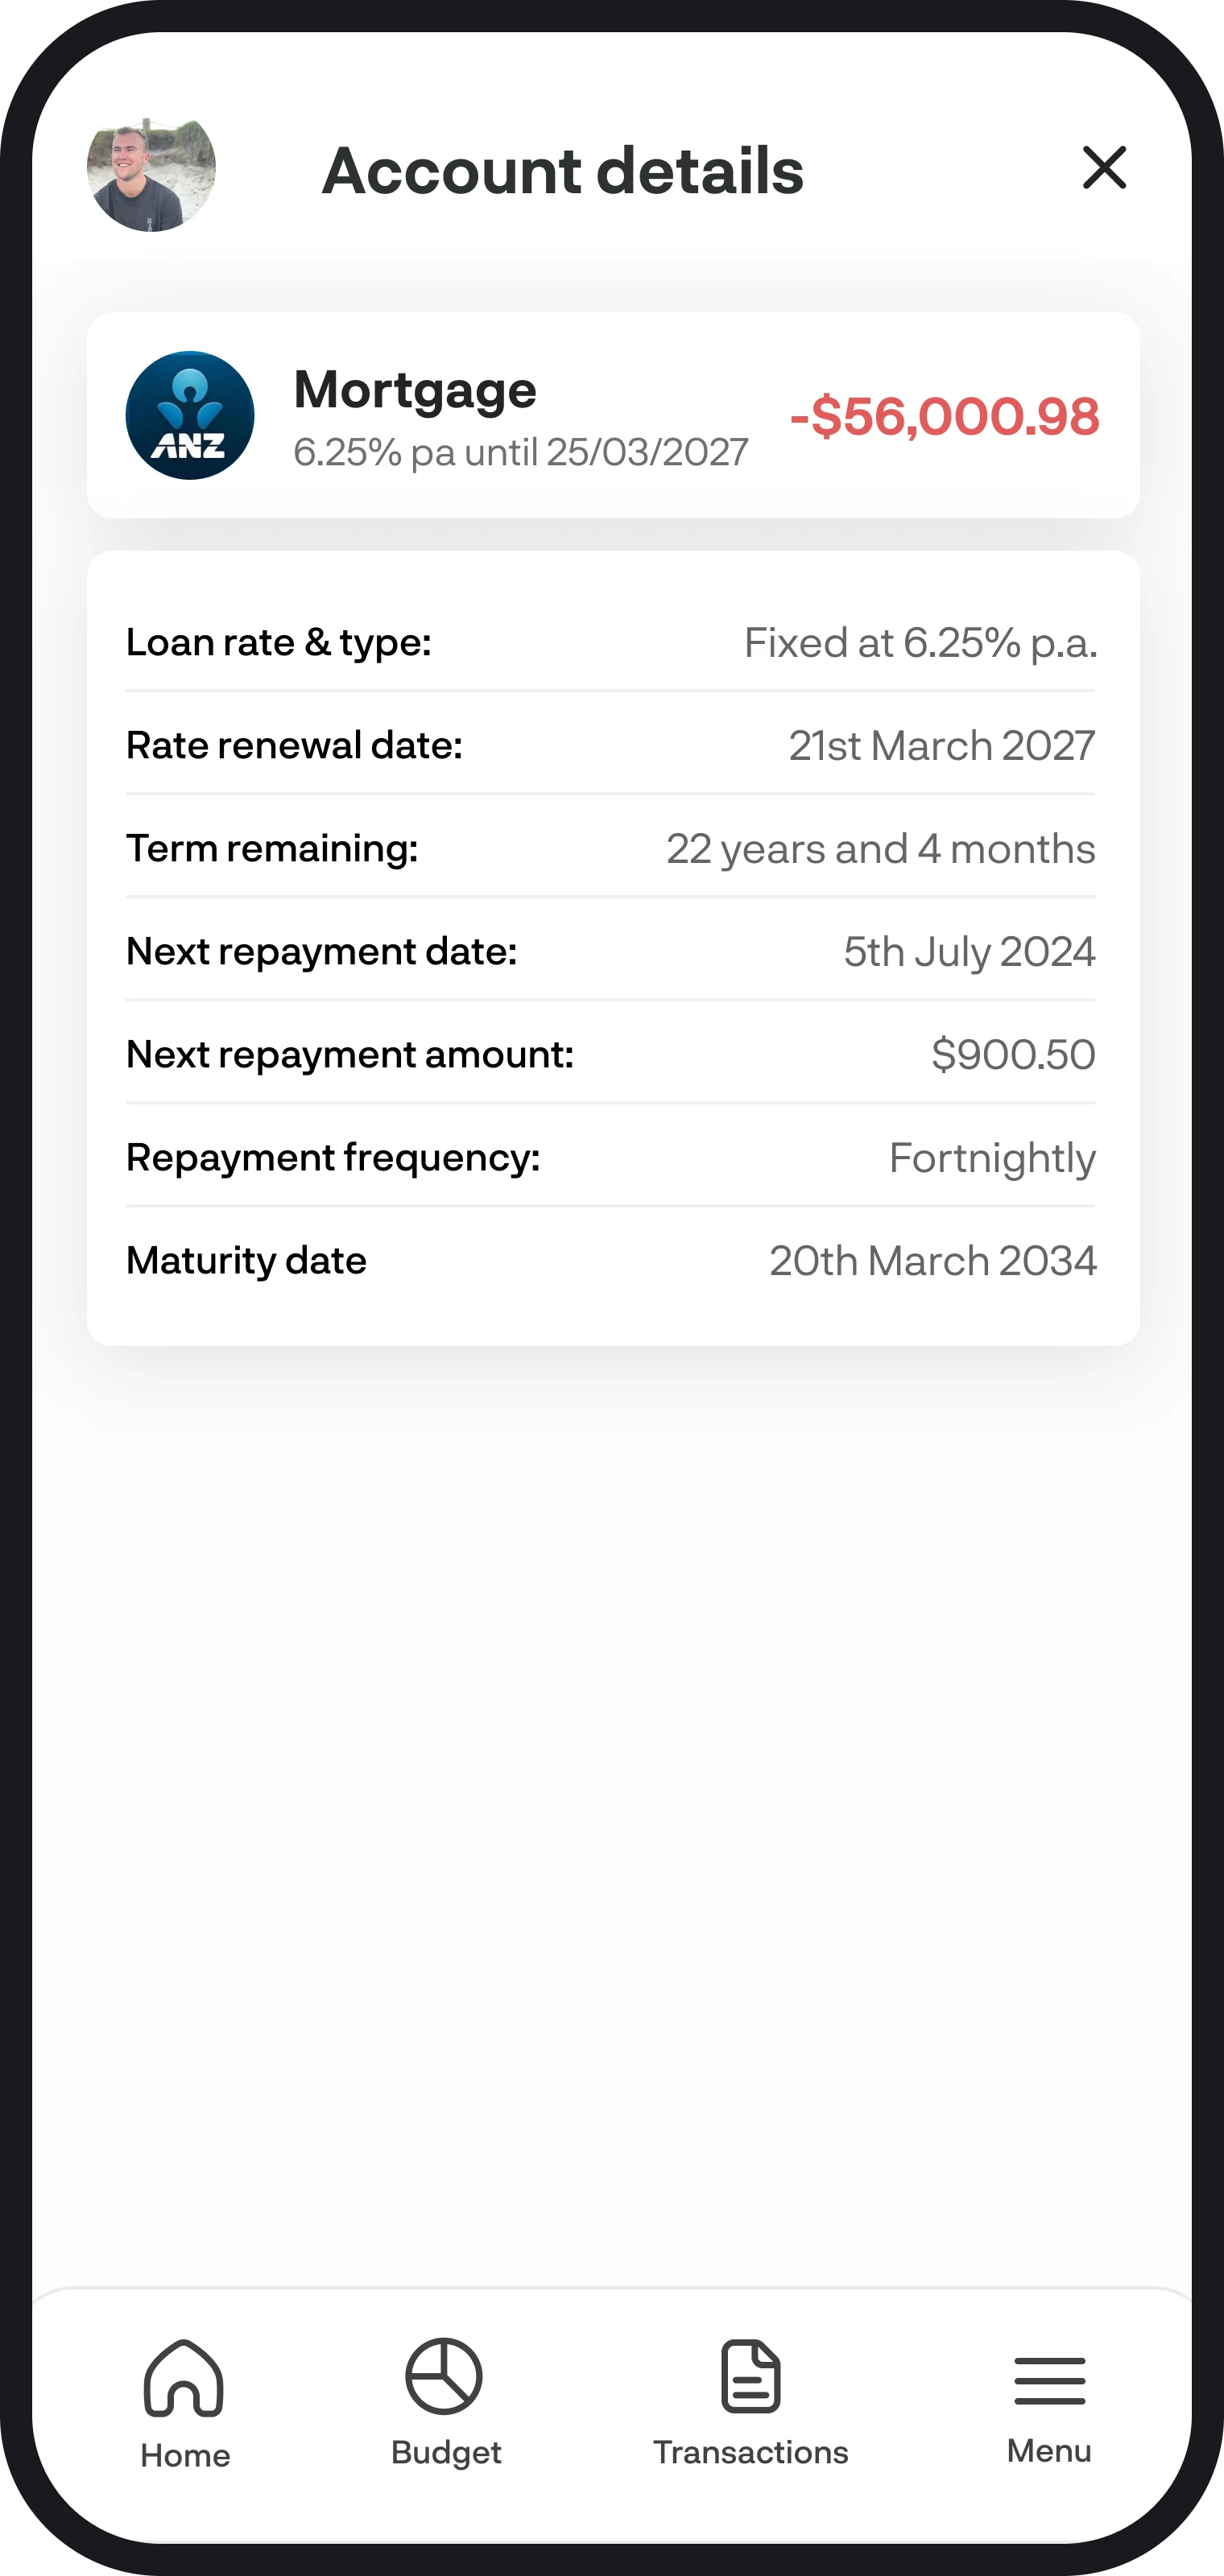
If you've connected any home loan accounts, we'll also display your loan details as well. Note: Details vary from bank to bank, TSB & The Co-operative Bank currently do not display any loan details.
9. Accounts with different currencies
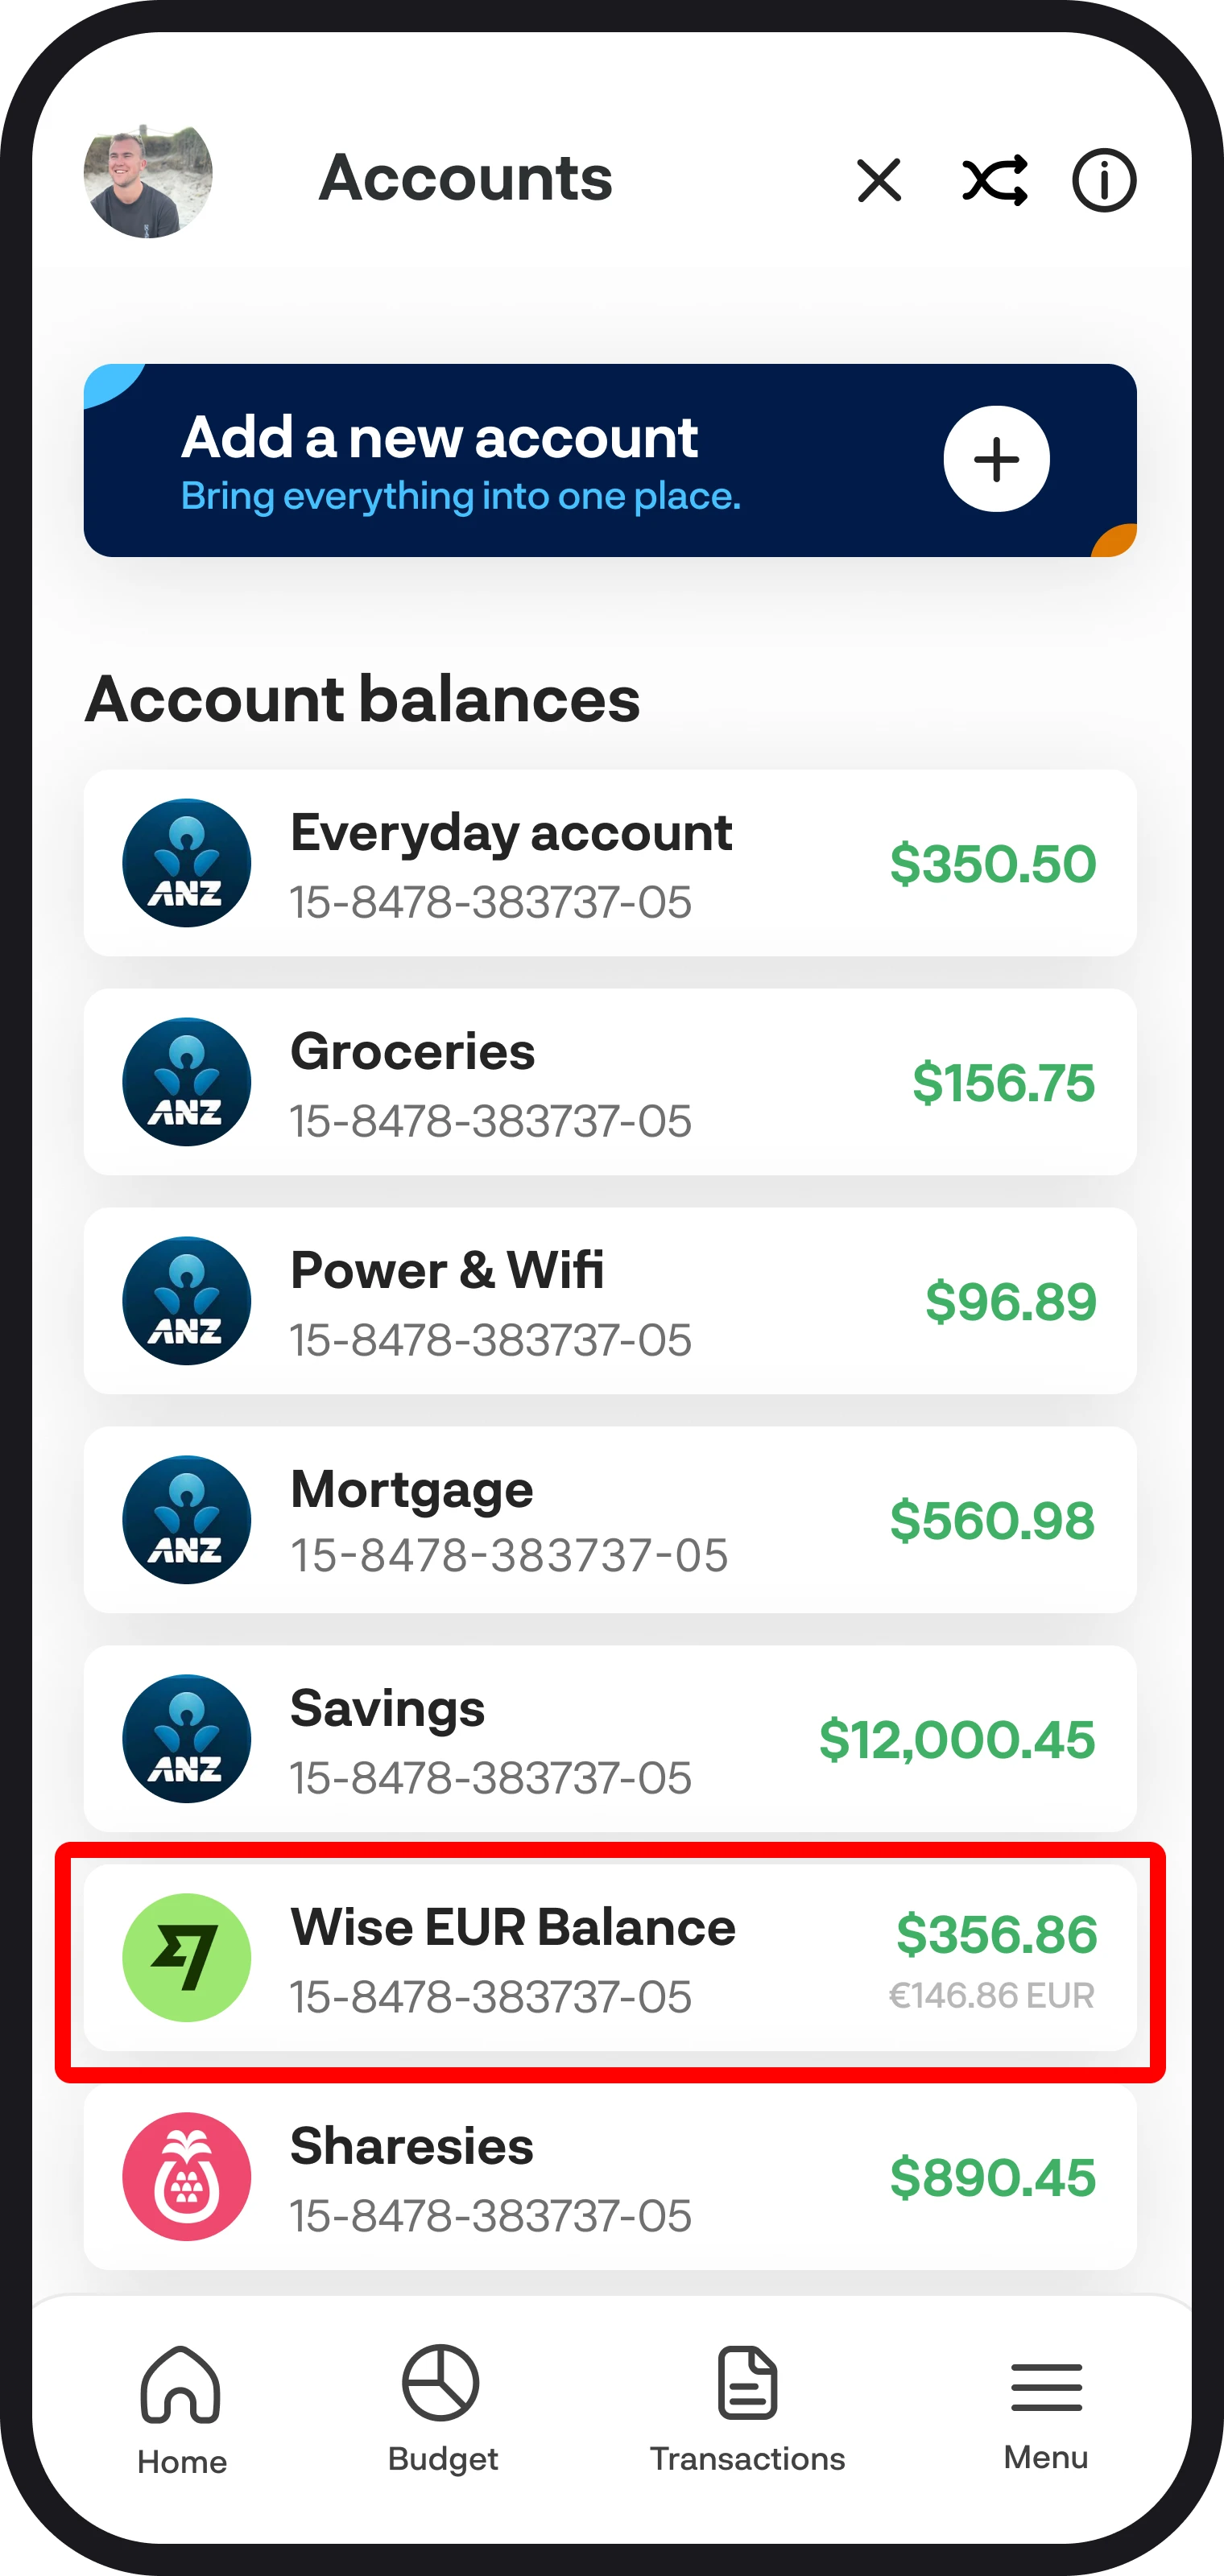
If you connect an account via Akahu that is a different currency to NZD, we use todays currency conversion rates to convert that account balance to NZD. We also display the original amount and currency of that account in grey just below the NZD amount on your account widget.
10. Accounts on the dashboard
You can also view your accounts and open account details from the dashboard as well. Simply tap on each widget to open the account details screen.
You're all ready to go 🎉
Woohoo! You now have the full overview on how to use the accounts feature. If you run into any issues while setting everything up, feel free to get in touch with us at hello@budgetbuddie.co.nz
