
How to manage your plan
How to manage your plan
Manage all your billing details and change your plan by using the Manage Plan feature. In this guide, we'll walk you through every step of how to manage your plan.
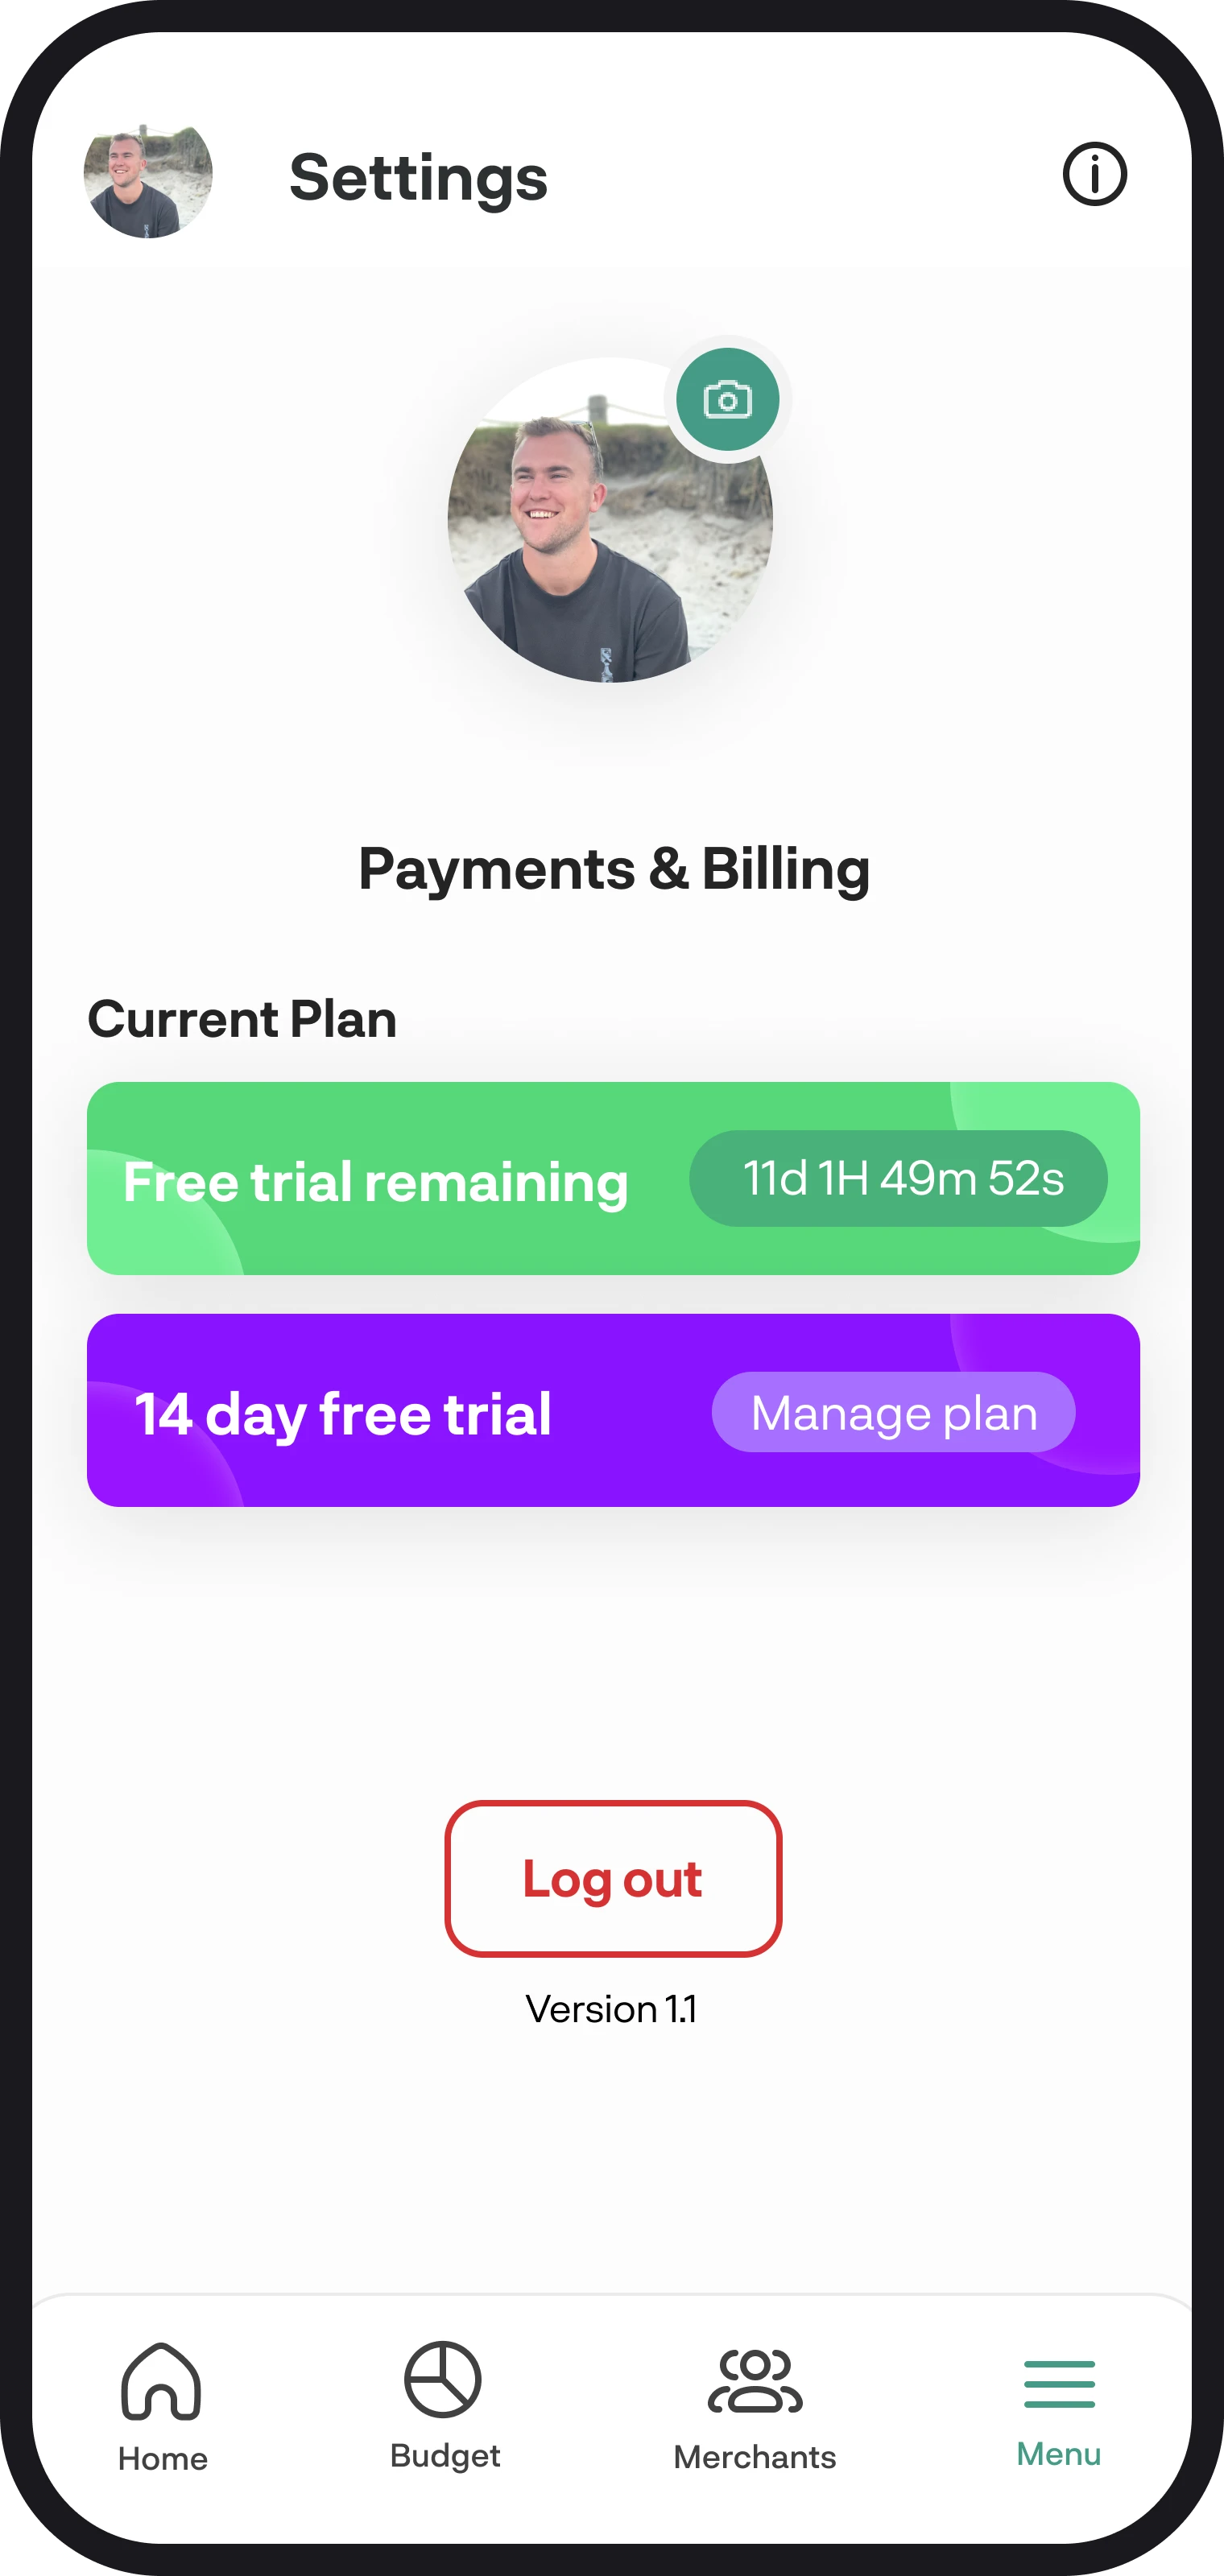
1. Navigate to settings
First, navigate to settings, and once you're in settings, scroll down to the bottom of the screen, where you'll see 'payments & billing.'
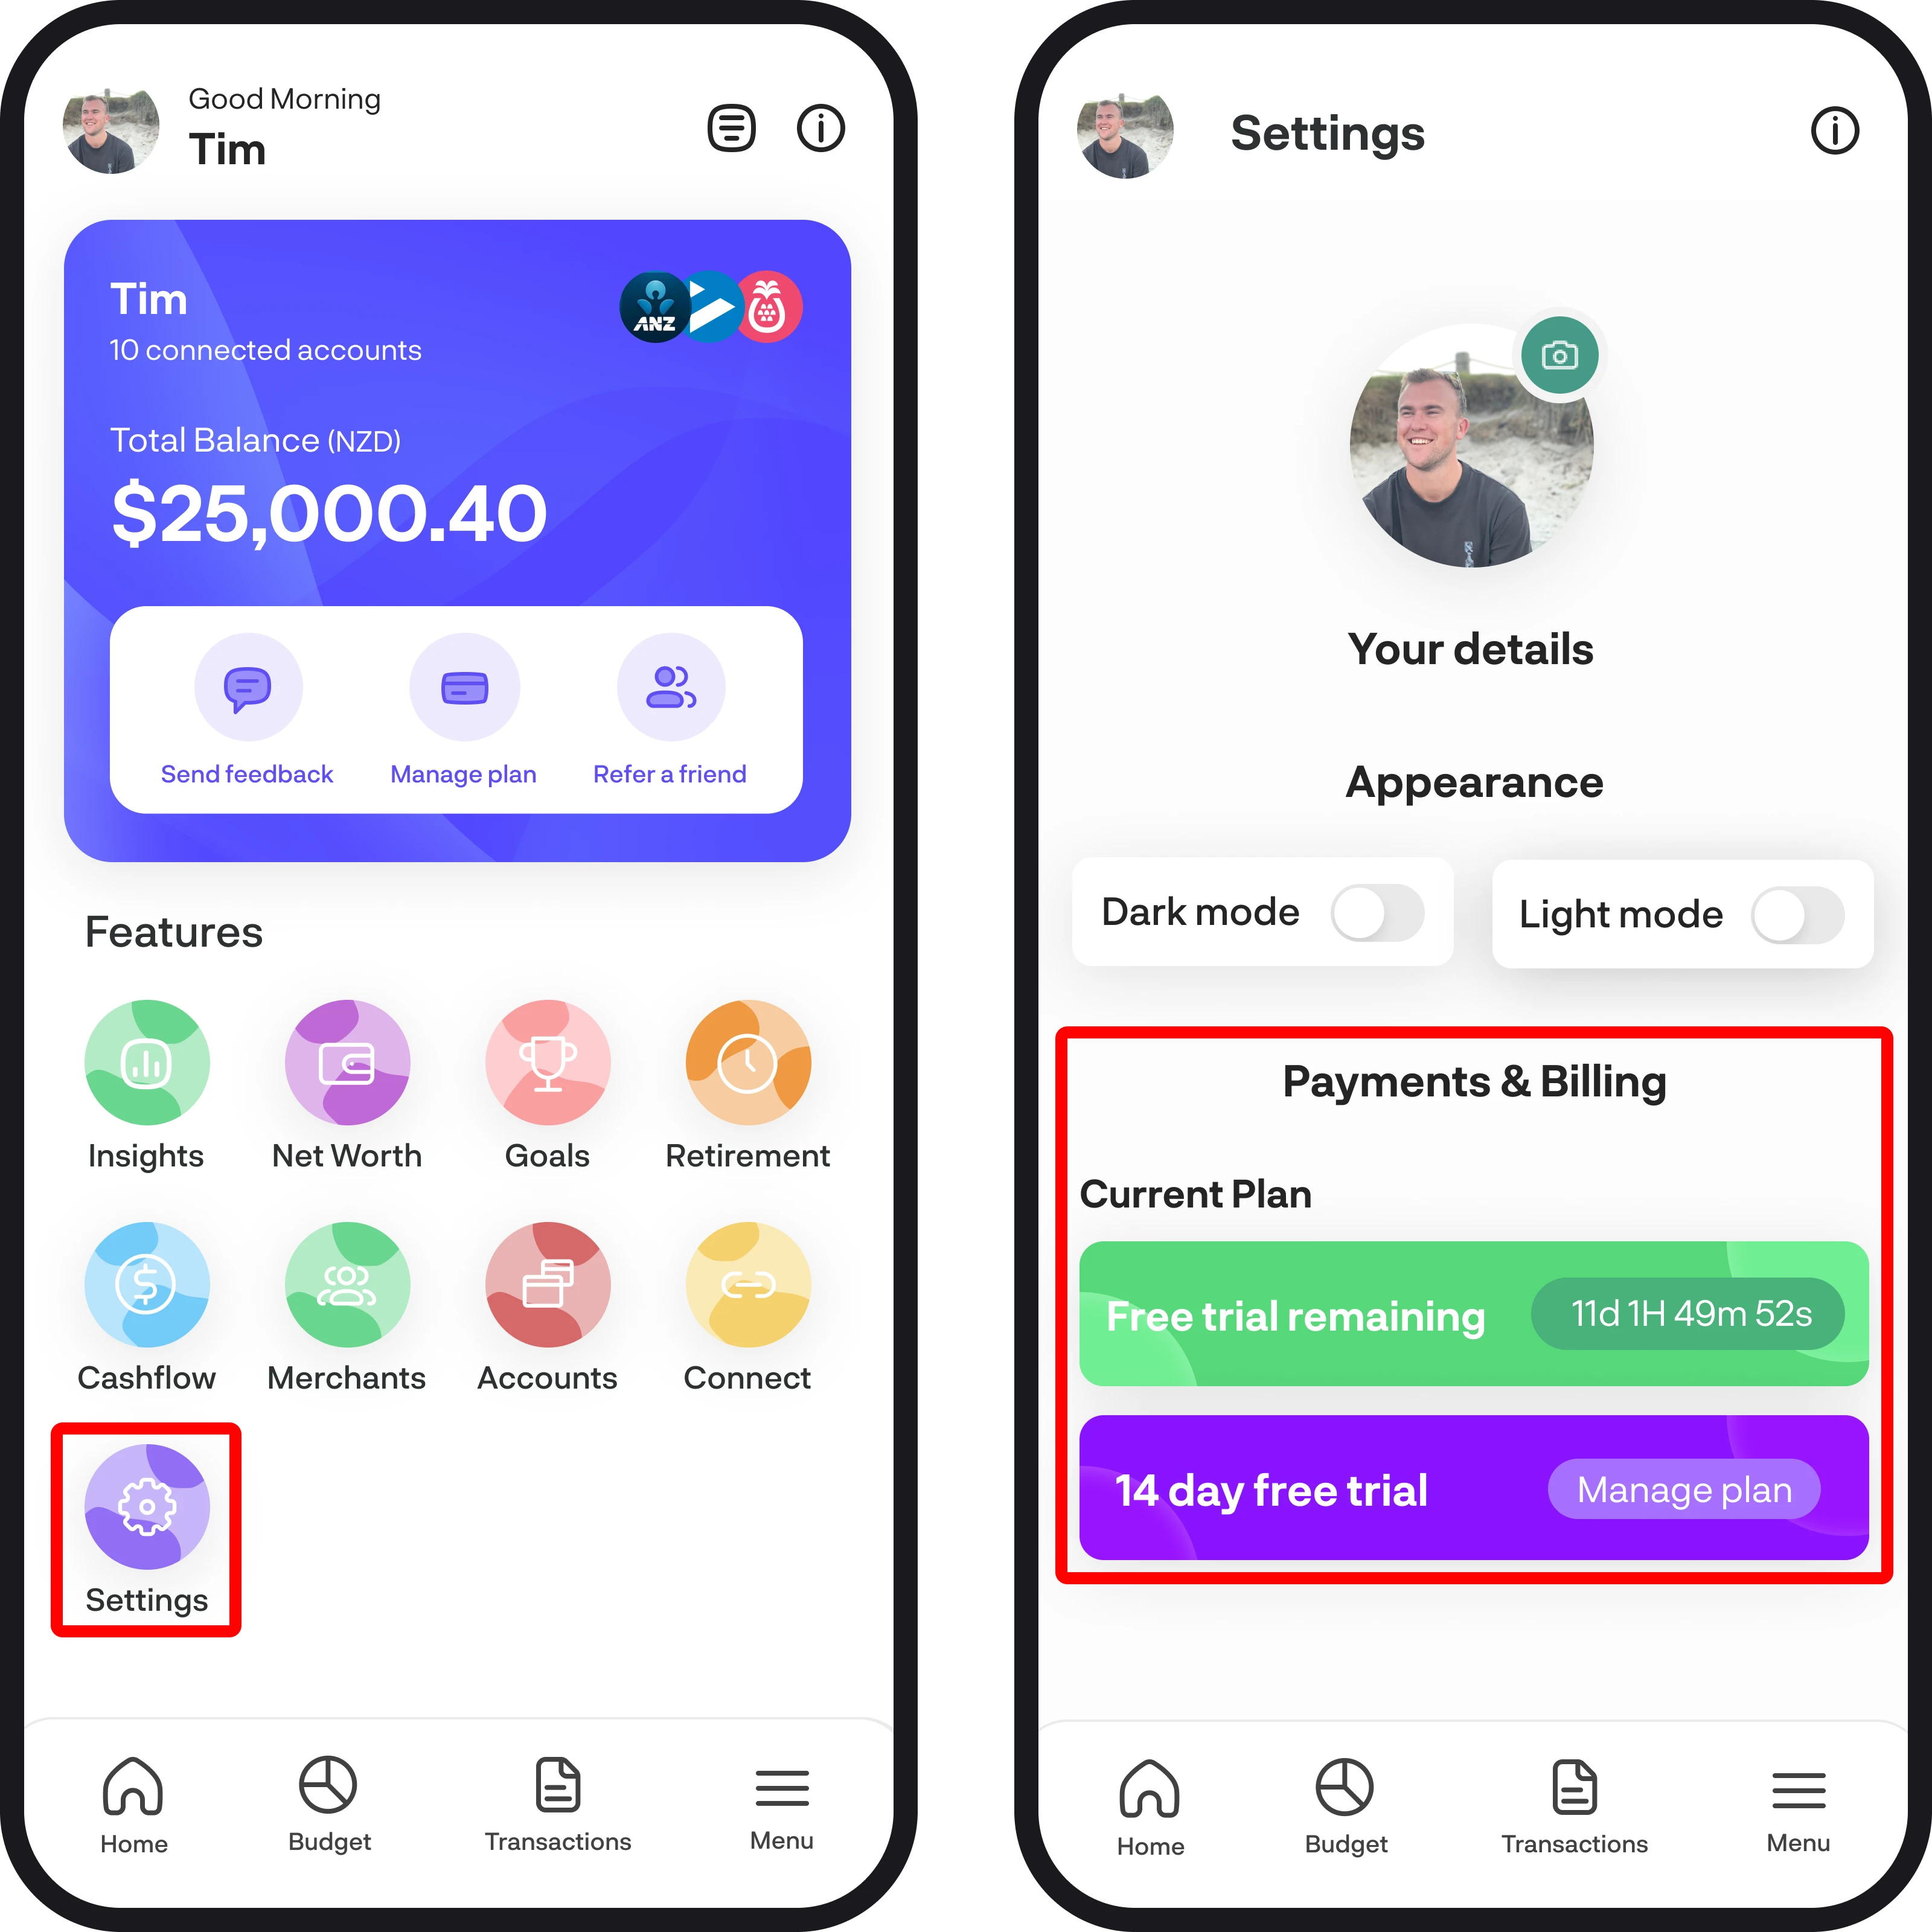
2. Your plan
Once you're in the payments and billing section of settings, simply tap on 'Manage Plan' next to the plan you're currently on. You'll then see a screen saying we've sent you an email to manage your plan.

3. Check your email
Check your email to view the email we've sent to allow you to manage your plan. Once you've received it, tap the green 'Manage account' button. A magic one time link is embedded in the manage account button and you'll automatically be logged in.
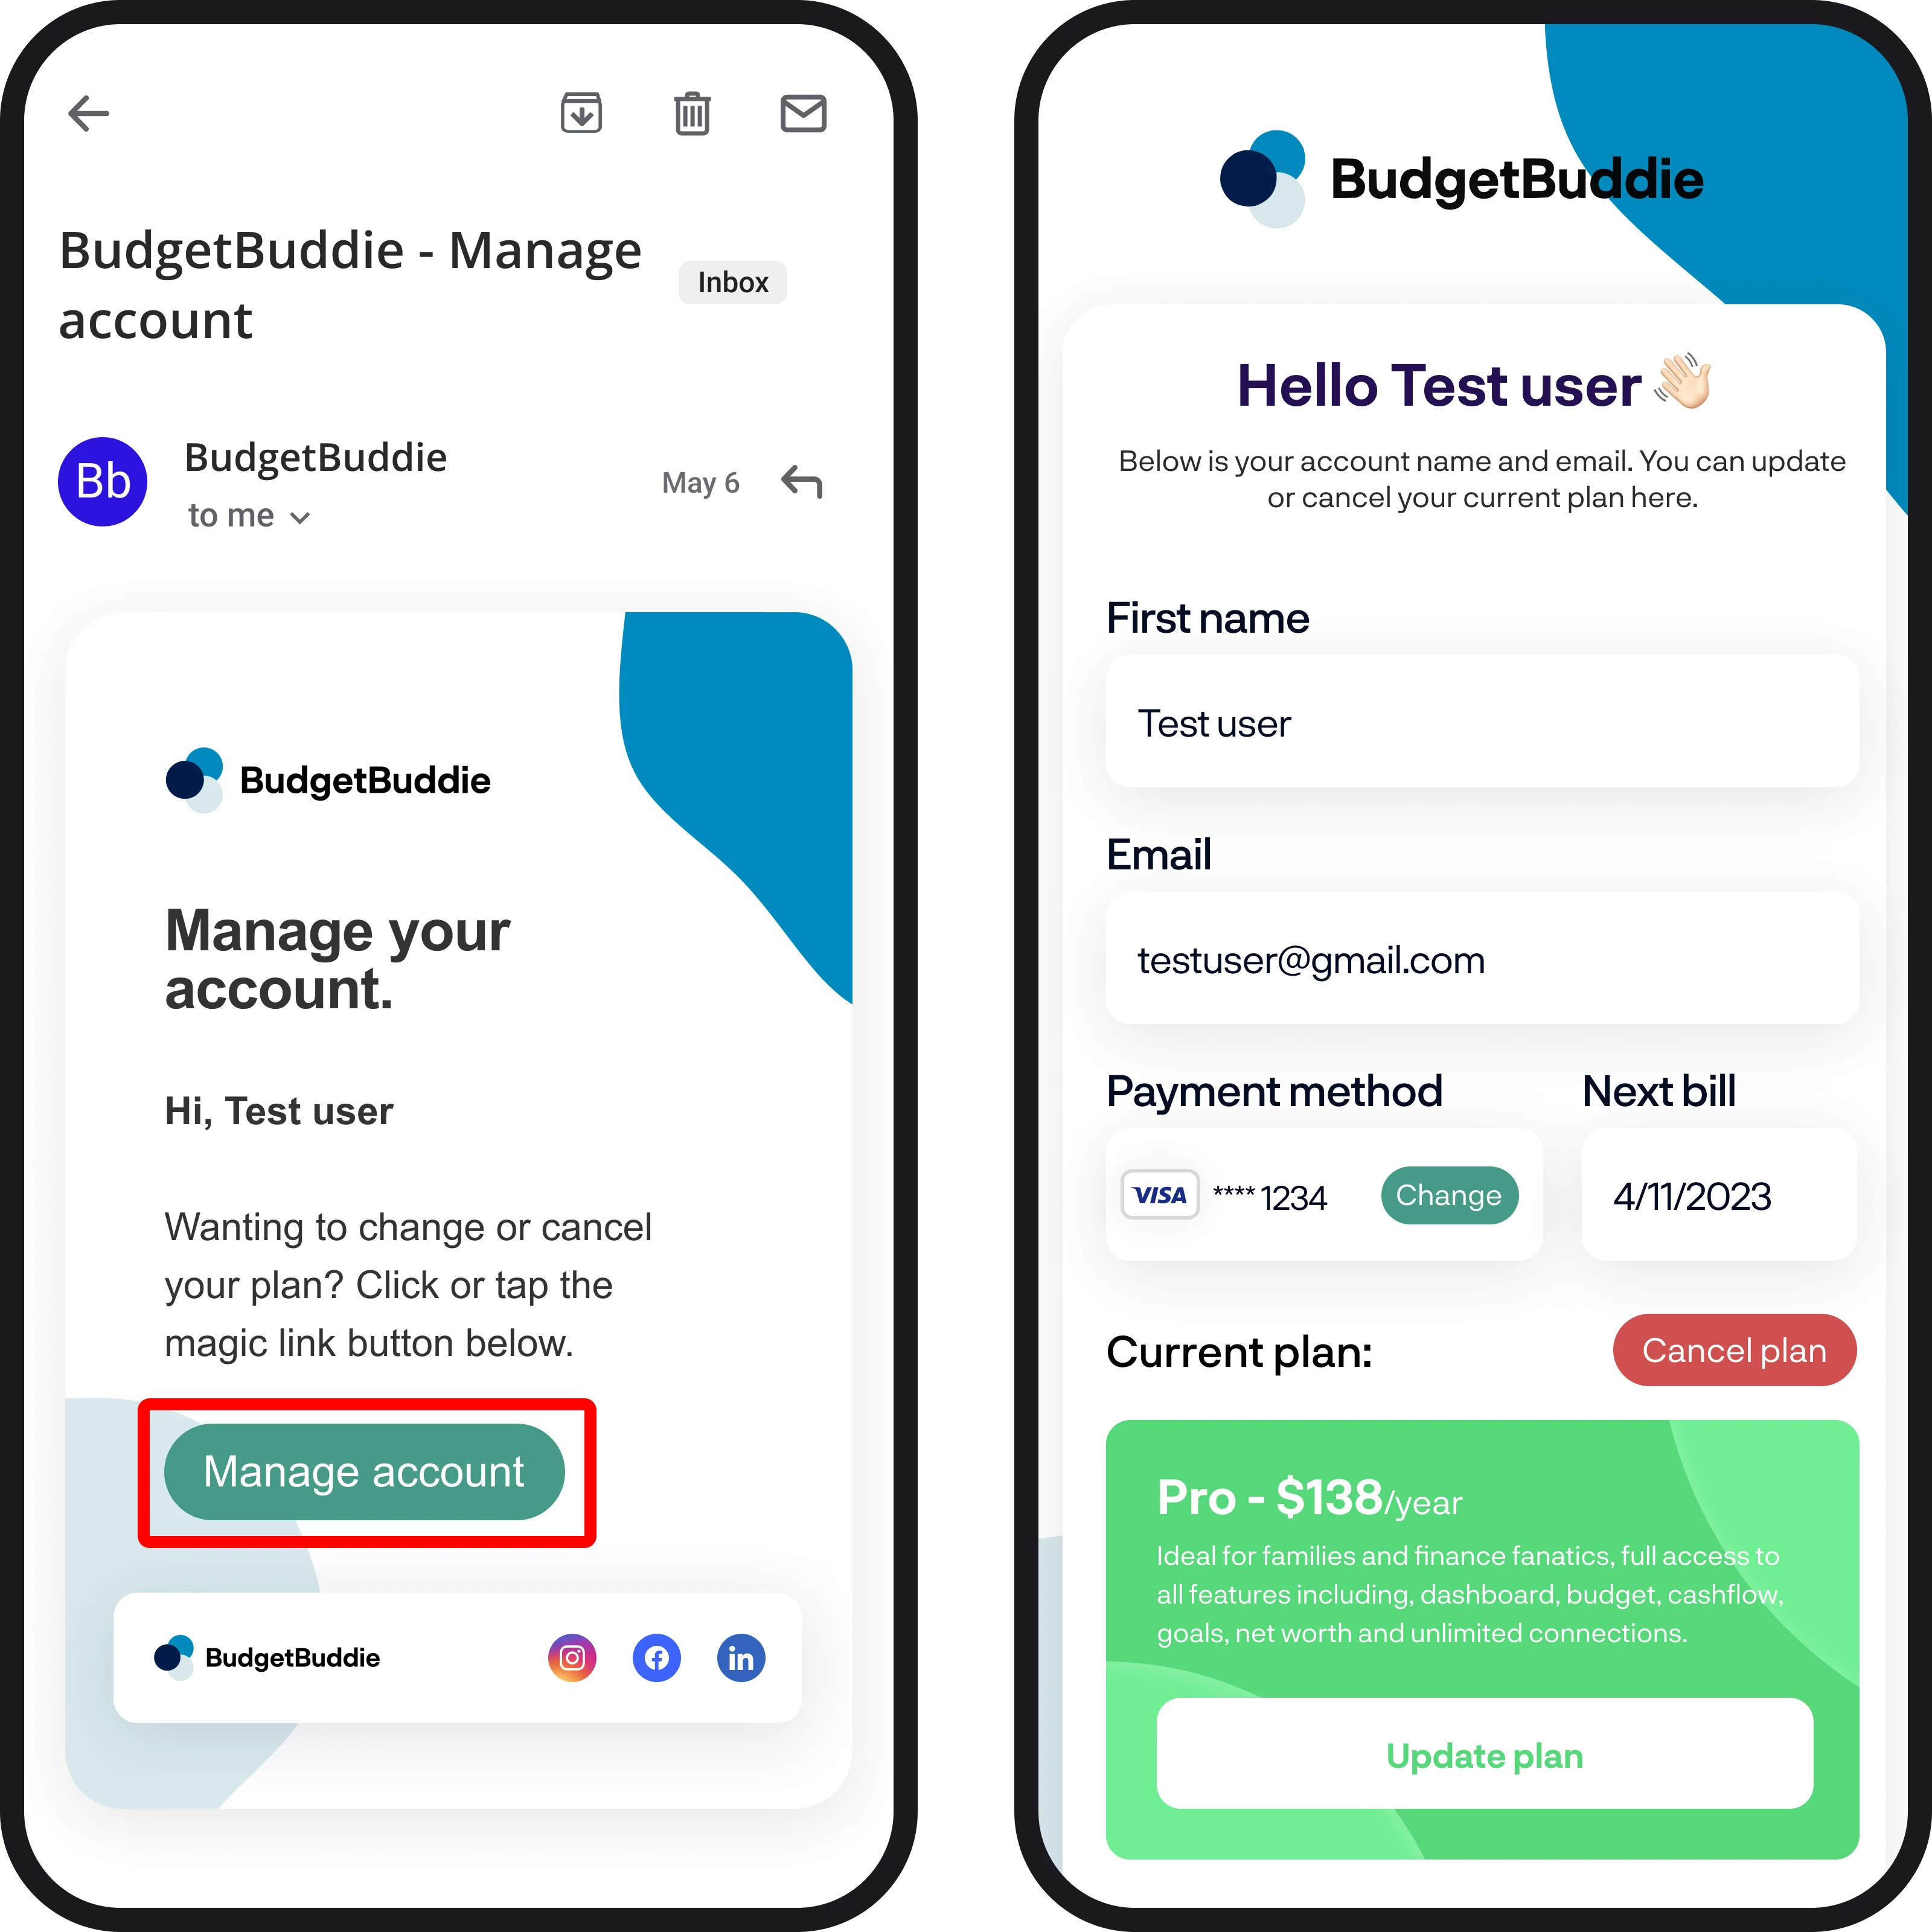
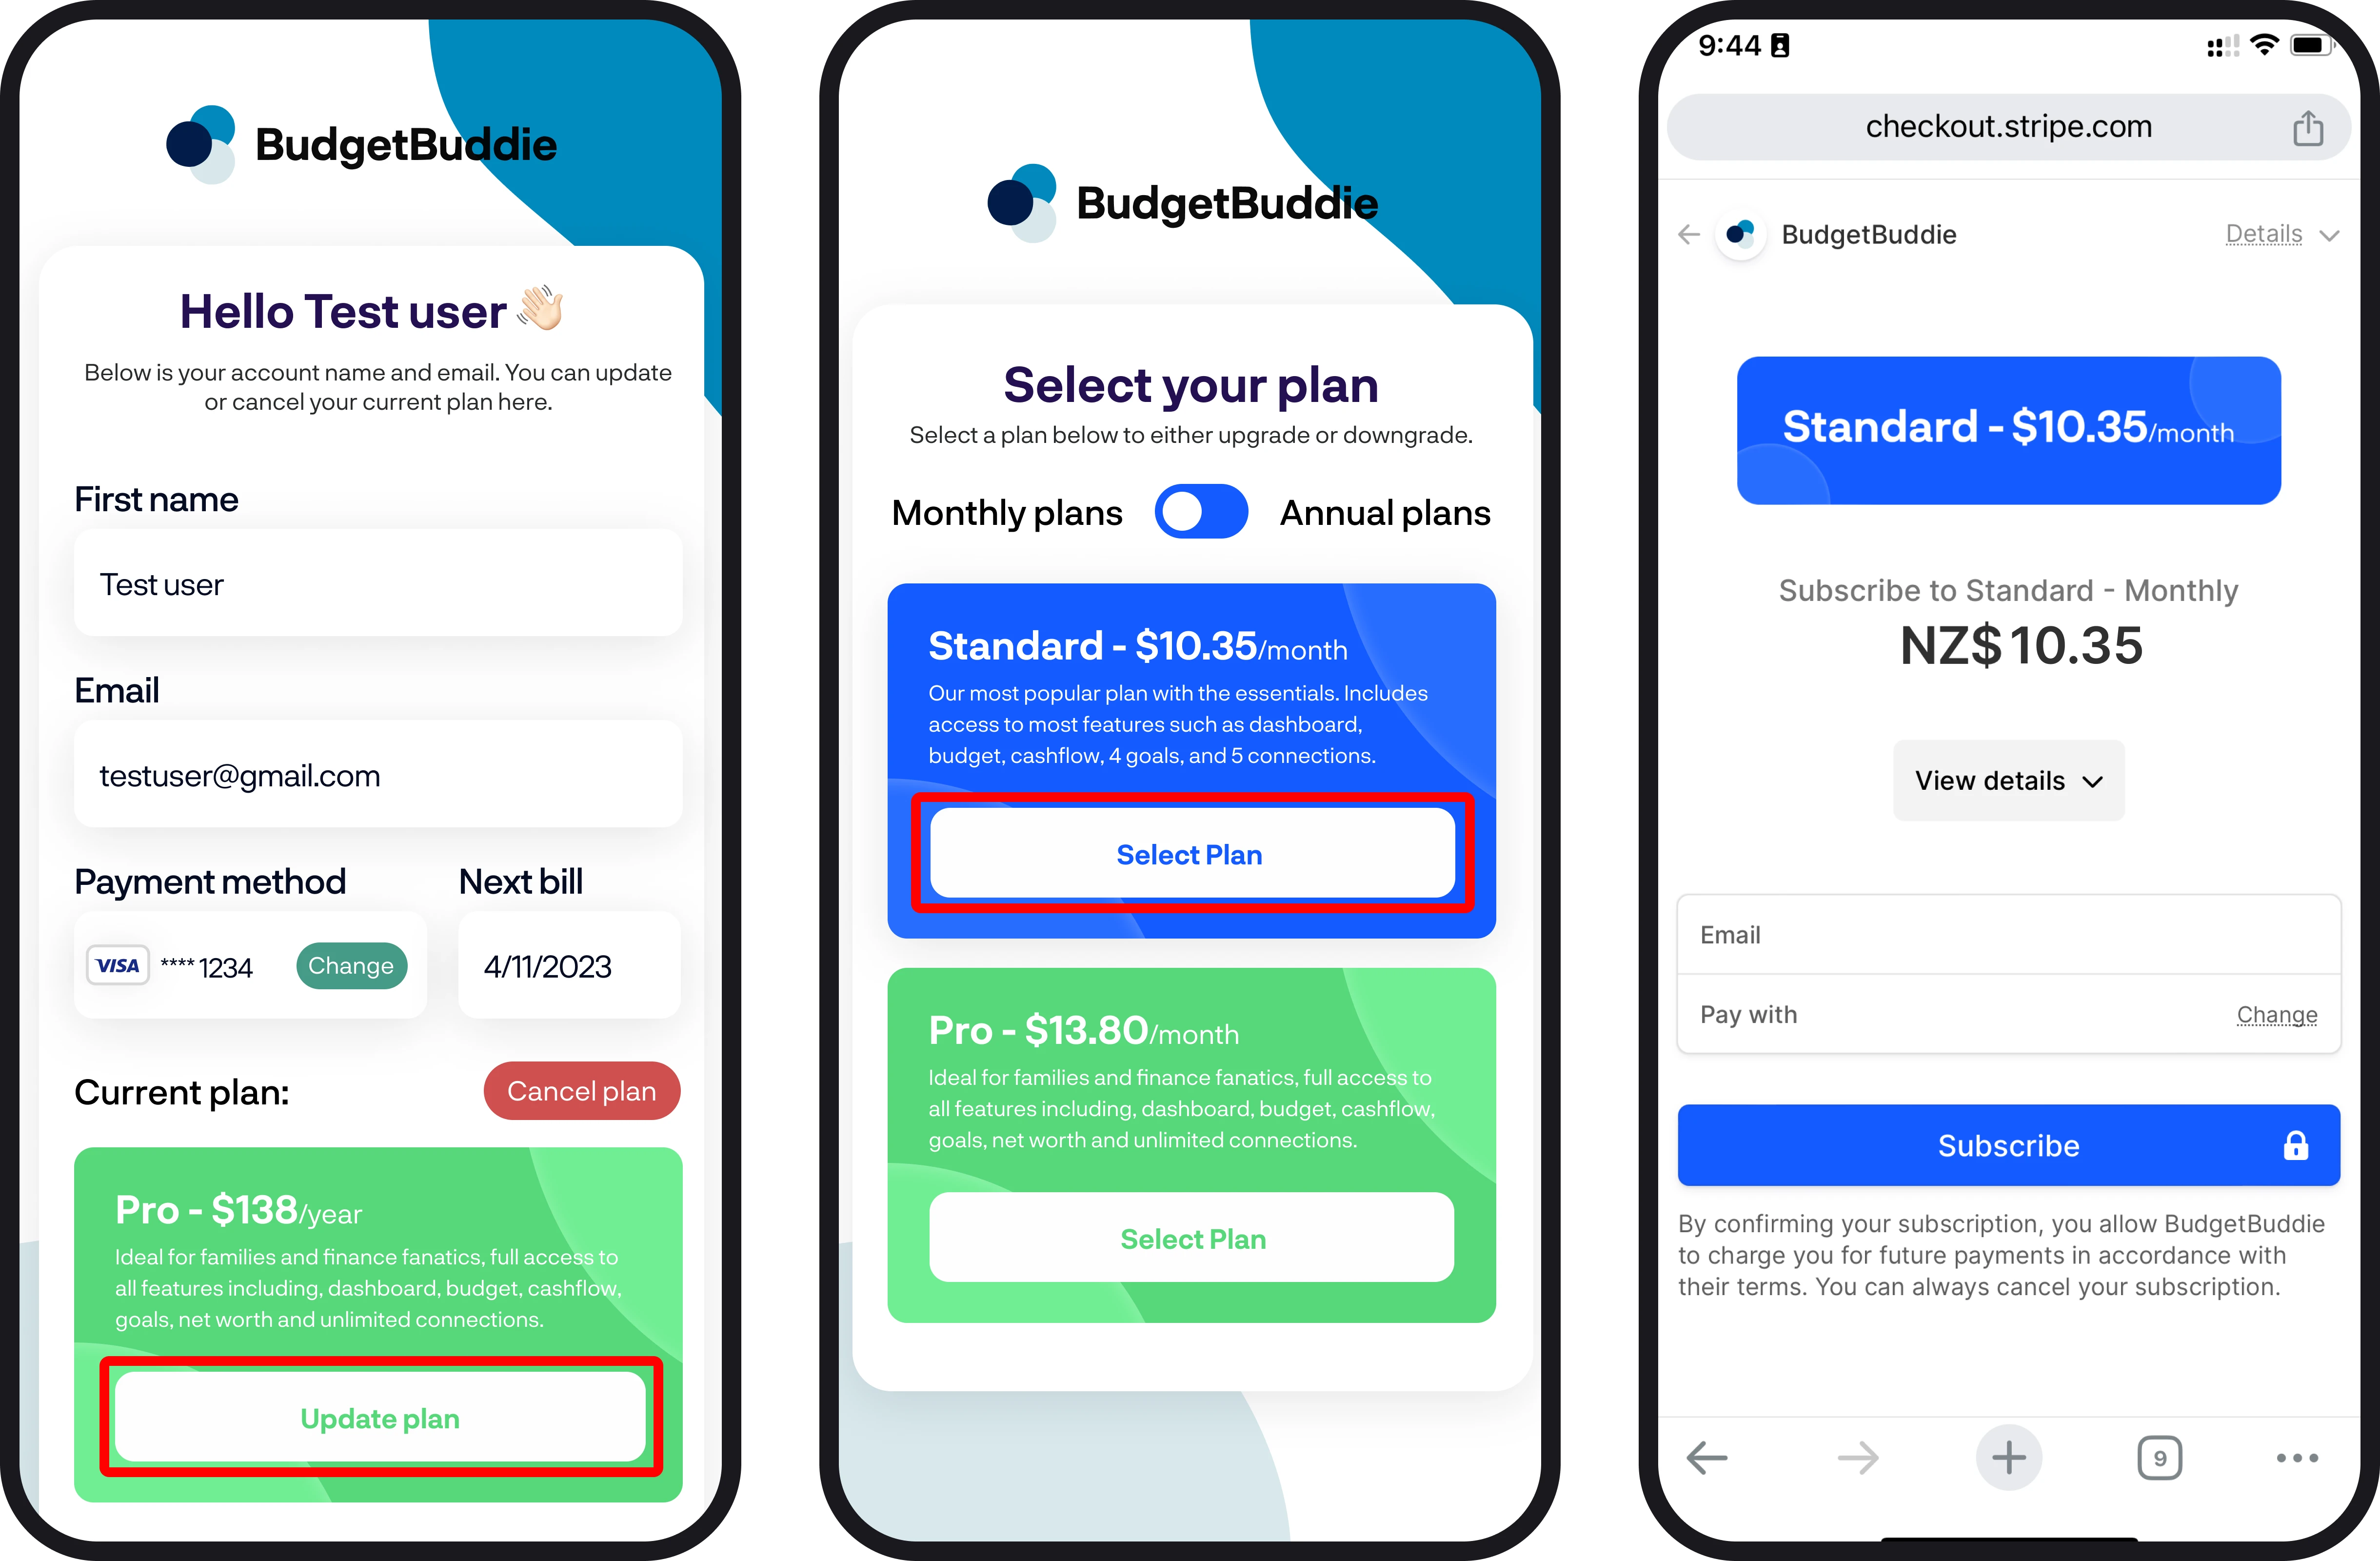
4. Manage account overview
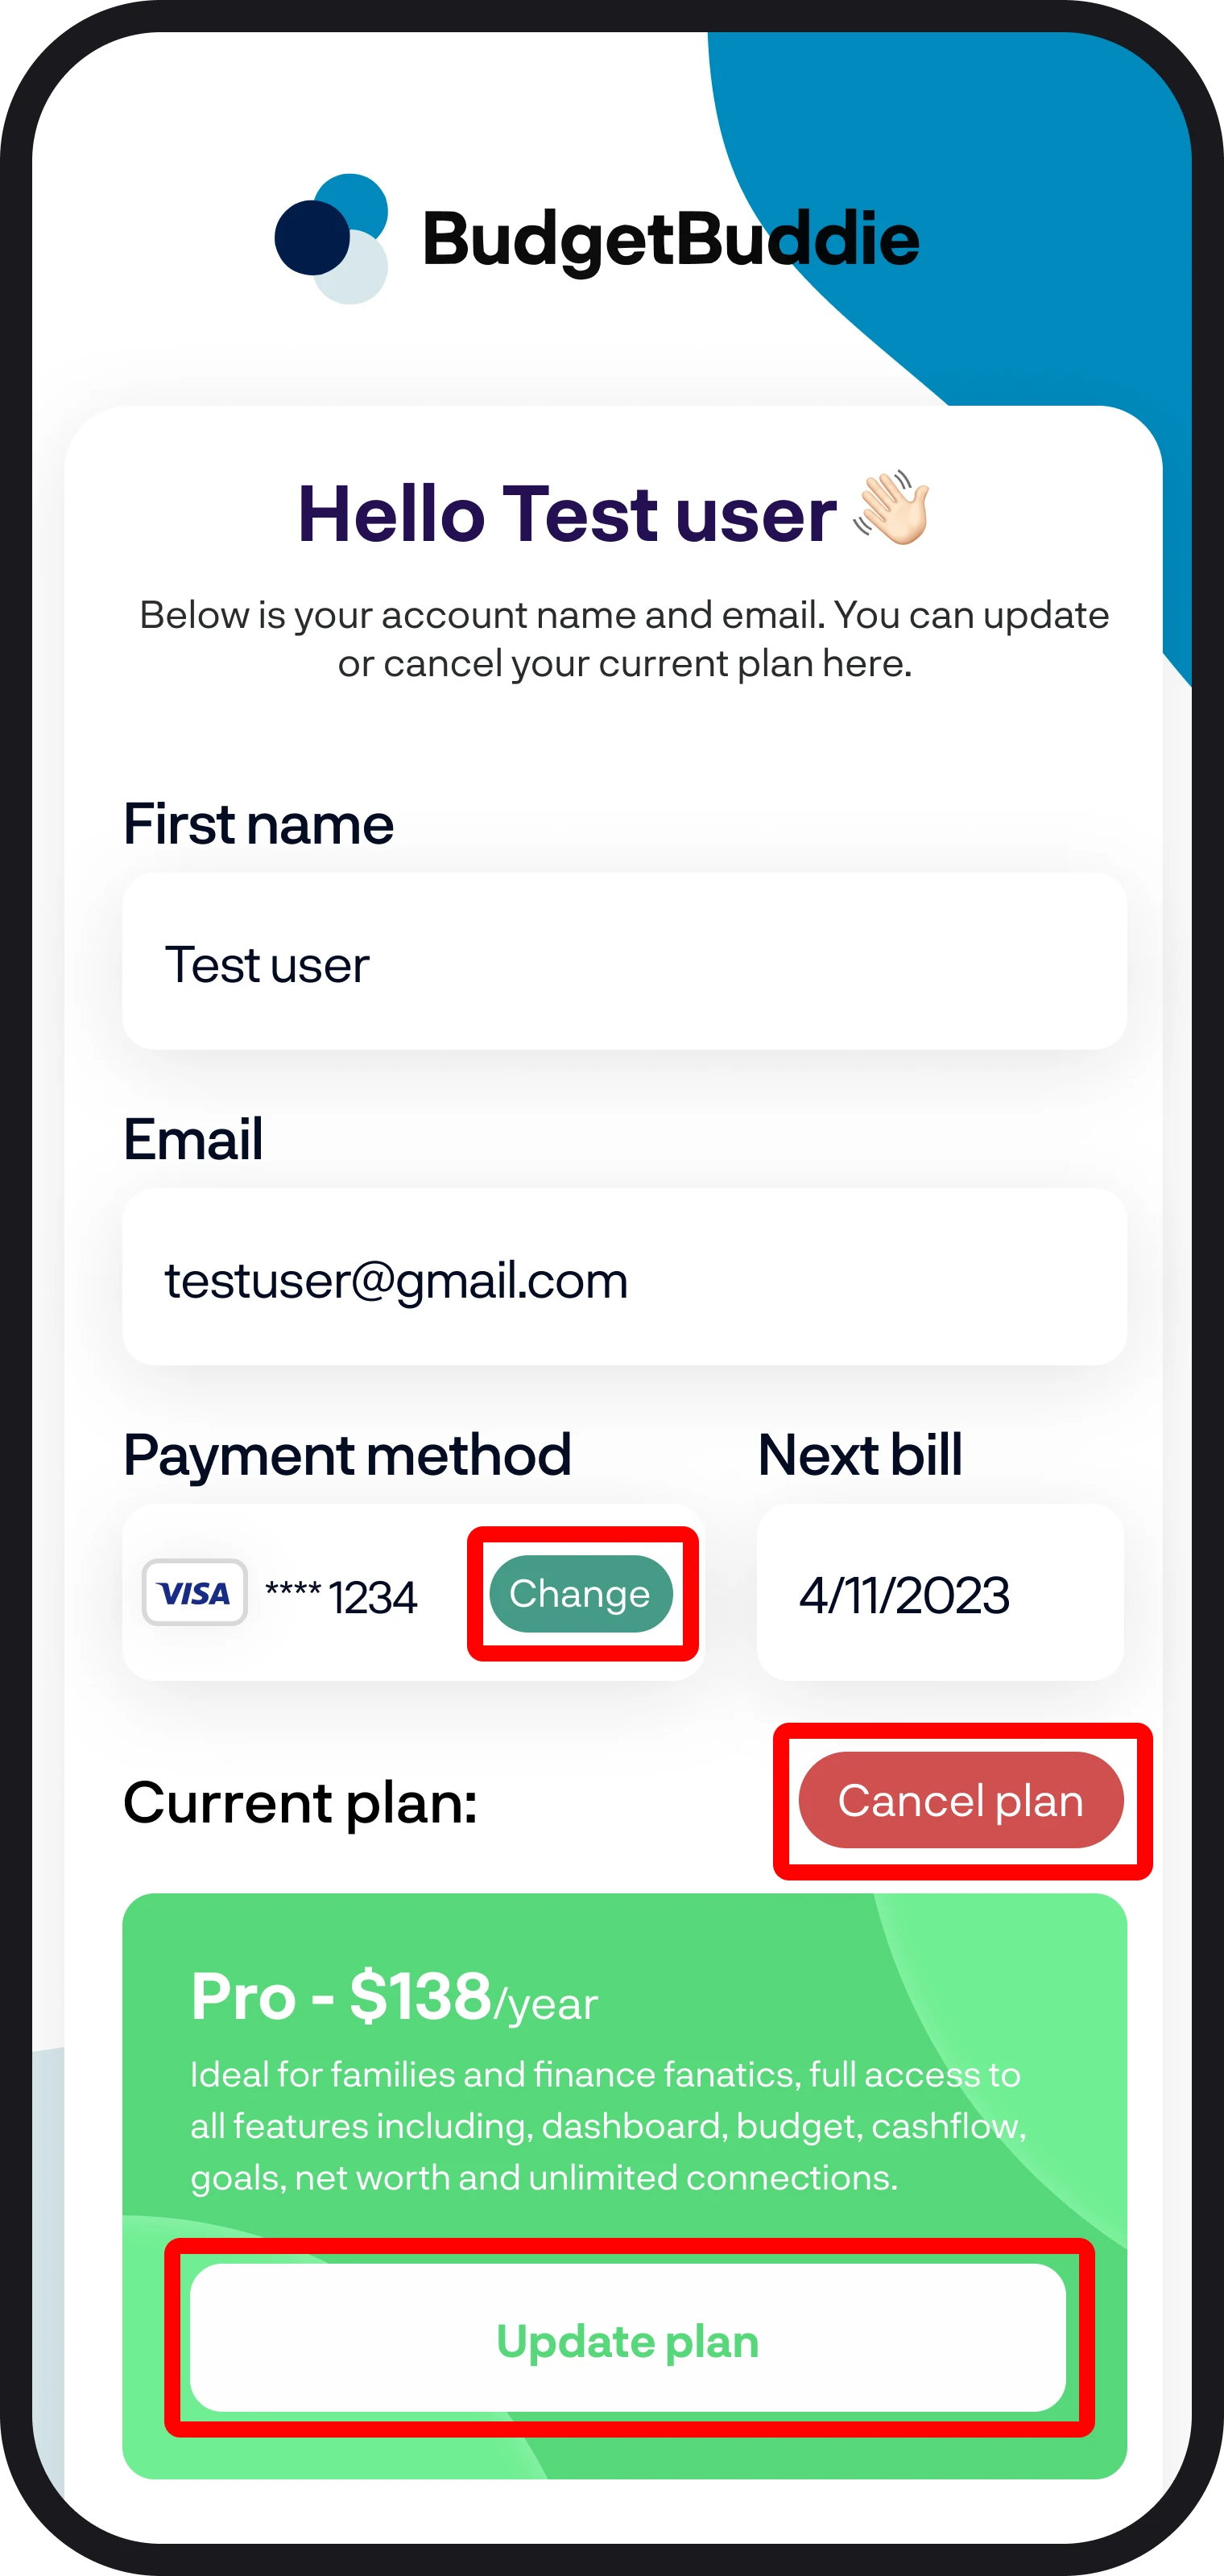
Once you've entered your login details and selected sign in, you'll then see a screen with your first name and email for your account. Then you'll see your plan. To update the plan you're on, simply tap the Update Plan button. If you'd like to update the payment details for your plan, you can select the green change button under payment details.
If you'd like to cancel your plan, simply tap on cancel plan above your selected plan.
5. Updating your plan
Like we mentioned above, to update your plan, simply select 'Update plan' on your current plan. You'll then see a new screen where you can select which plan you'd like to change to. Select the plan you'd like to change to, and then we'll re-direct you to Stripe to process the payment for the change.
Once you've processed your payment, you'll be redirected back to the Manage Account screen, where your plan will be updated.
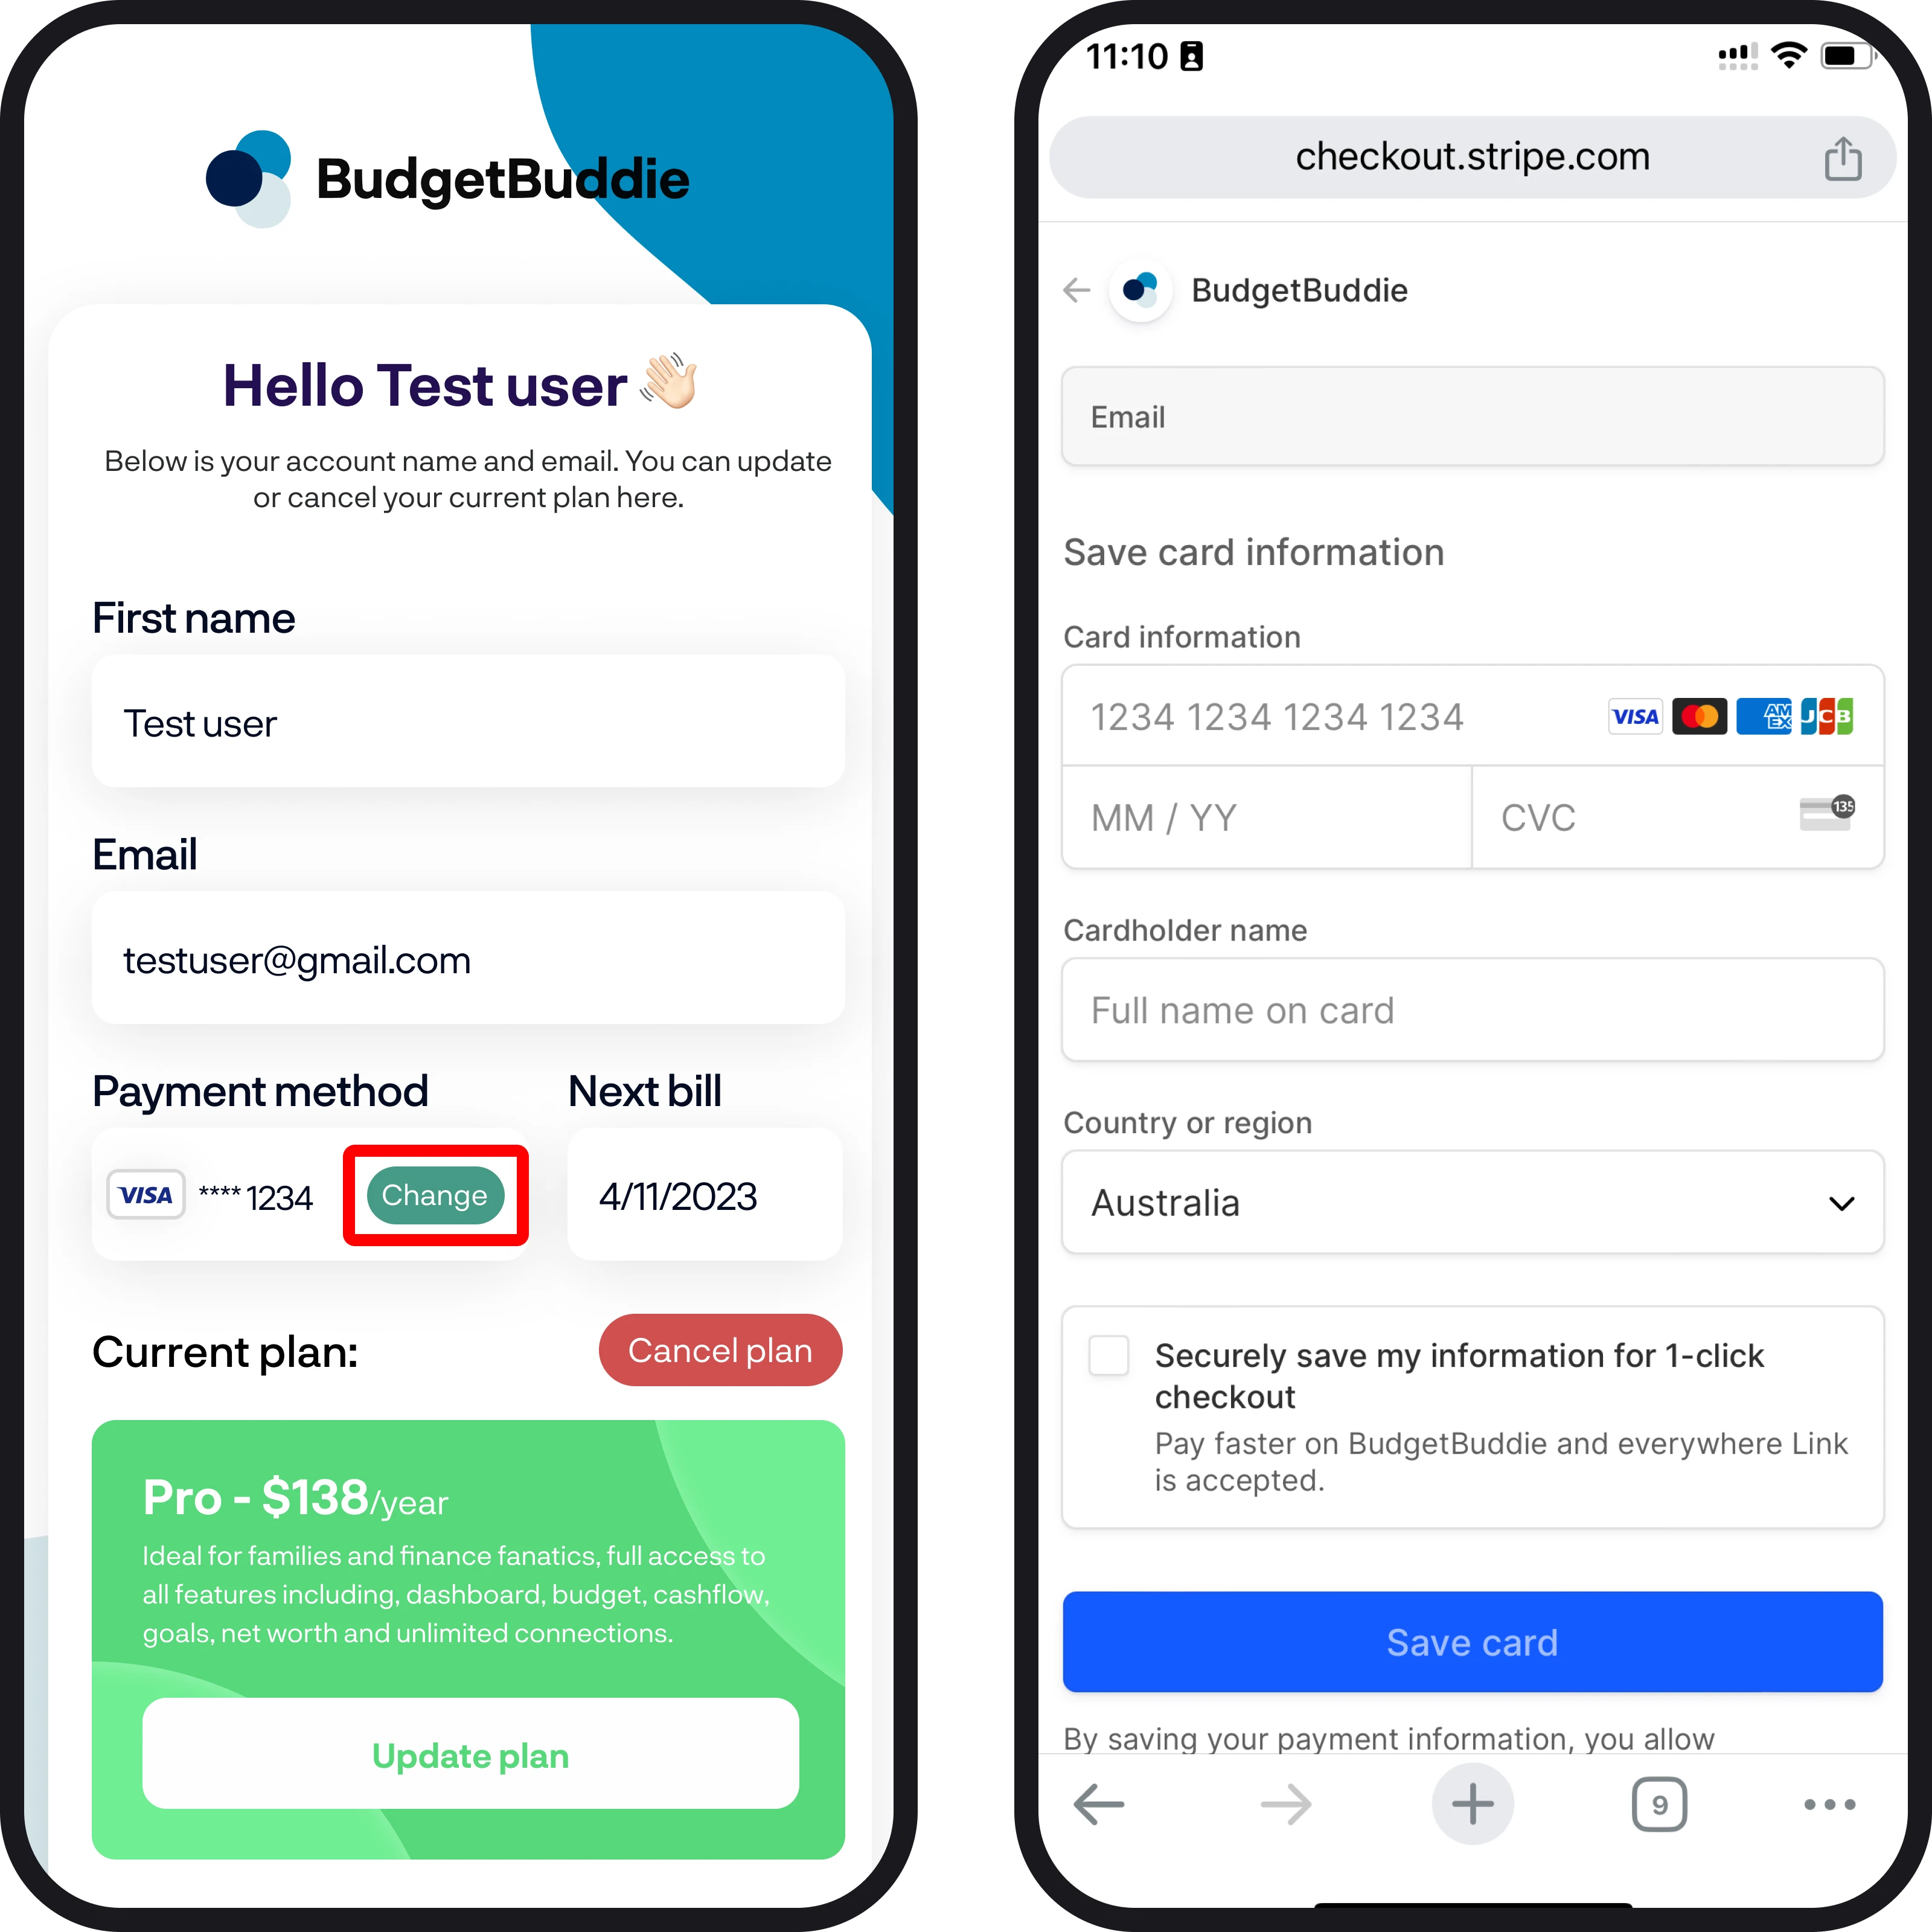
6. Updating payment details
To update your payment details, tap on the 'Change' green button under the payment method heading. Once you've selected that, you'll then be redirected to Stripe to update your details, enter in your new card details, and then select 'Save card', which will then process your change and redirect you back to the manage account screen.
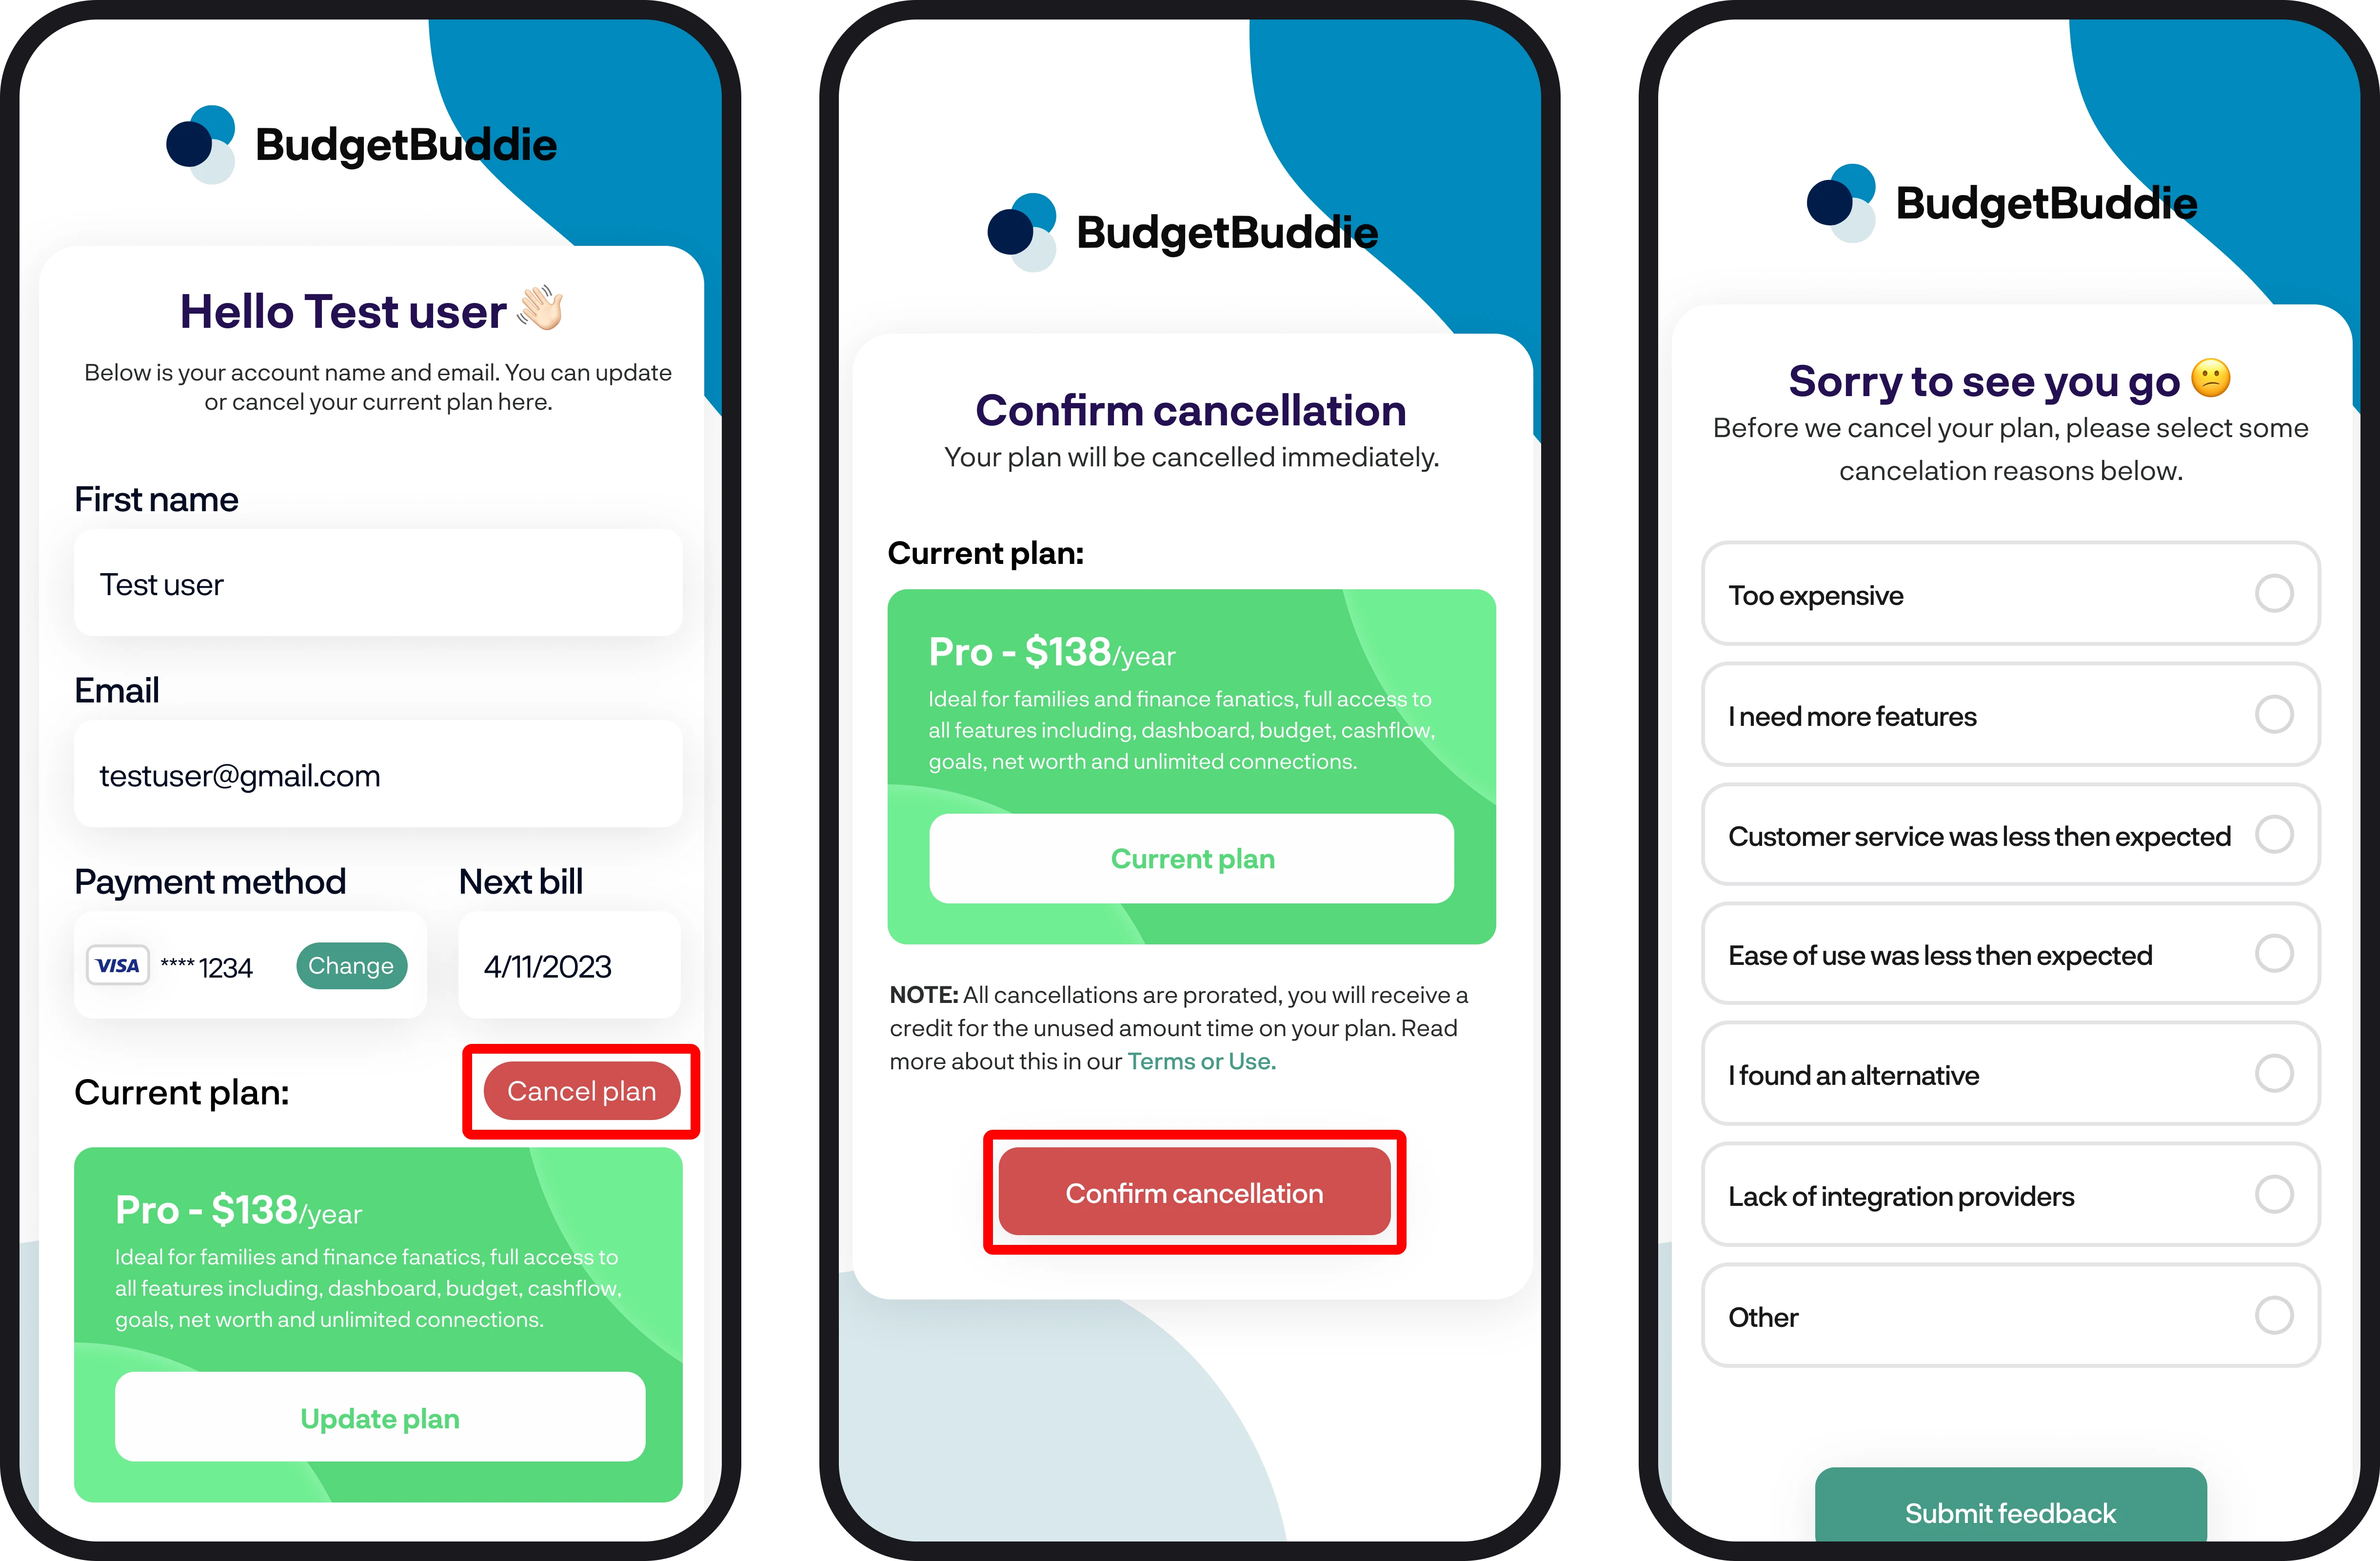
7. Cancelling your plan
To cancel your plan, select the red button saying 'Cancel plan' above your current plan. You'll then see a screen to confirm your cancellation. Tap the red button 'Confirm cancellation'. We'll then bring you to the feedback screen, where we'll require some feedback on your cancellation before we process it.
Once you've provided your feedback, we'll then confirm your cancellation and redirect you back to the Manage Account screen.
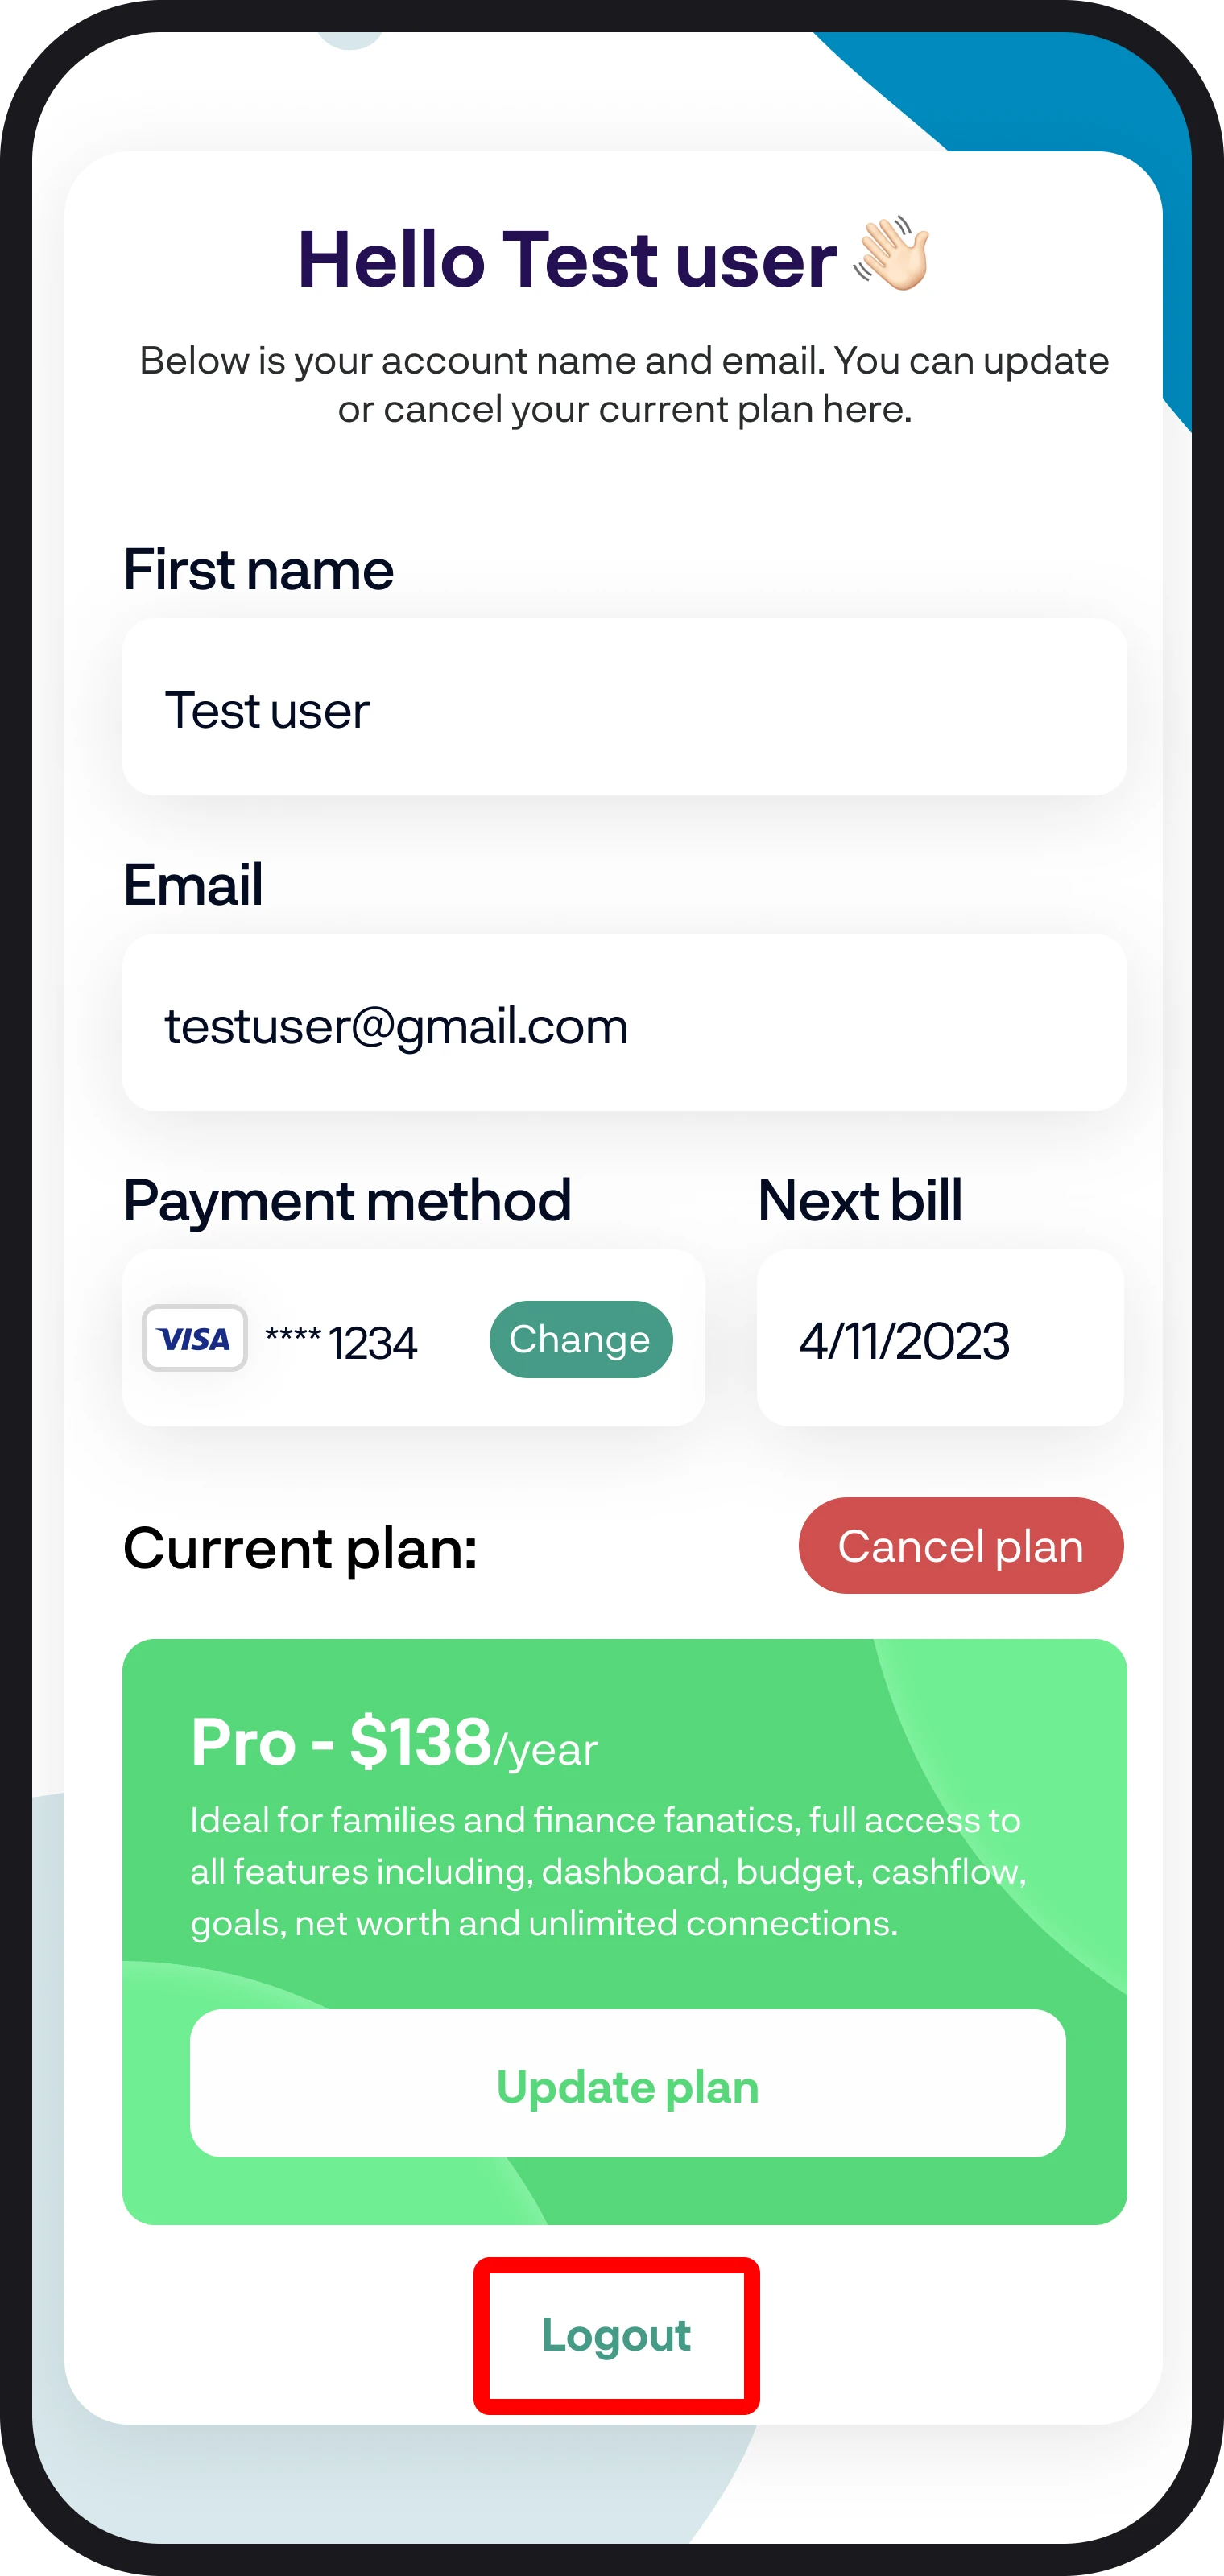
8. Finish up
Once you're finished completing your changes and managing your account, simply select 'Logout' to go back to the login screen.
You're all ready to go 🎉
Woohoo! You now know how to manage your plan. If you run into any issues while managing your plan, feel free to get in touch with us at hello@budgetbuddie.co.nz