
How to create a new goal
How to create a new goal
Have something you want to save for? Here in this guide, we'll walk you through all the ins and outs of how to create a goal.
1. A quick overview
Goals are a great way to stay on track and have something to aim for. You can set goals for things like wanting to hit a certain savings target or even wanting to pay off debt. When you enter all your details, we'll estimate when you're likely to achieve your goal based on your contributions. You can choose to connect your accounts to a goal or enter your account balance manually.
2. Adding a new goal
To add a new goal, simply tap on the button at the top of the screen saying, 'Add a new goal'.
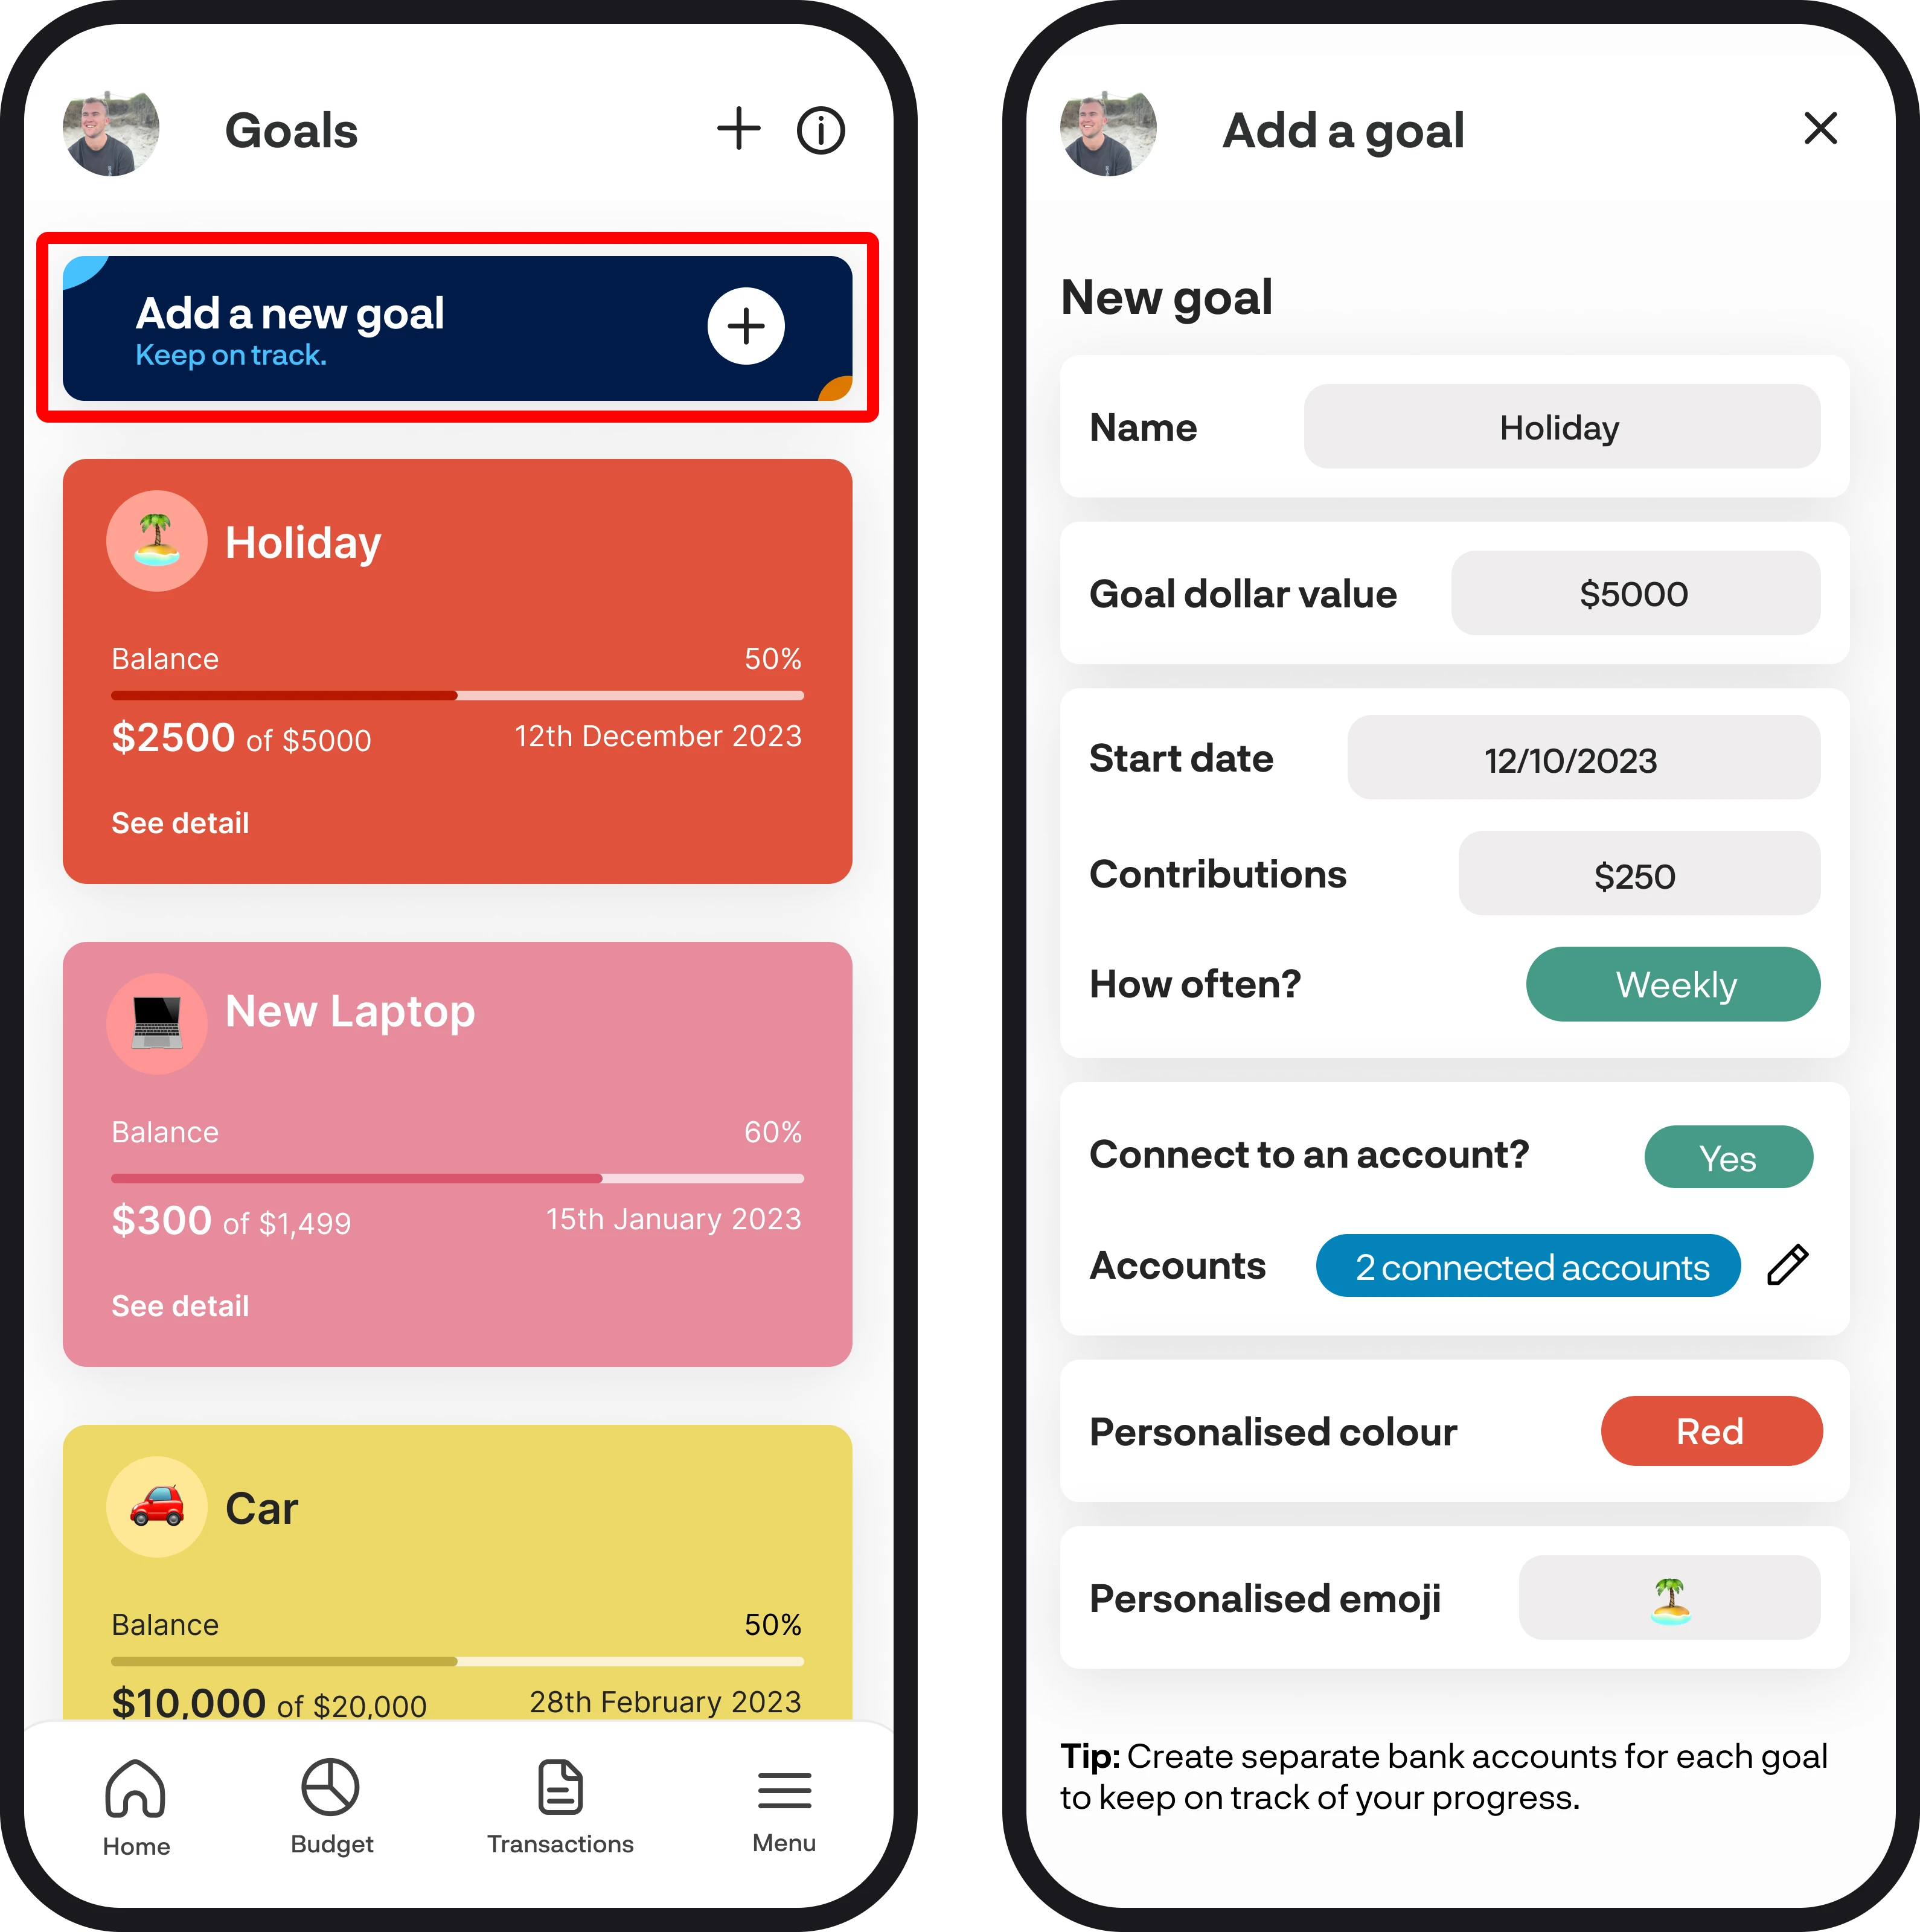
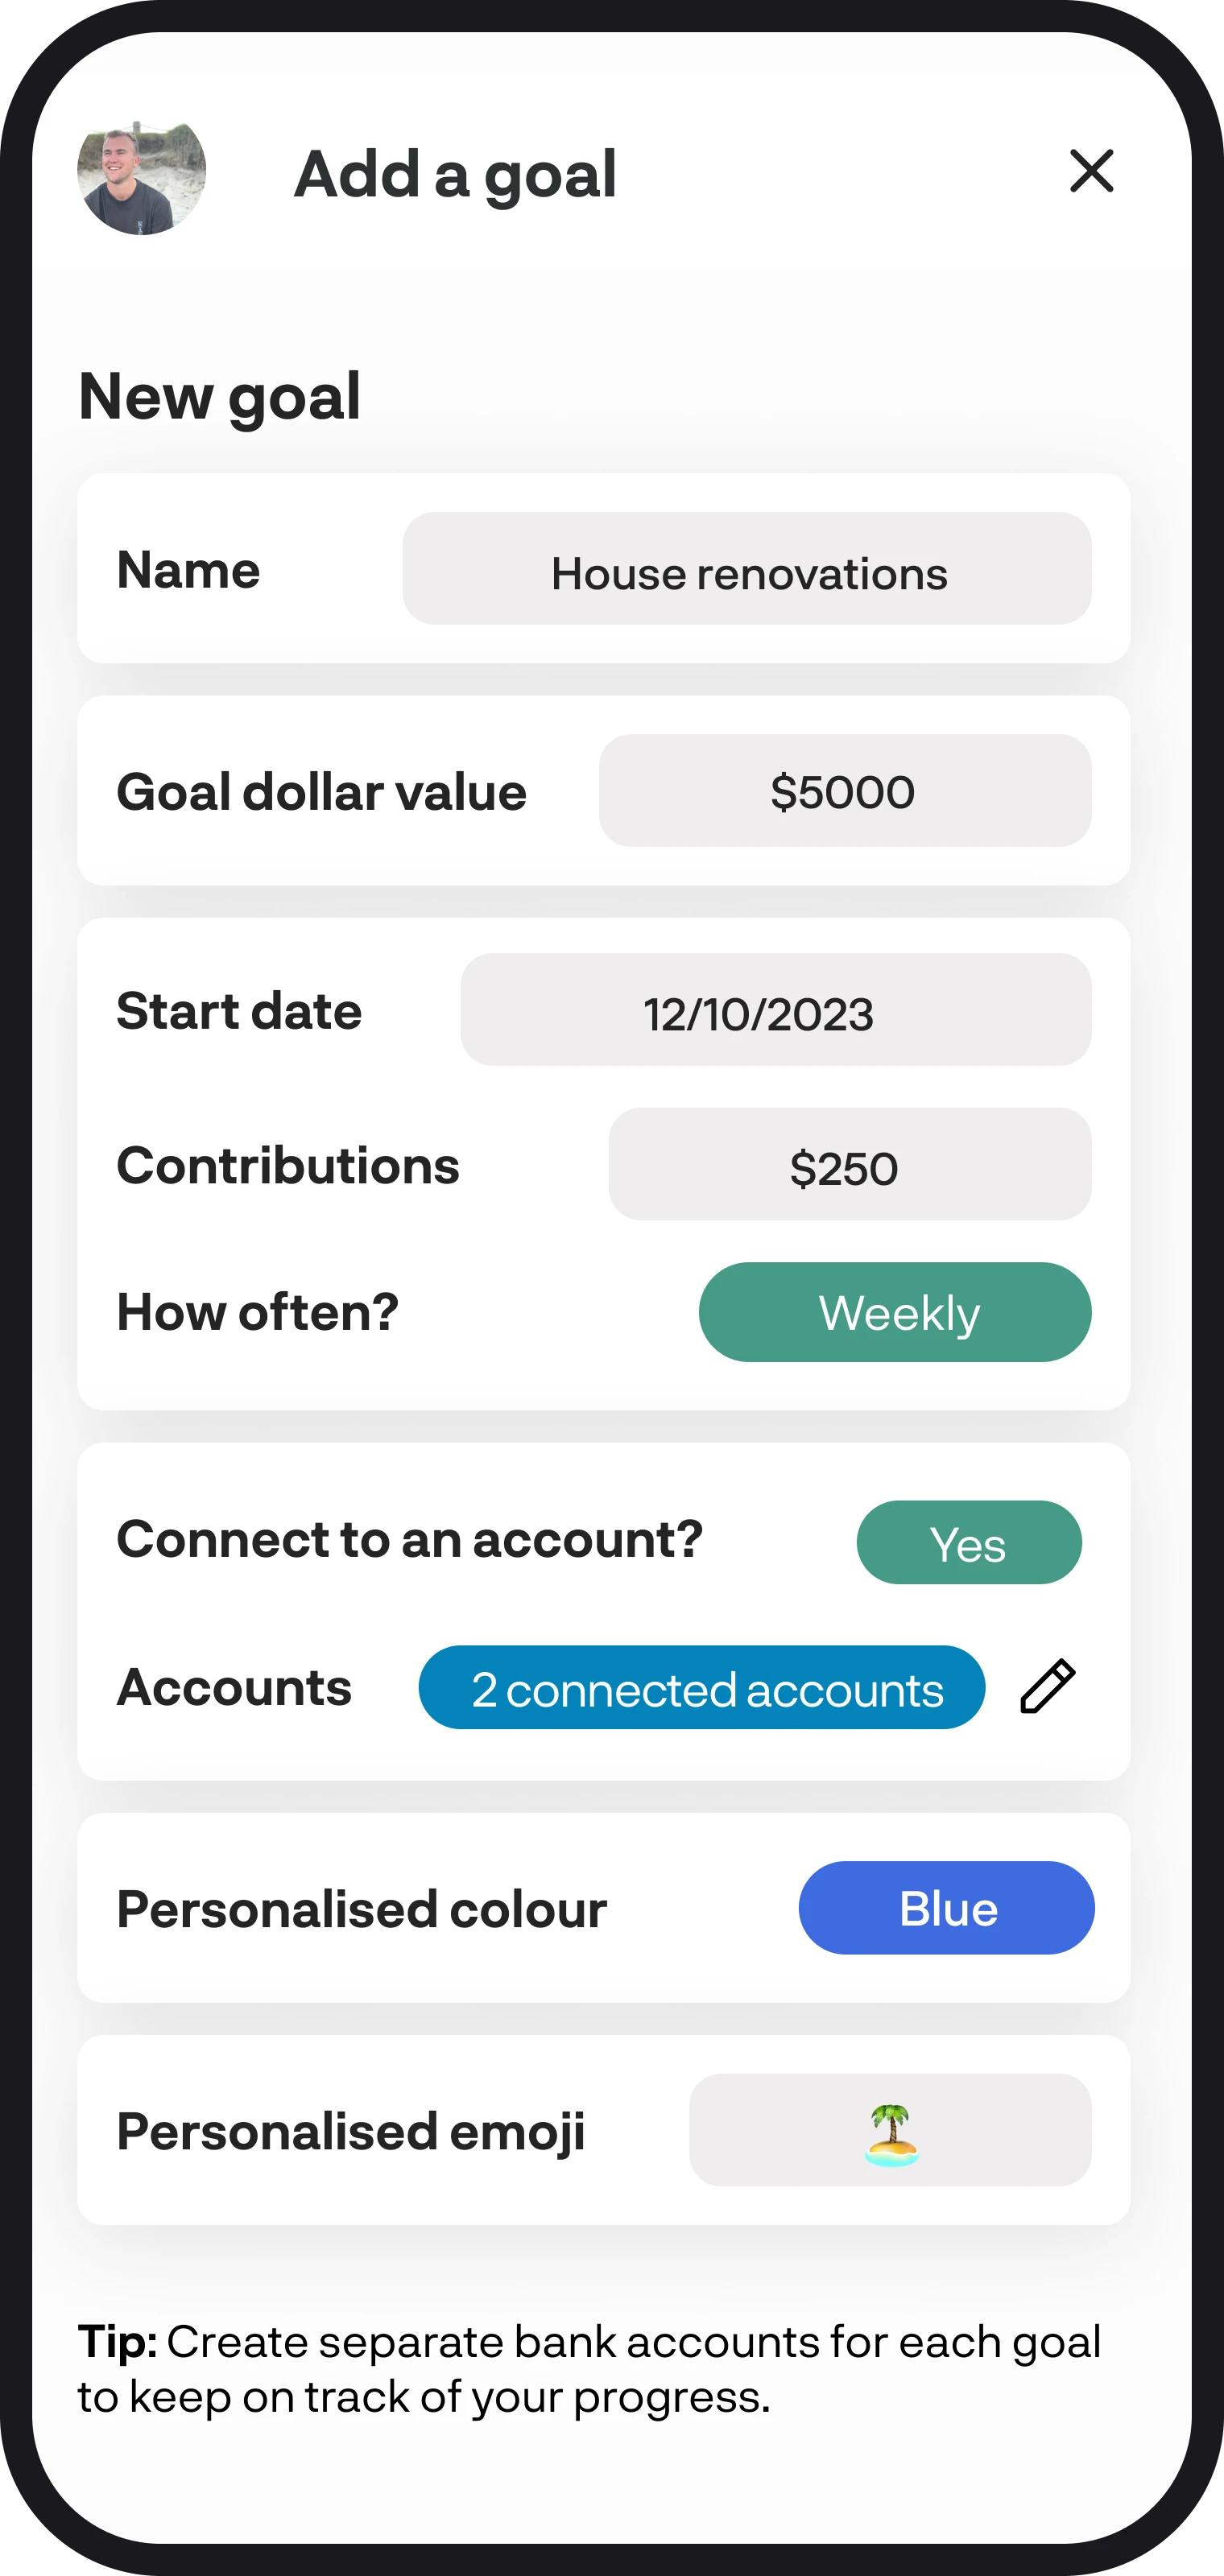
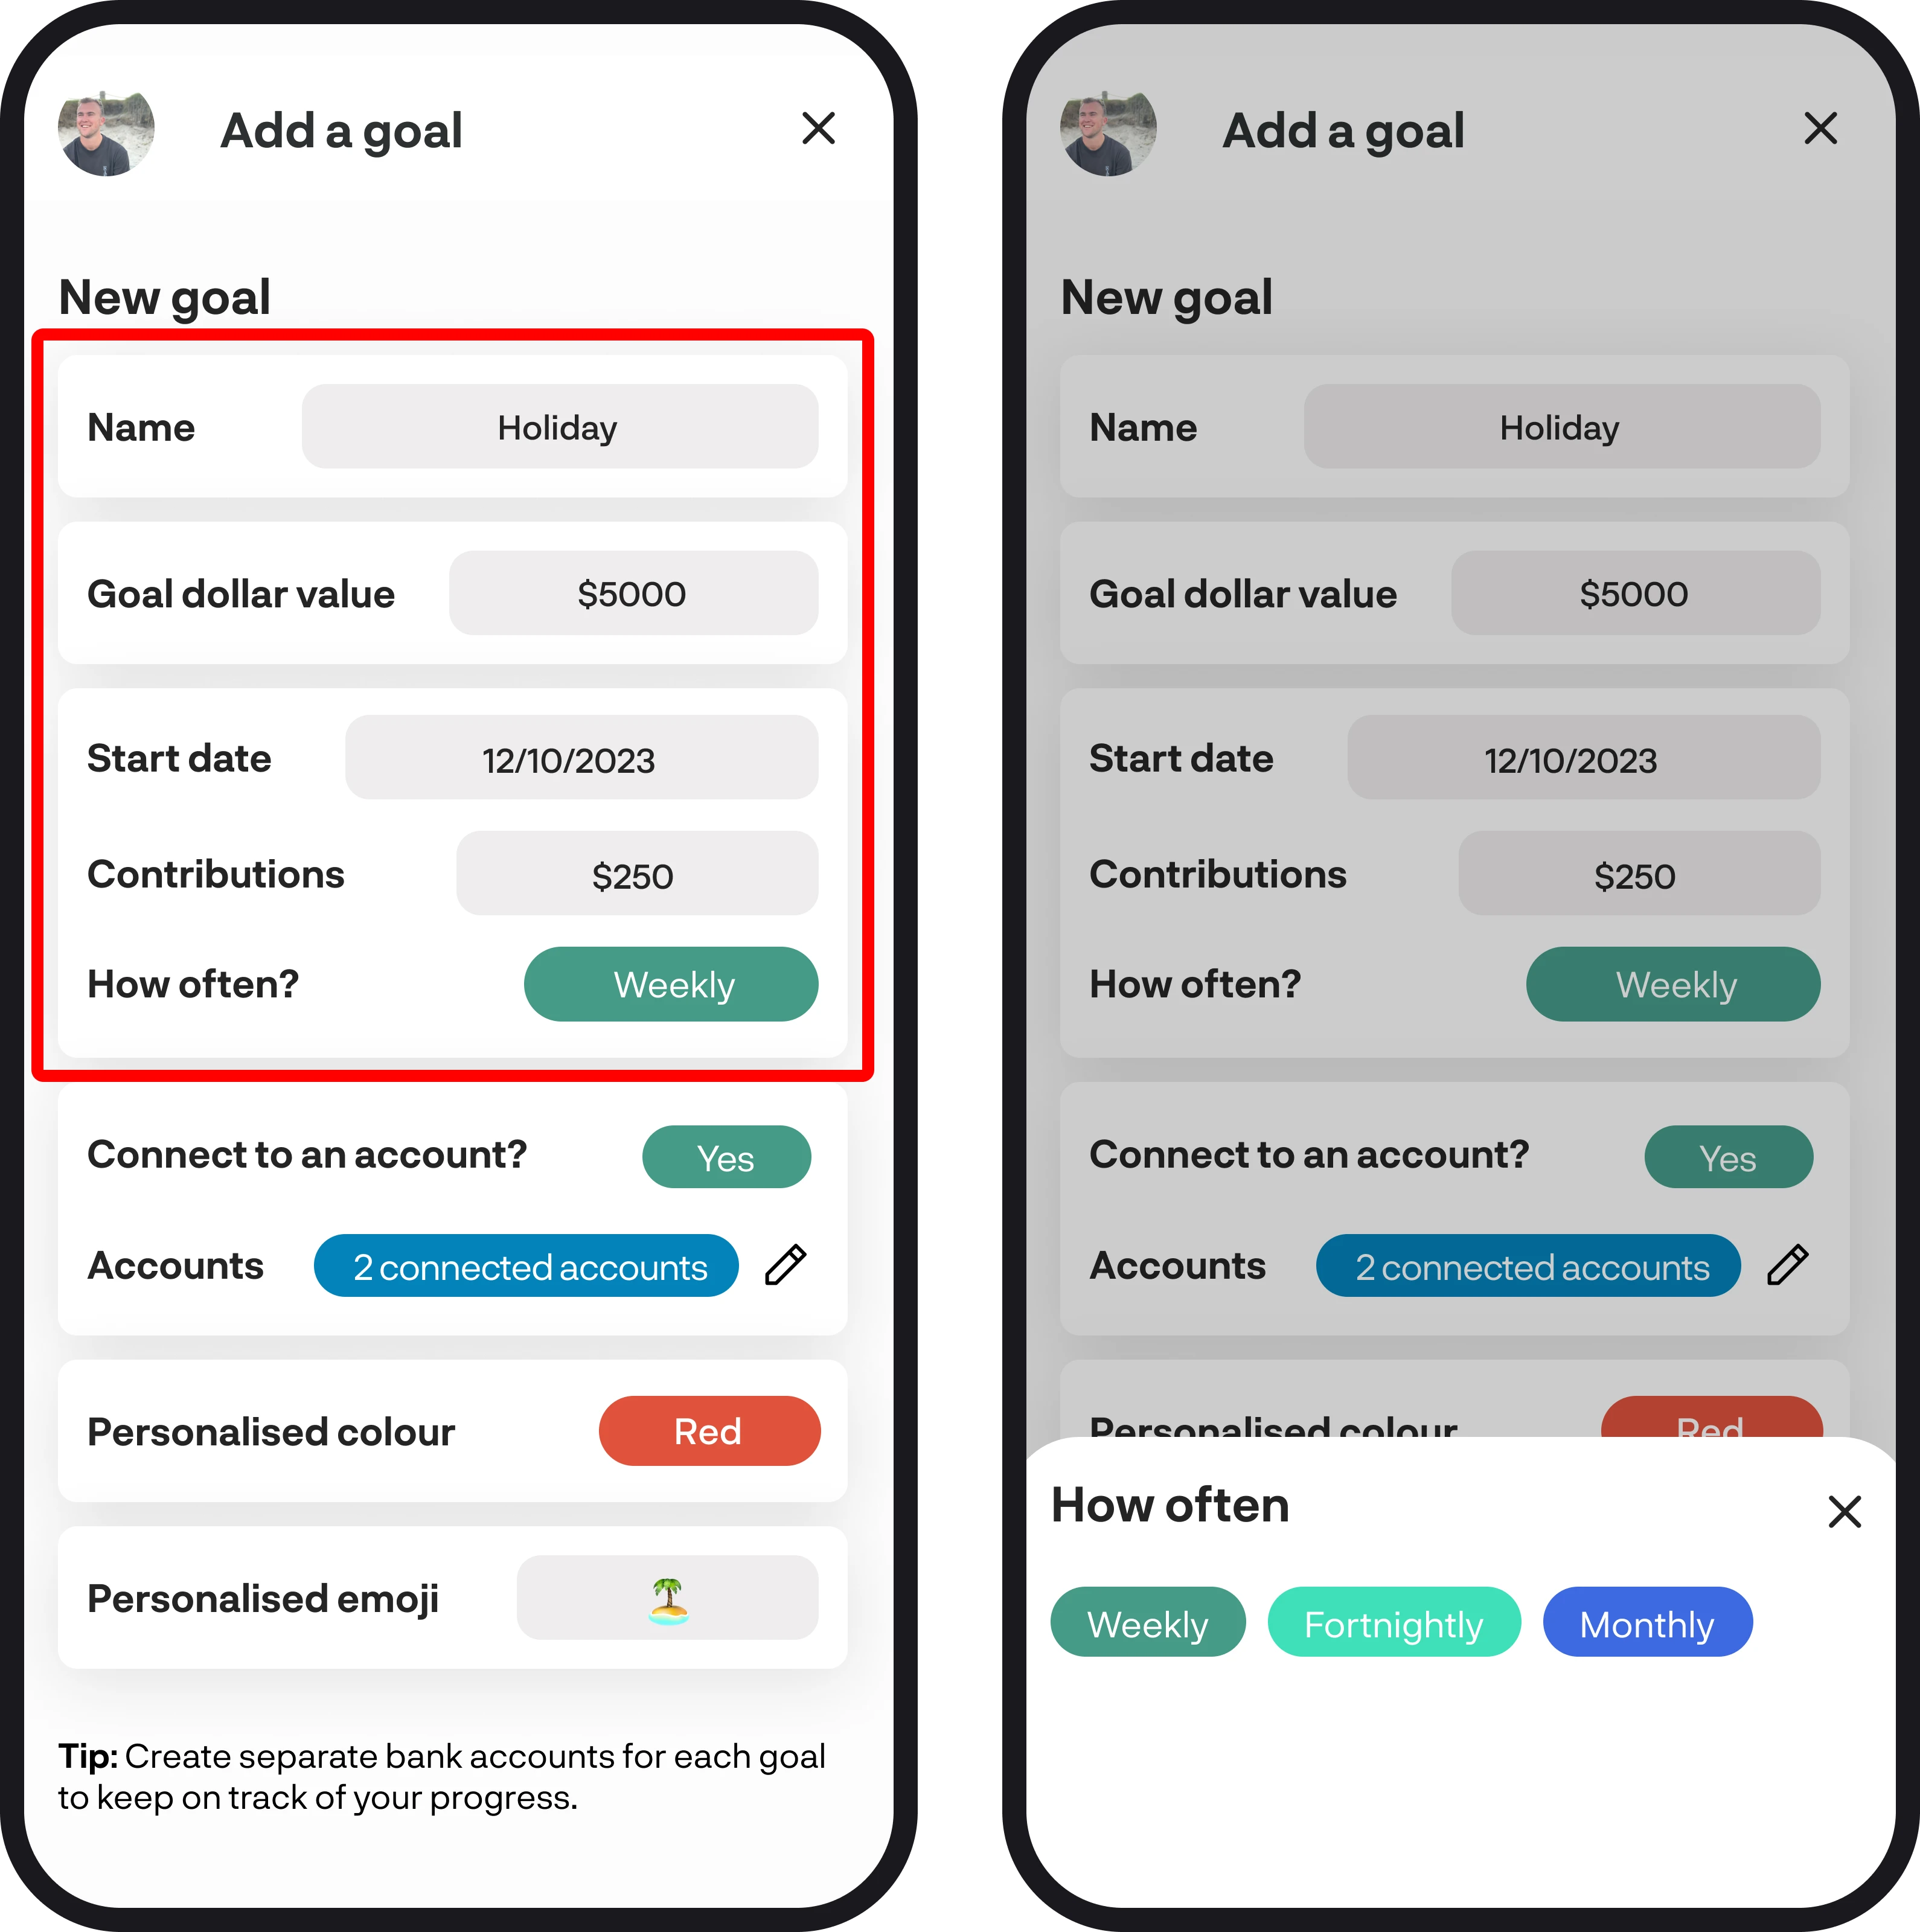
3. Enter your details
Once you've selected to add a new goal, you'll then see the add a goal screen, where you can enter in all your details. Start by entering the name of your goal, then your dollar value. If your goal is to pay off debt, then make your dollar value $0. Now select the date for when your contributions will start for your goal. After you've selected your date, enter in your contribution amount and how often you'll be contributing this amount.
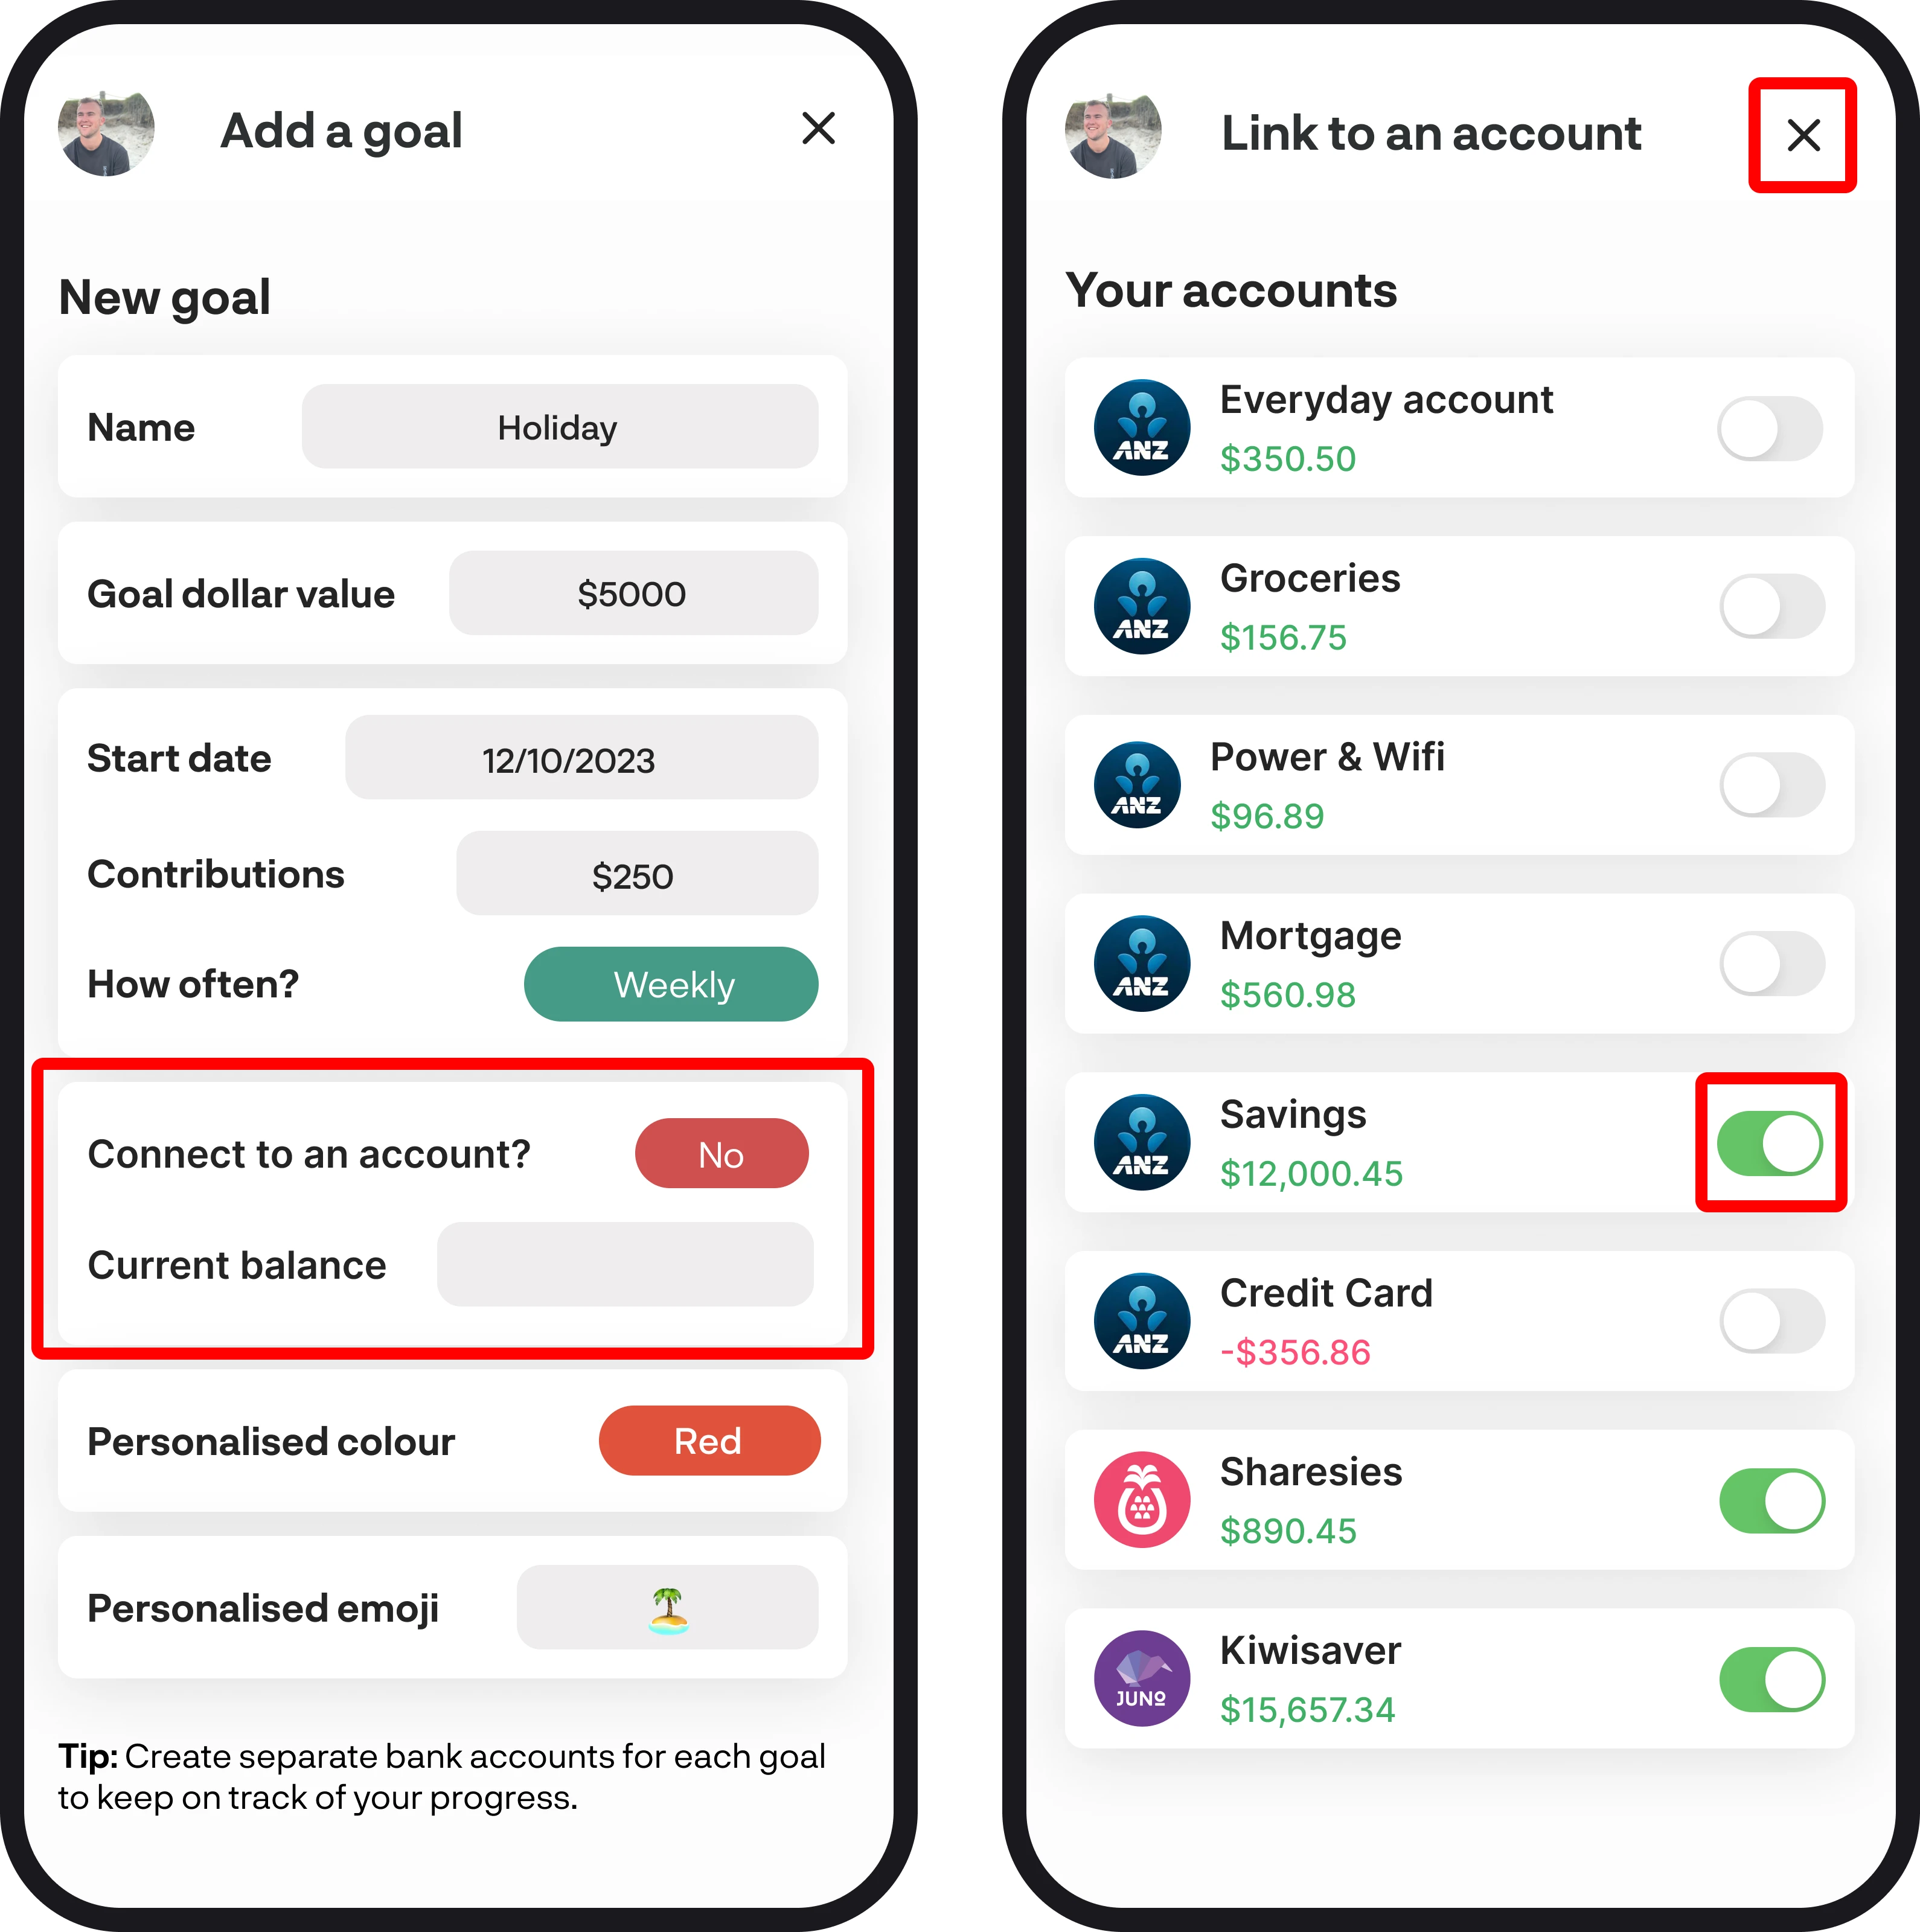
4. Connect an account
Once you've entered in your details, you can choose to connect your accounts to a goal. You can choose to connect just one or multiple accounts to a single goal. To connect an account, tap on the red 'no' field to the right of 'Connect to an account' until it says 'Yes', and then your account selection screen will open automatically. If you'd like to enter in your balance manually, simply leave the option as 'no' and enter your current balance.
If you choose to connect an account, you'll see the account selection screen. Tap on each toggle to select which accounts you'd like factored into your goal's current balance. Once you've finished selecting your accounts, tap the exit symbol in the top right corner to return to the add goal screen.
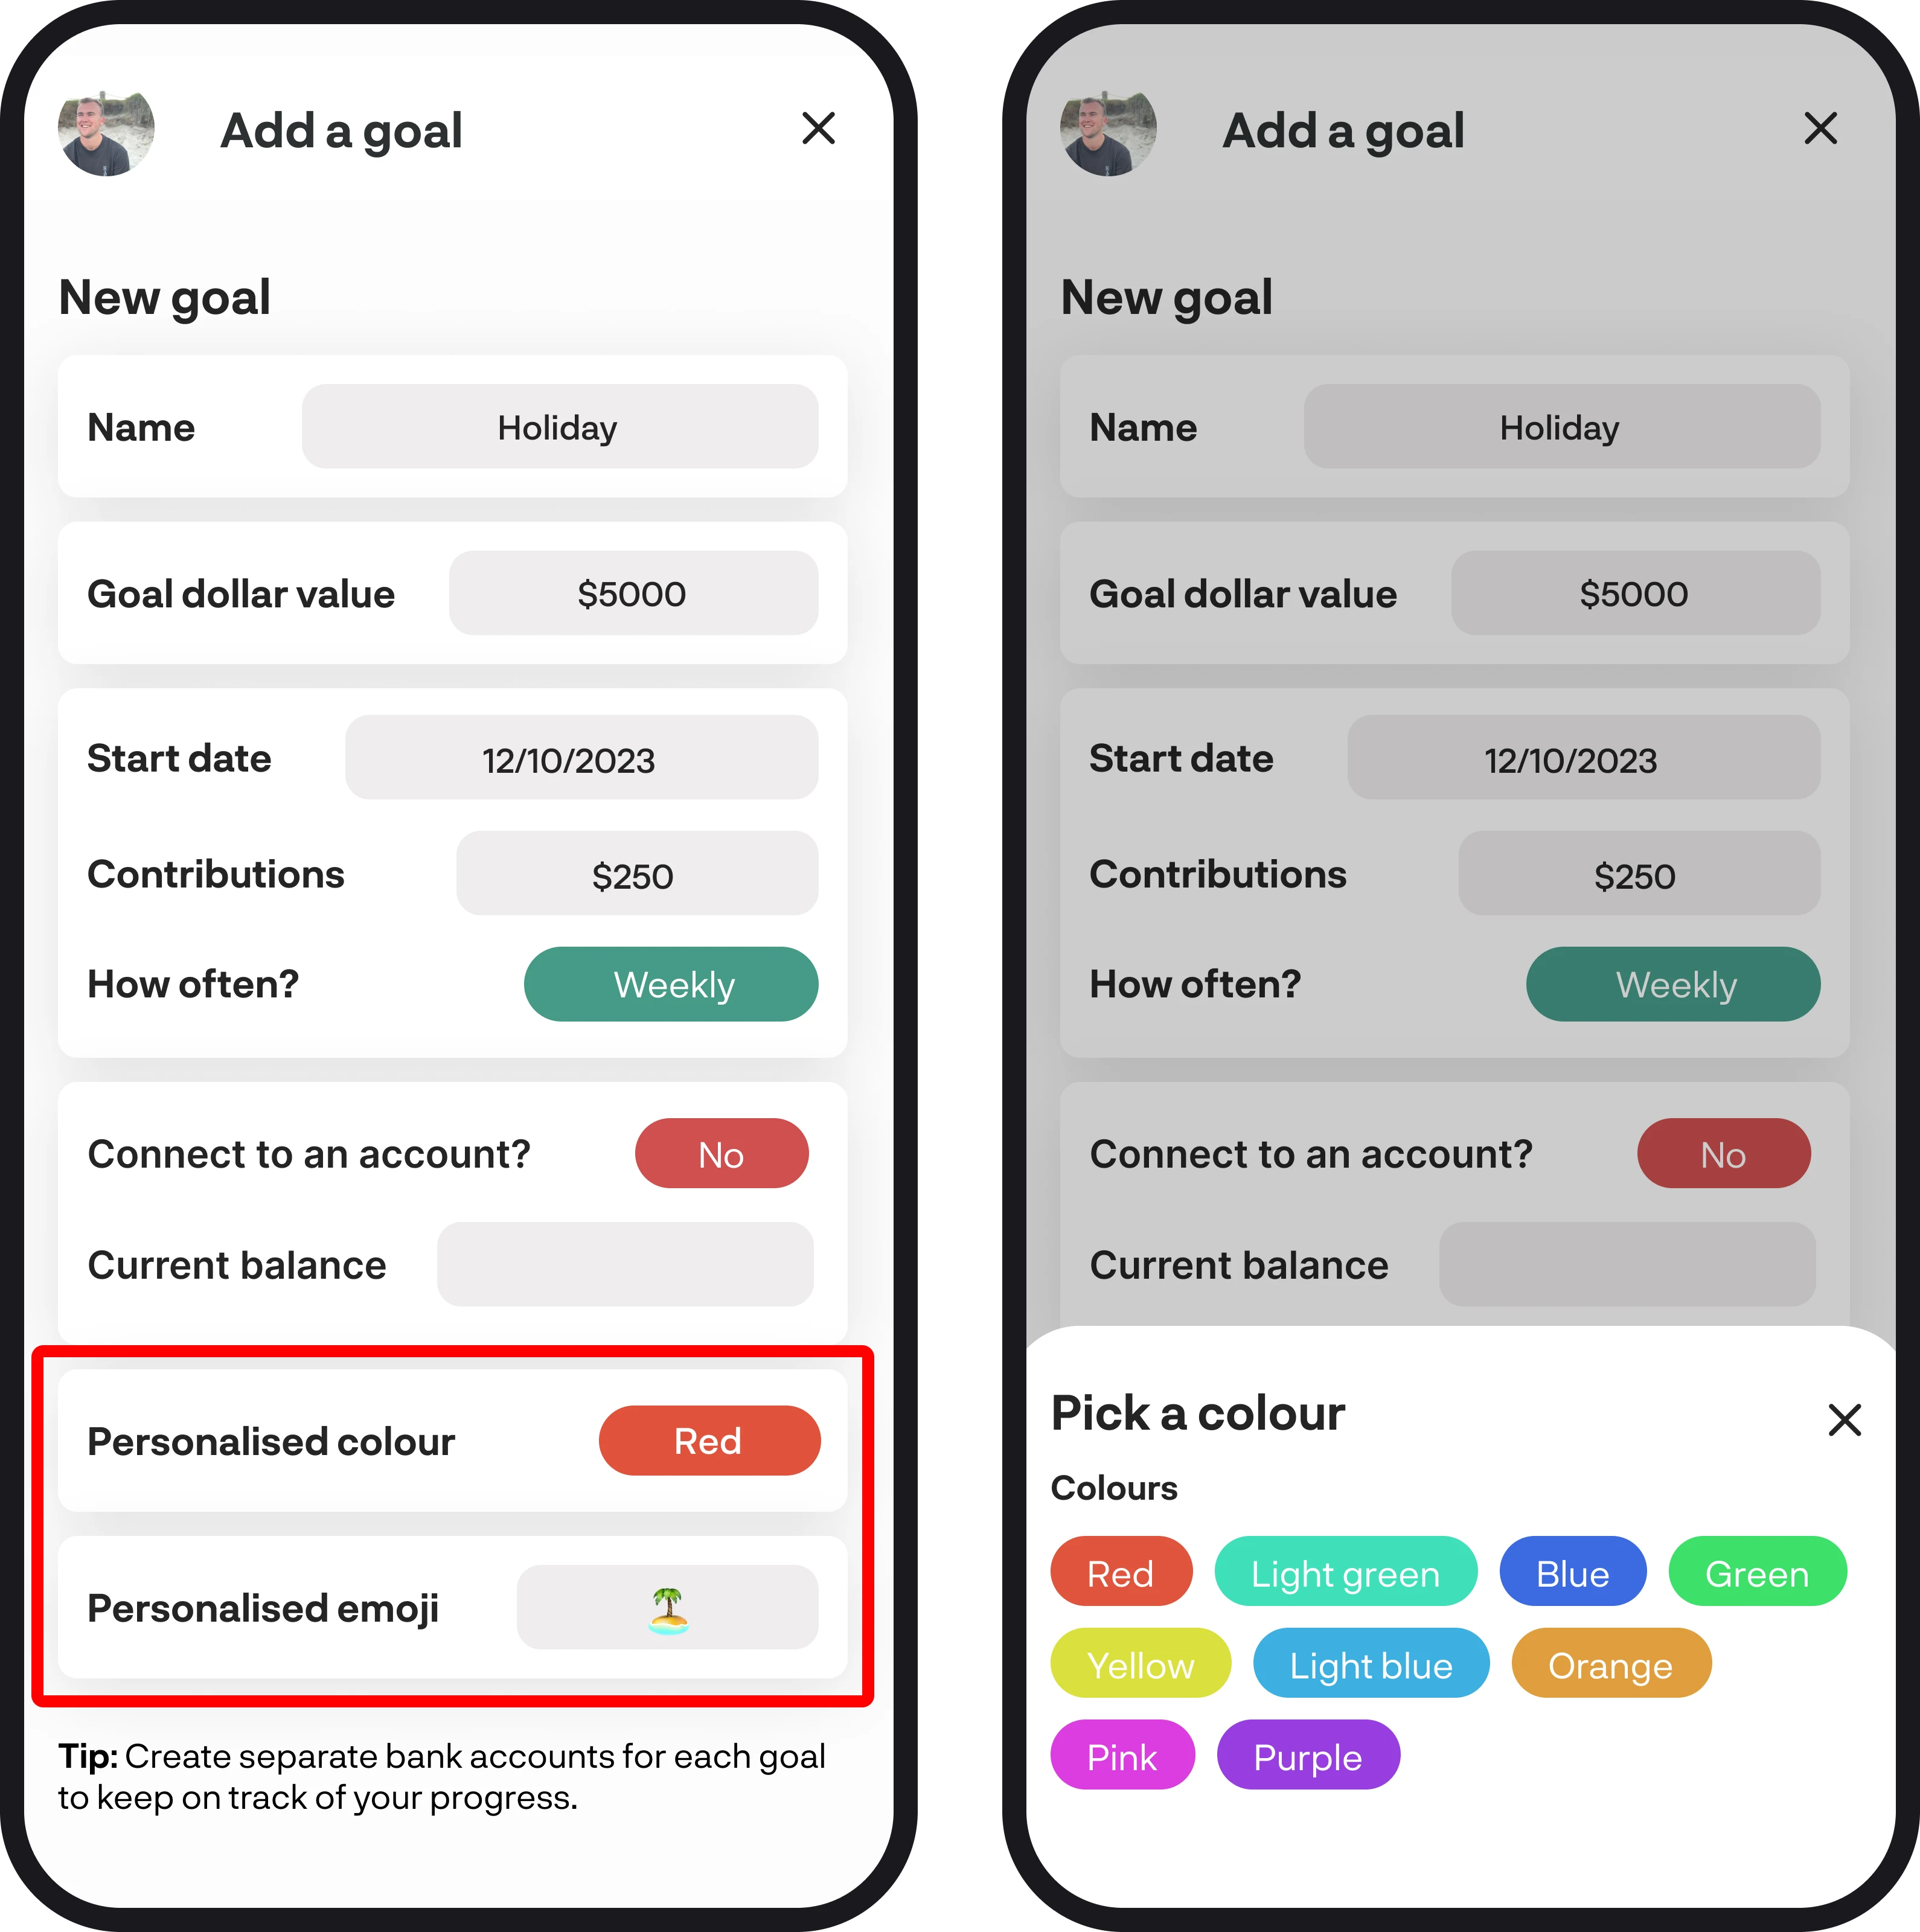
5. Personalise
Once you have chosen to connect your goal to your account or not, you can personalise it by adding a colour and emoji. To choose the colour for your goal, simply tap on the button next to 'Personalised colour', and you'll then see a pop-up to select your colour. Once you've selected your colour, you can then choose an emoji for your goal by tapping the input field next to 'Personalised emoji'.
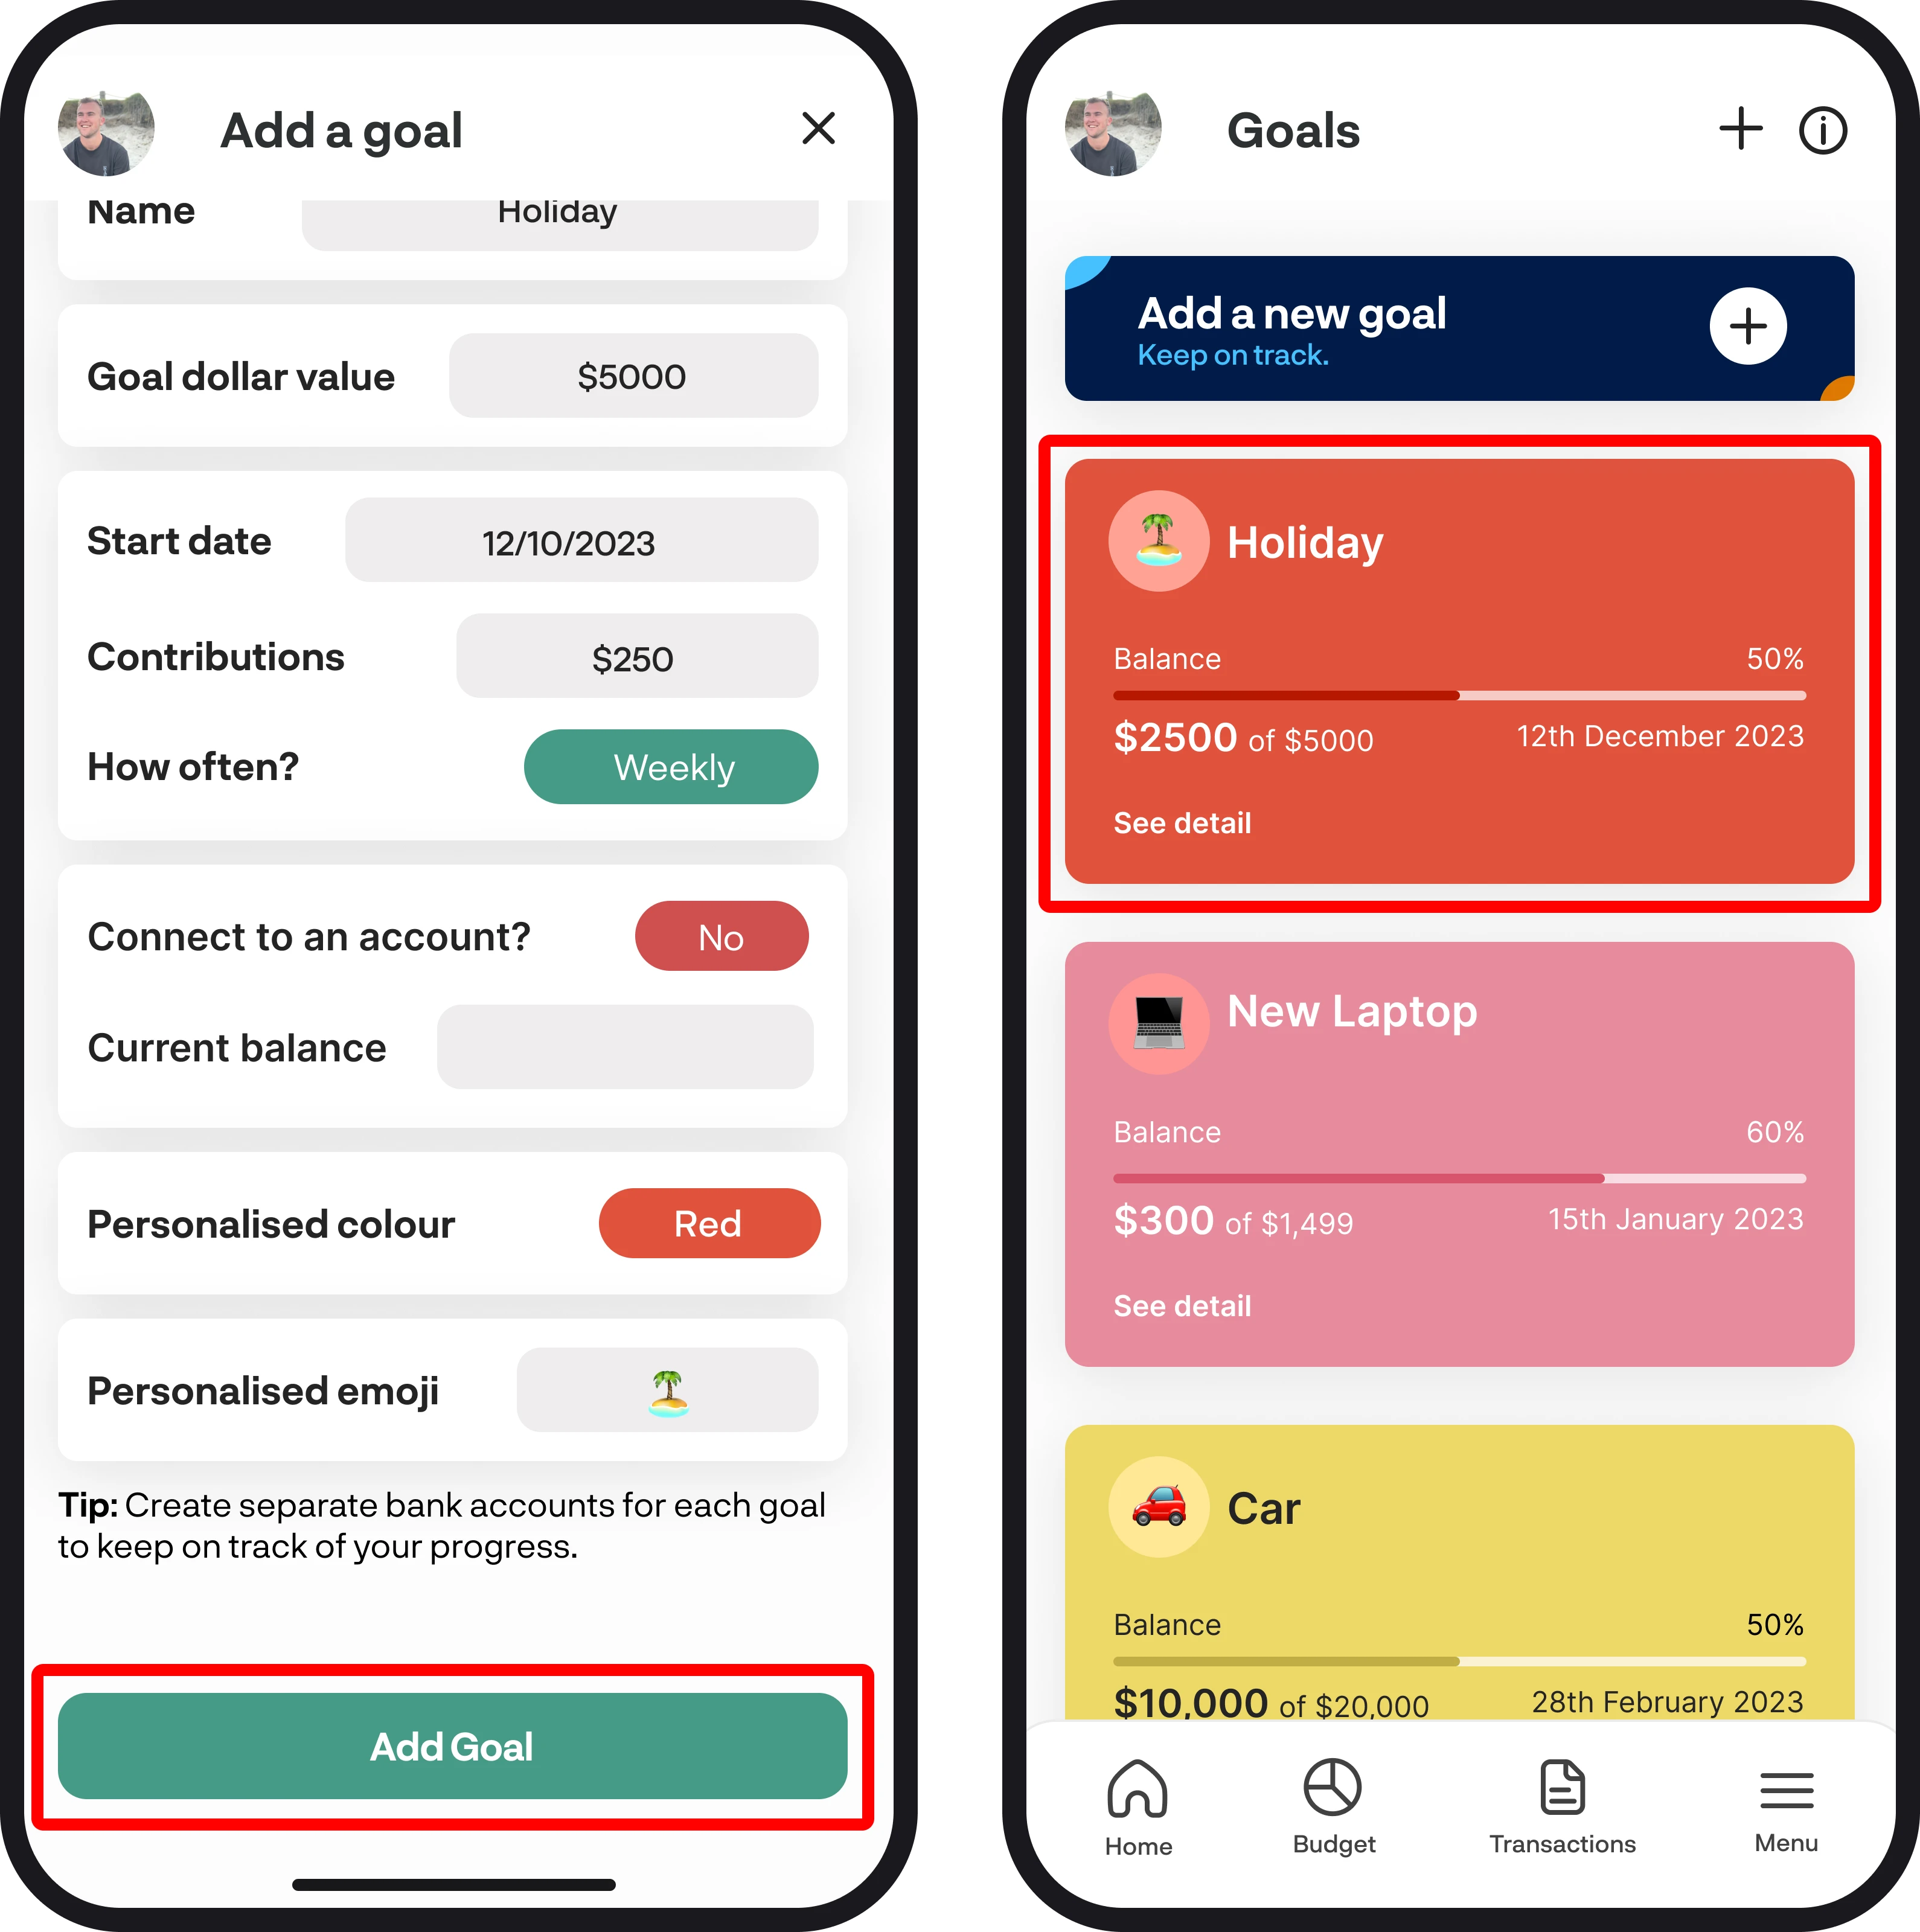
6. Finish adding goal
Once you've entered in all your details, chosen to connect your accounts, and personalised your goal, you can then add it by tapping the green 'Add goal' button. You'll then see it on your goals screen with all your details, along with your progress and when you're expected to achieve it.
You're all ready to go 🎉
Woohoo! You've just created your first goal. If you run into any issues while setting everything up, feel free to get in touch with us at hello@budgetbuddie.co.nz